Share This


Test Blog
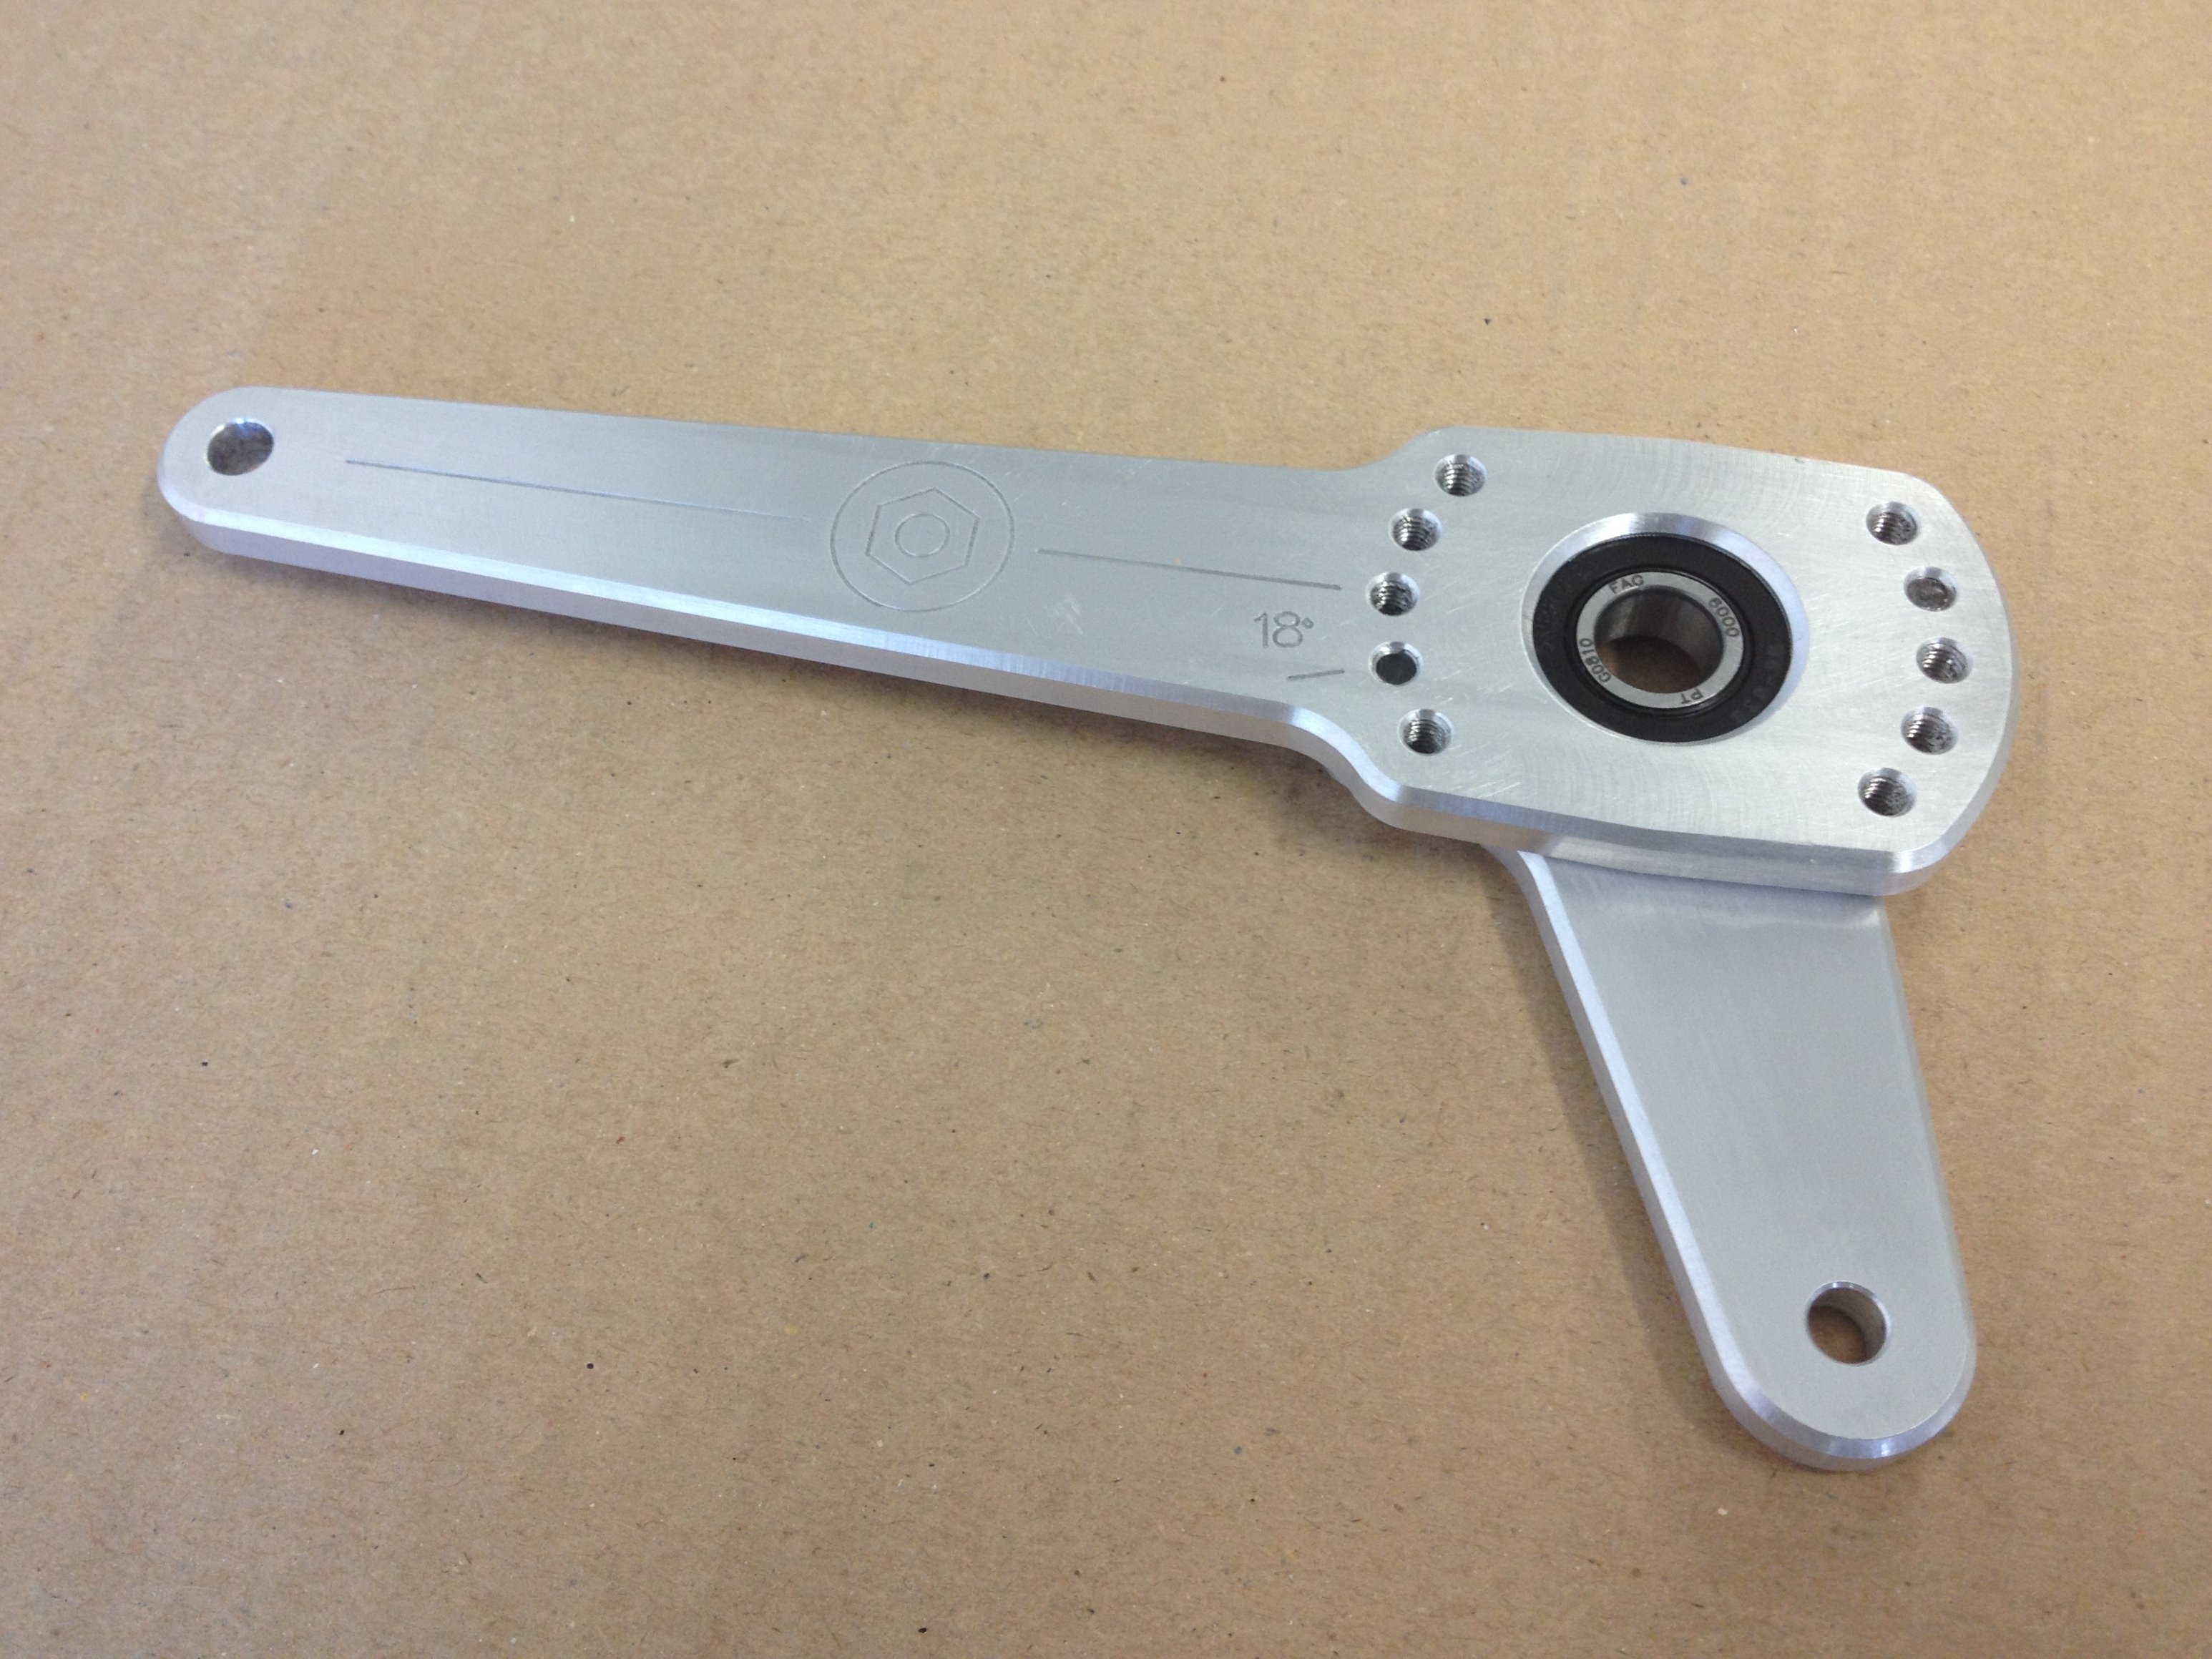
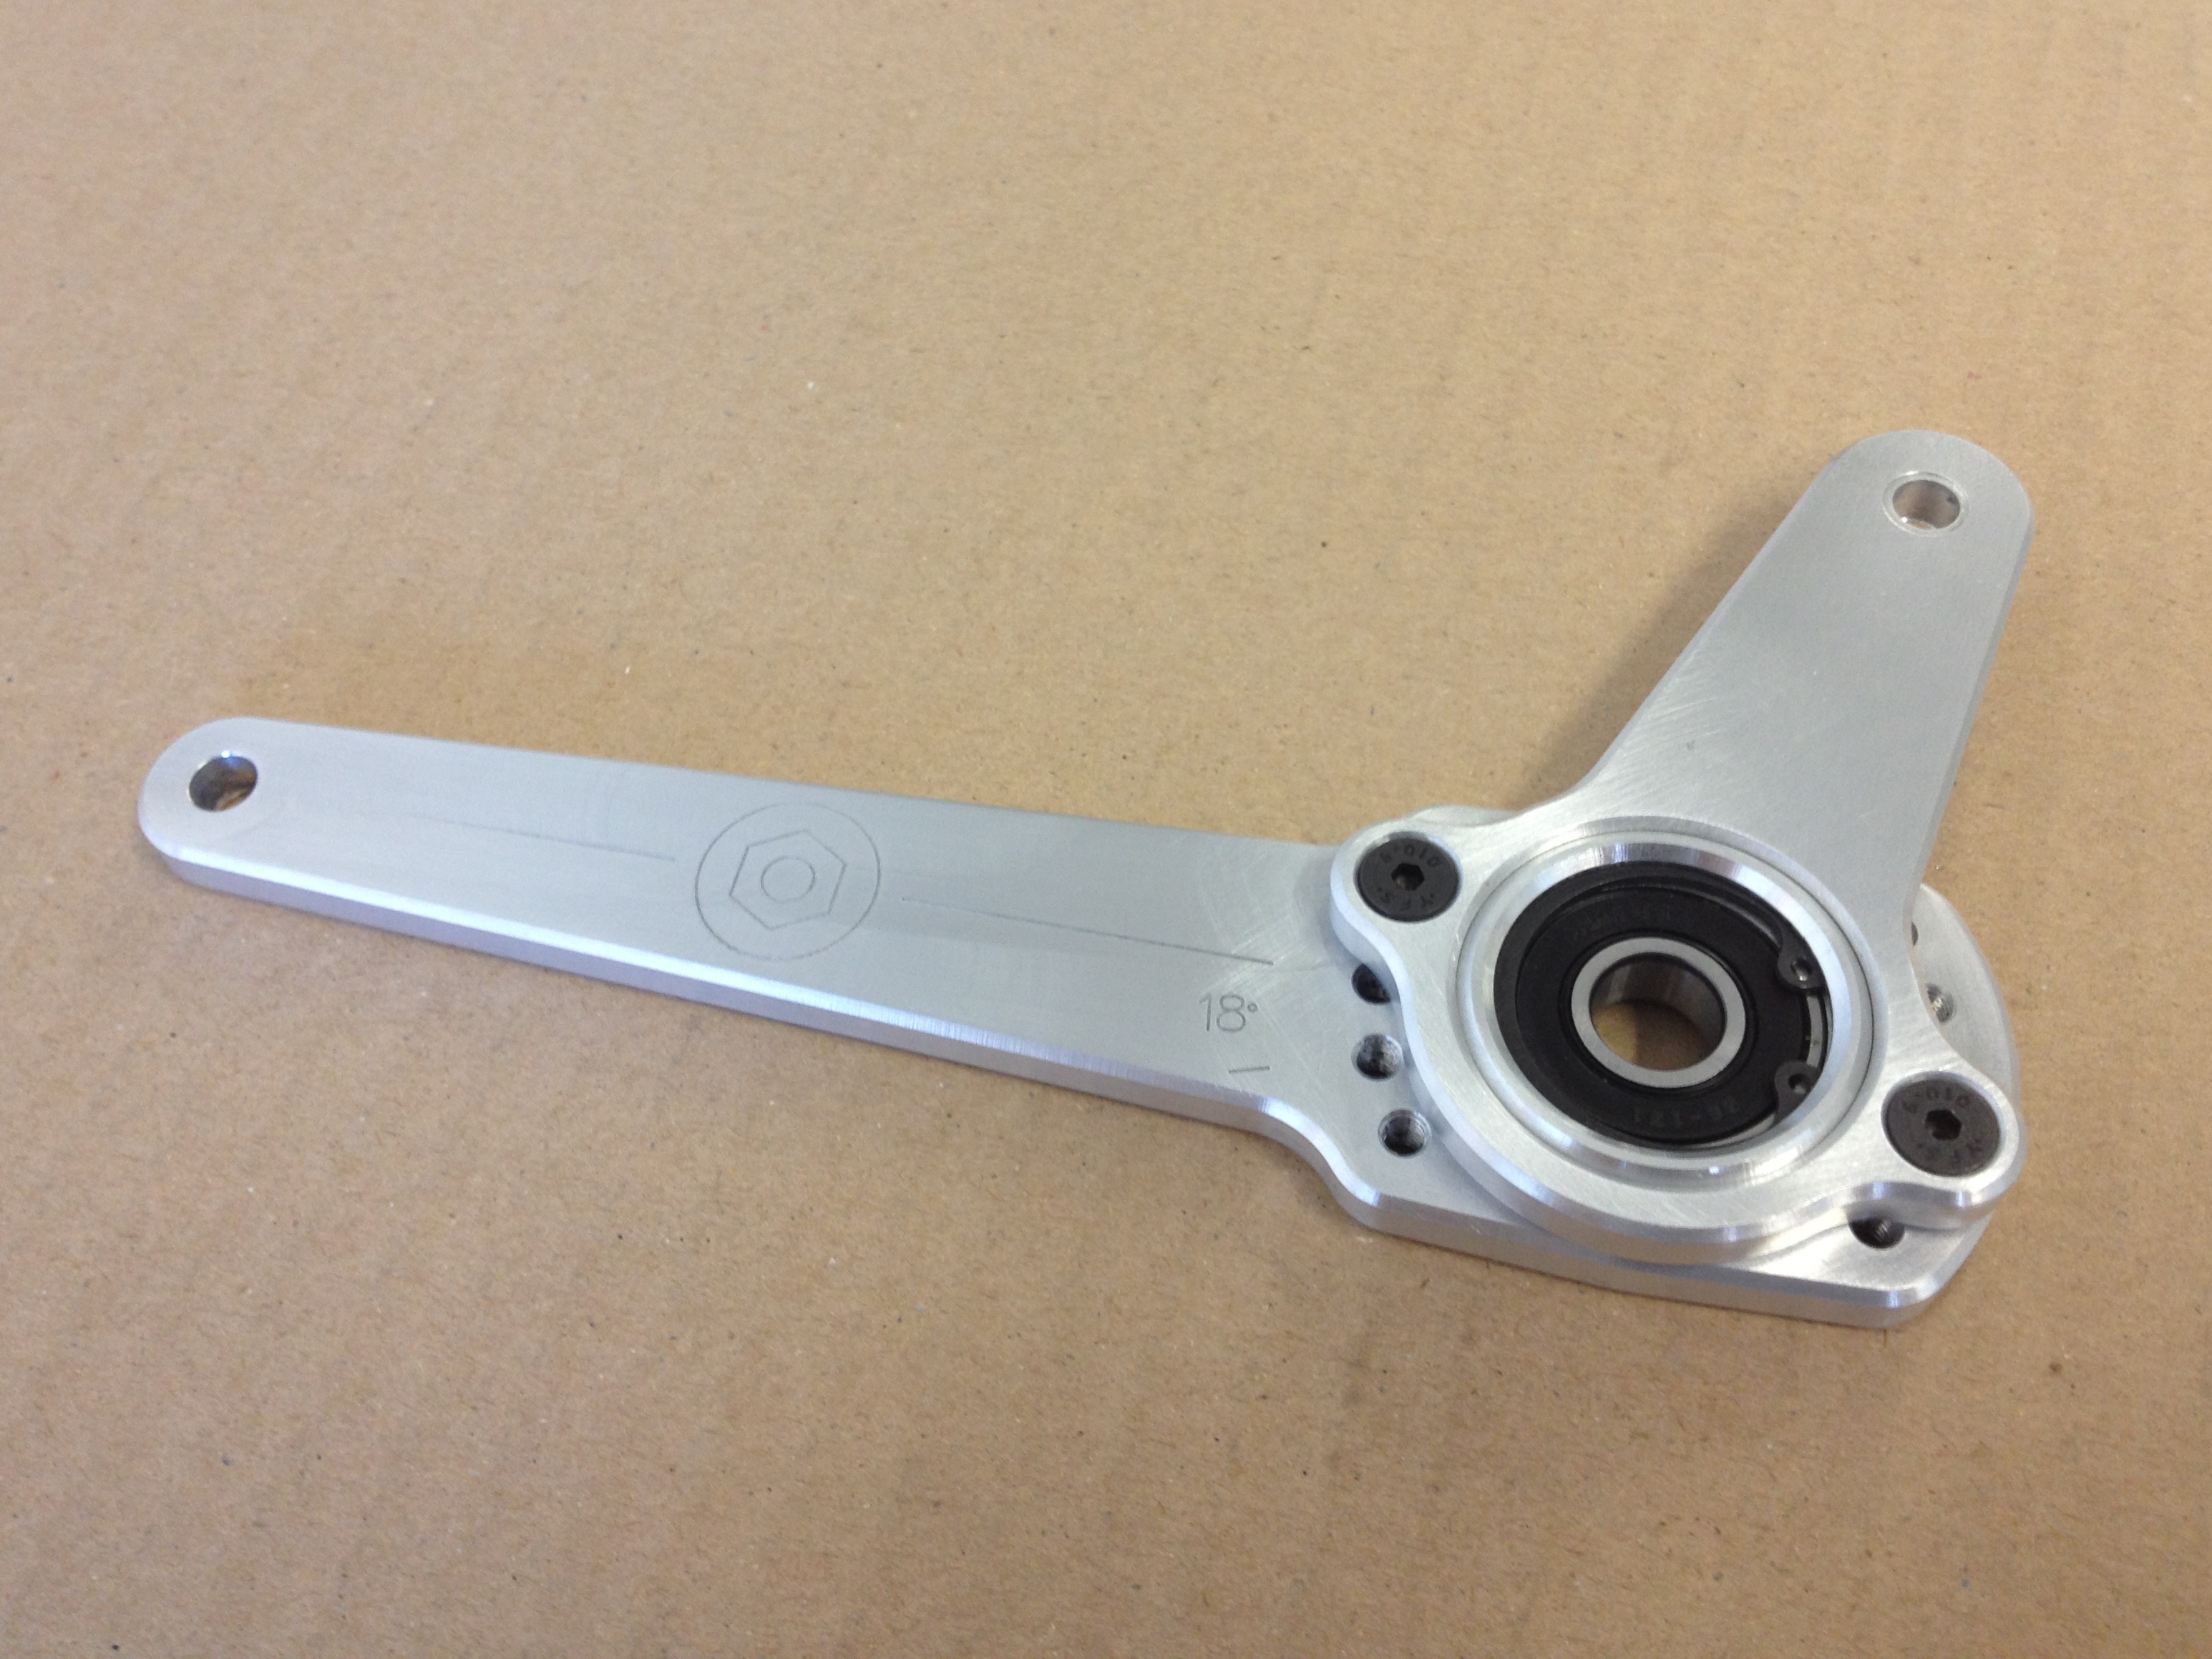
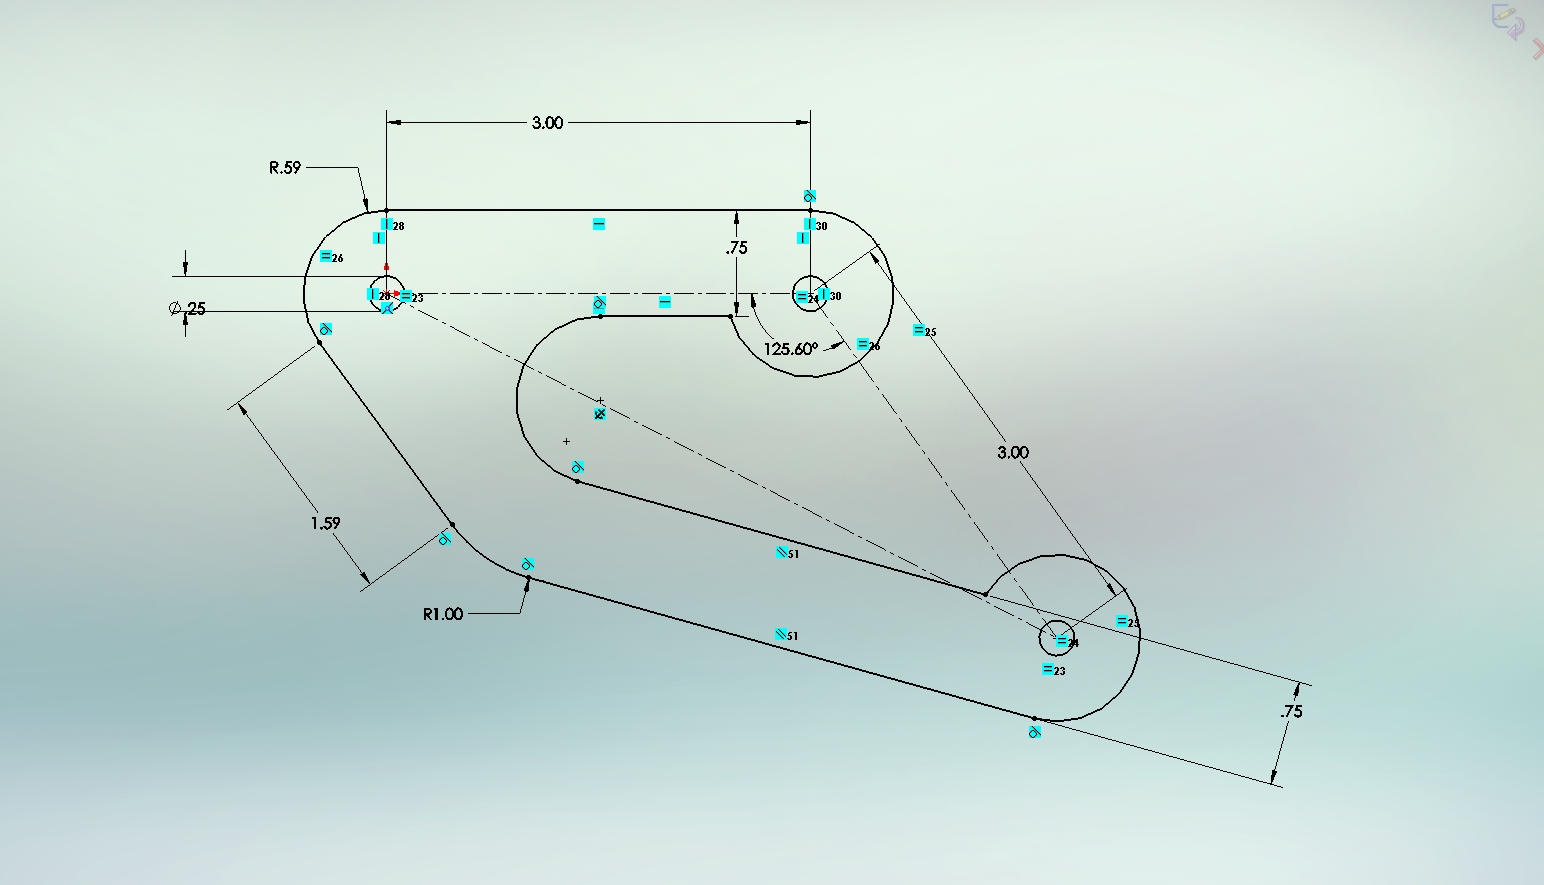
Adjustable Shift Lever
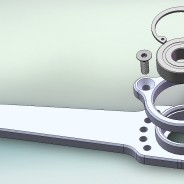
Adjustable angle shift lever.
6061 aluminum, sealed ball bearing, snap ring, fasteners.
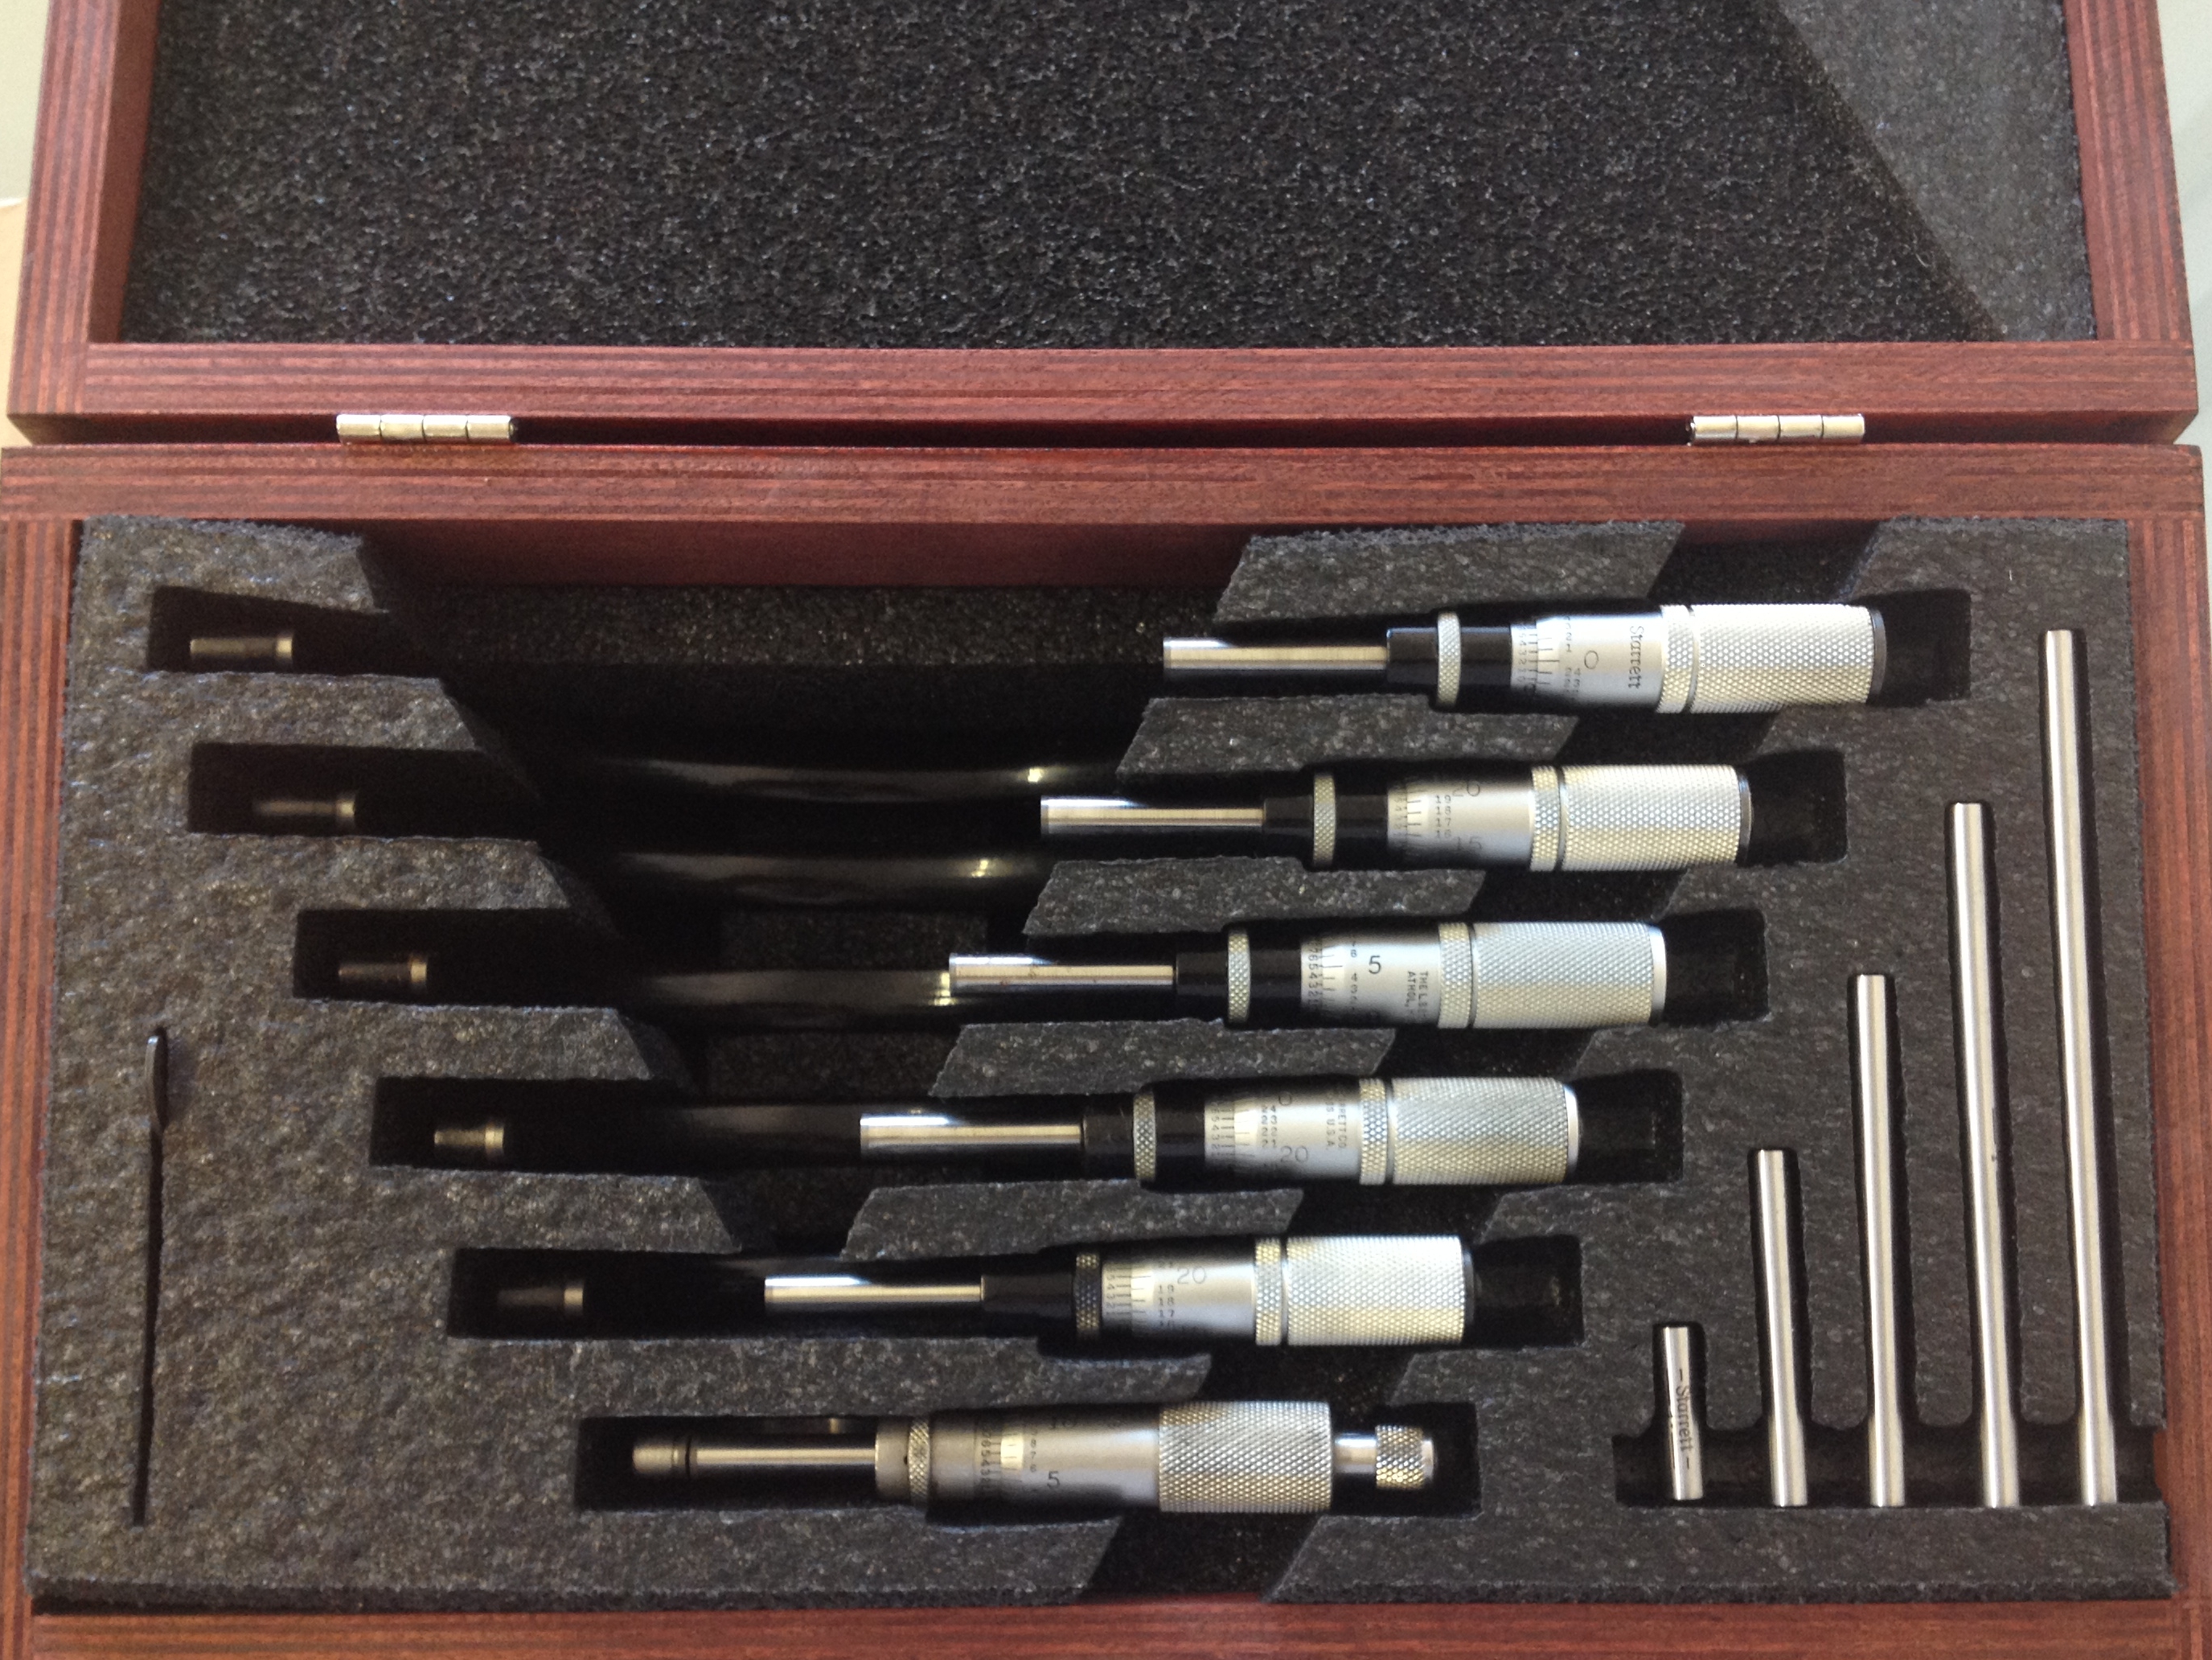
Precision measuring – Micrometers get a home
I’ve had this mic set for awhile but I just ordered the box.
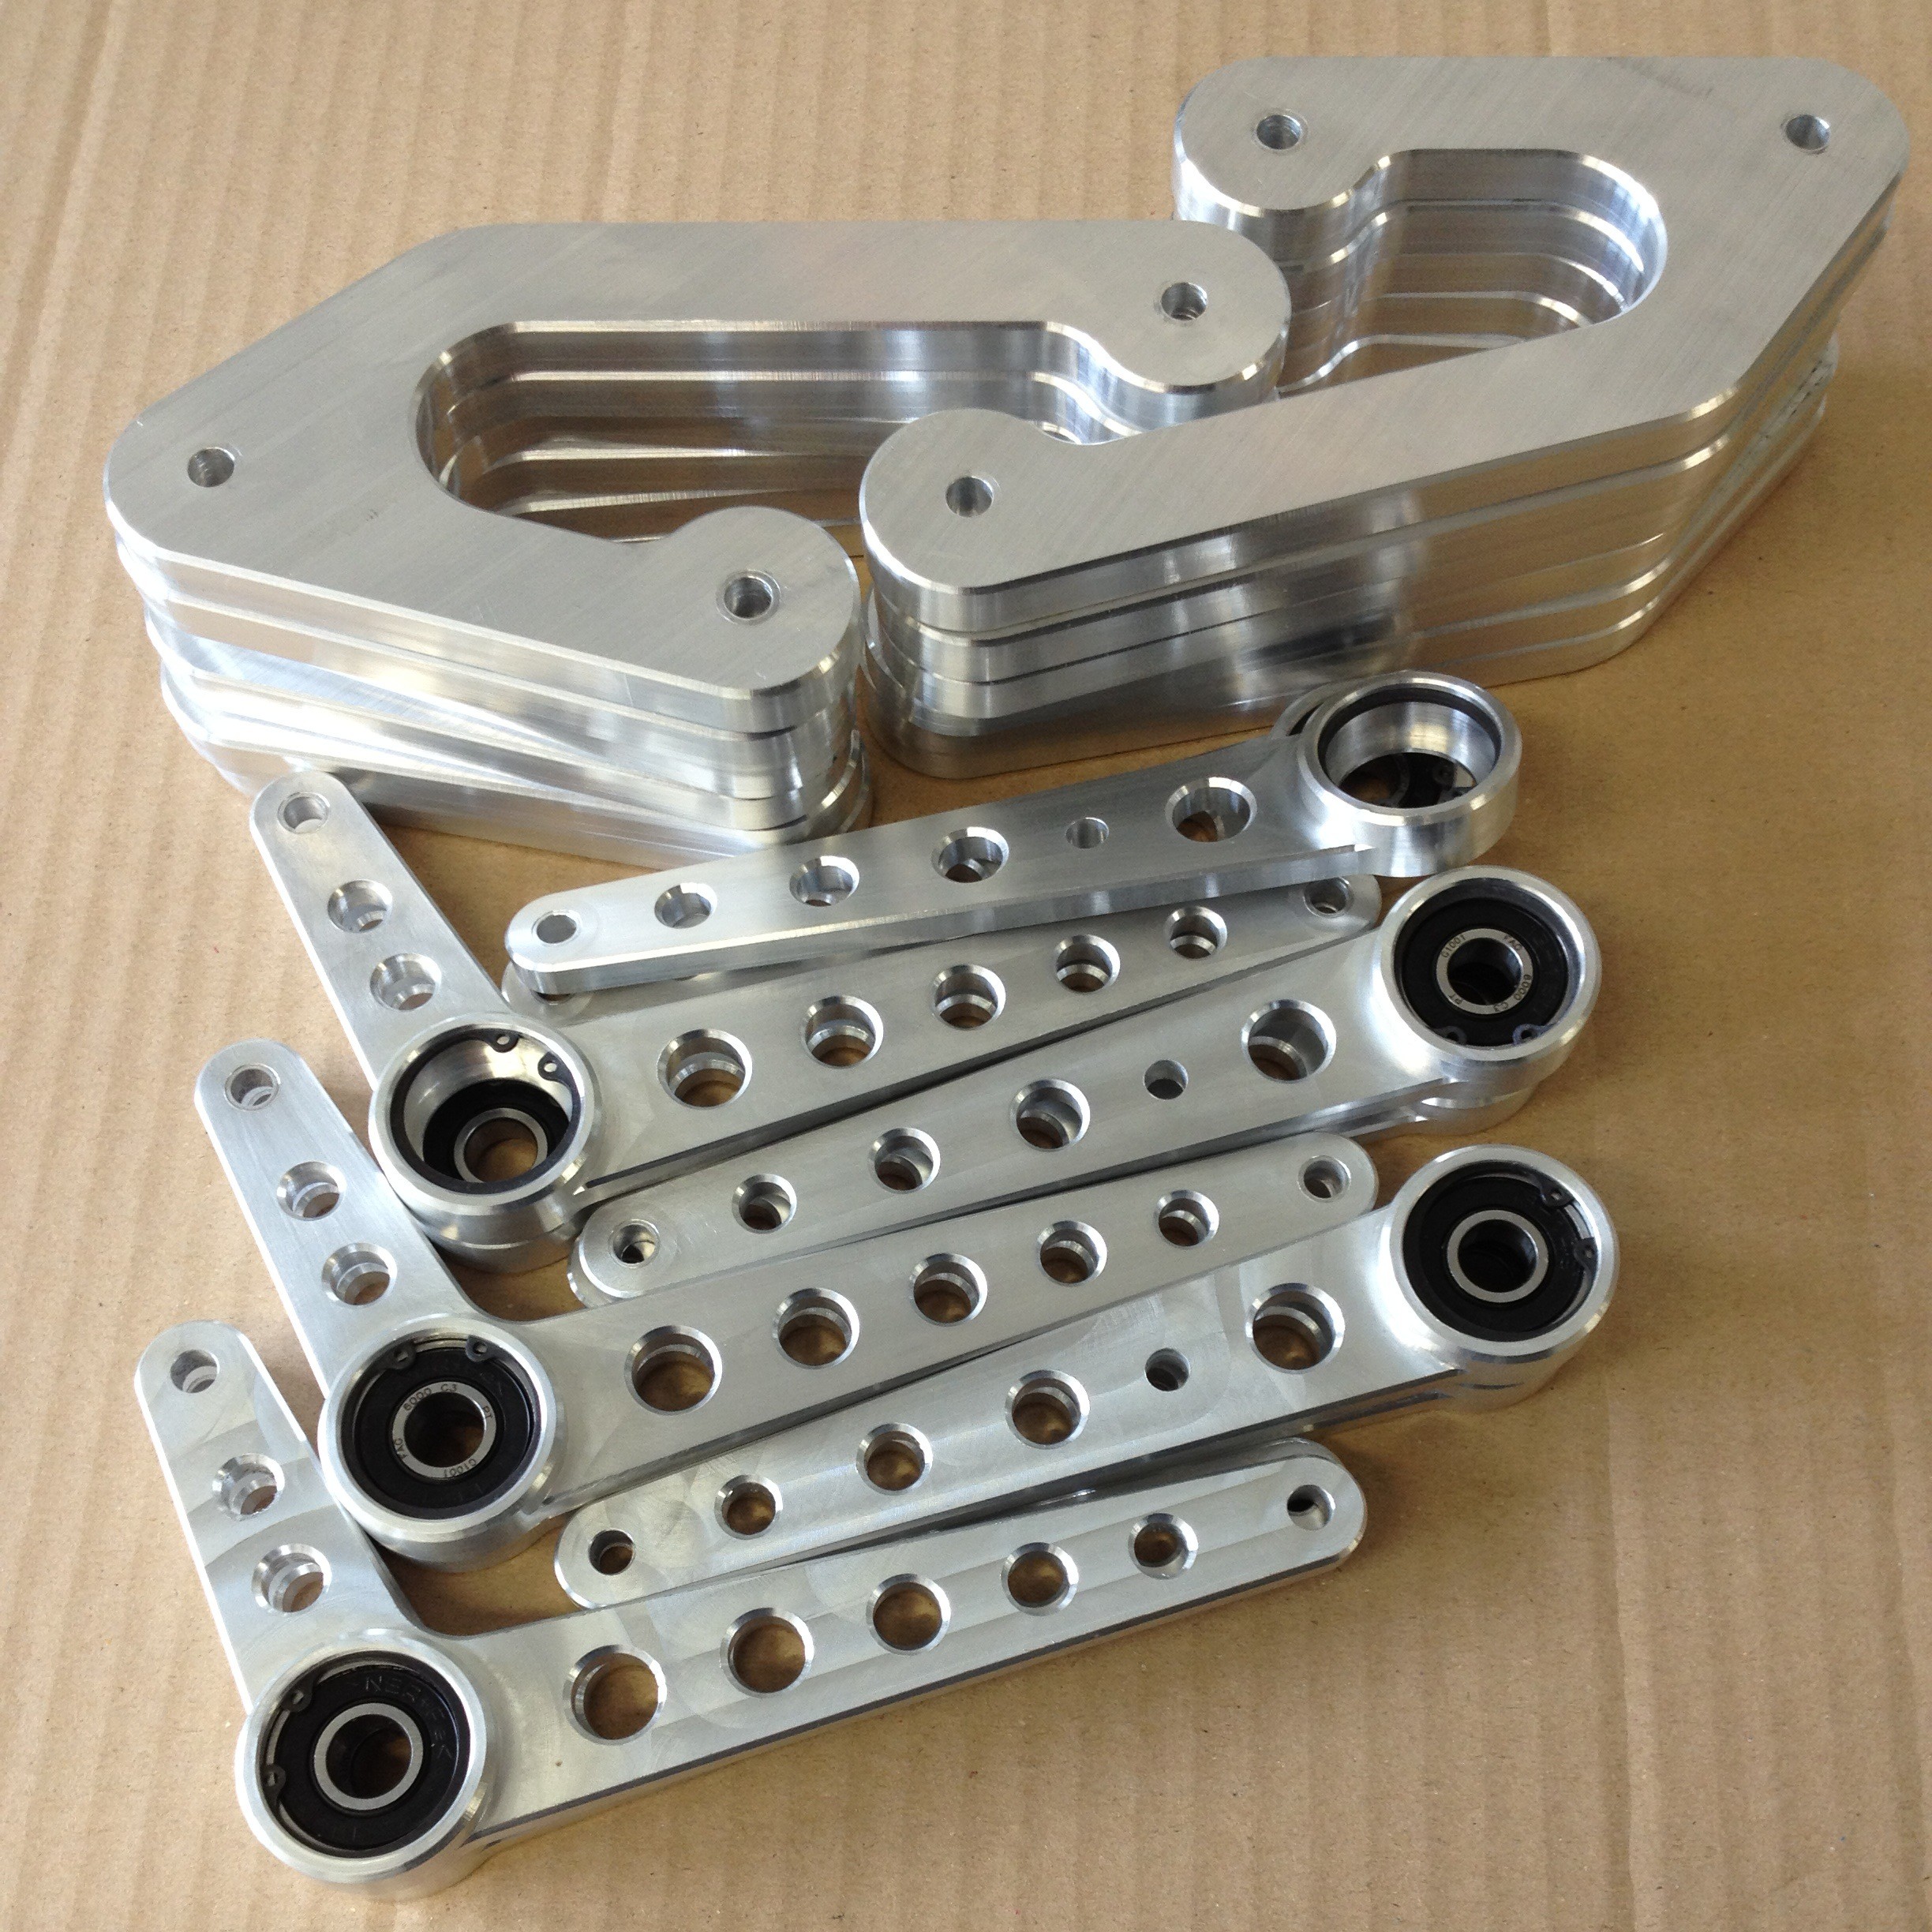
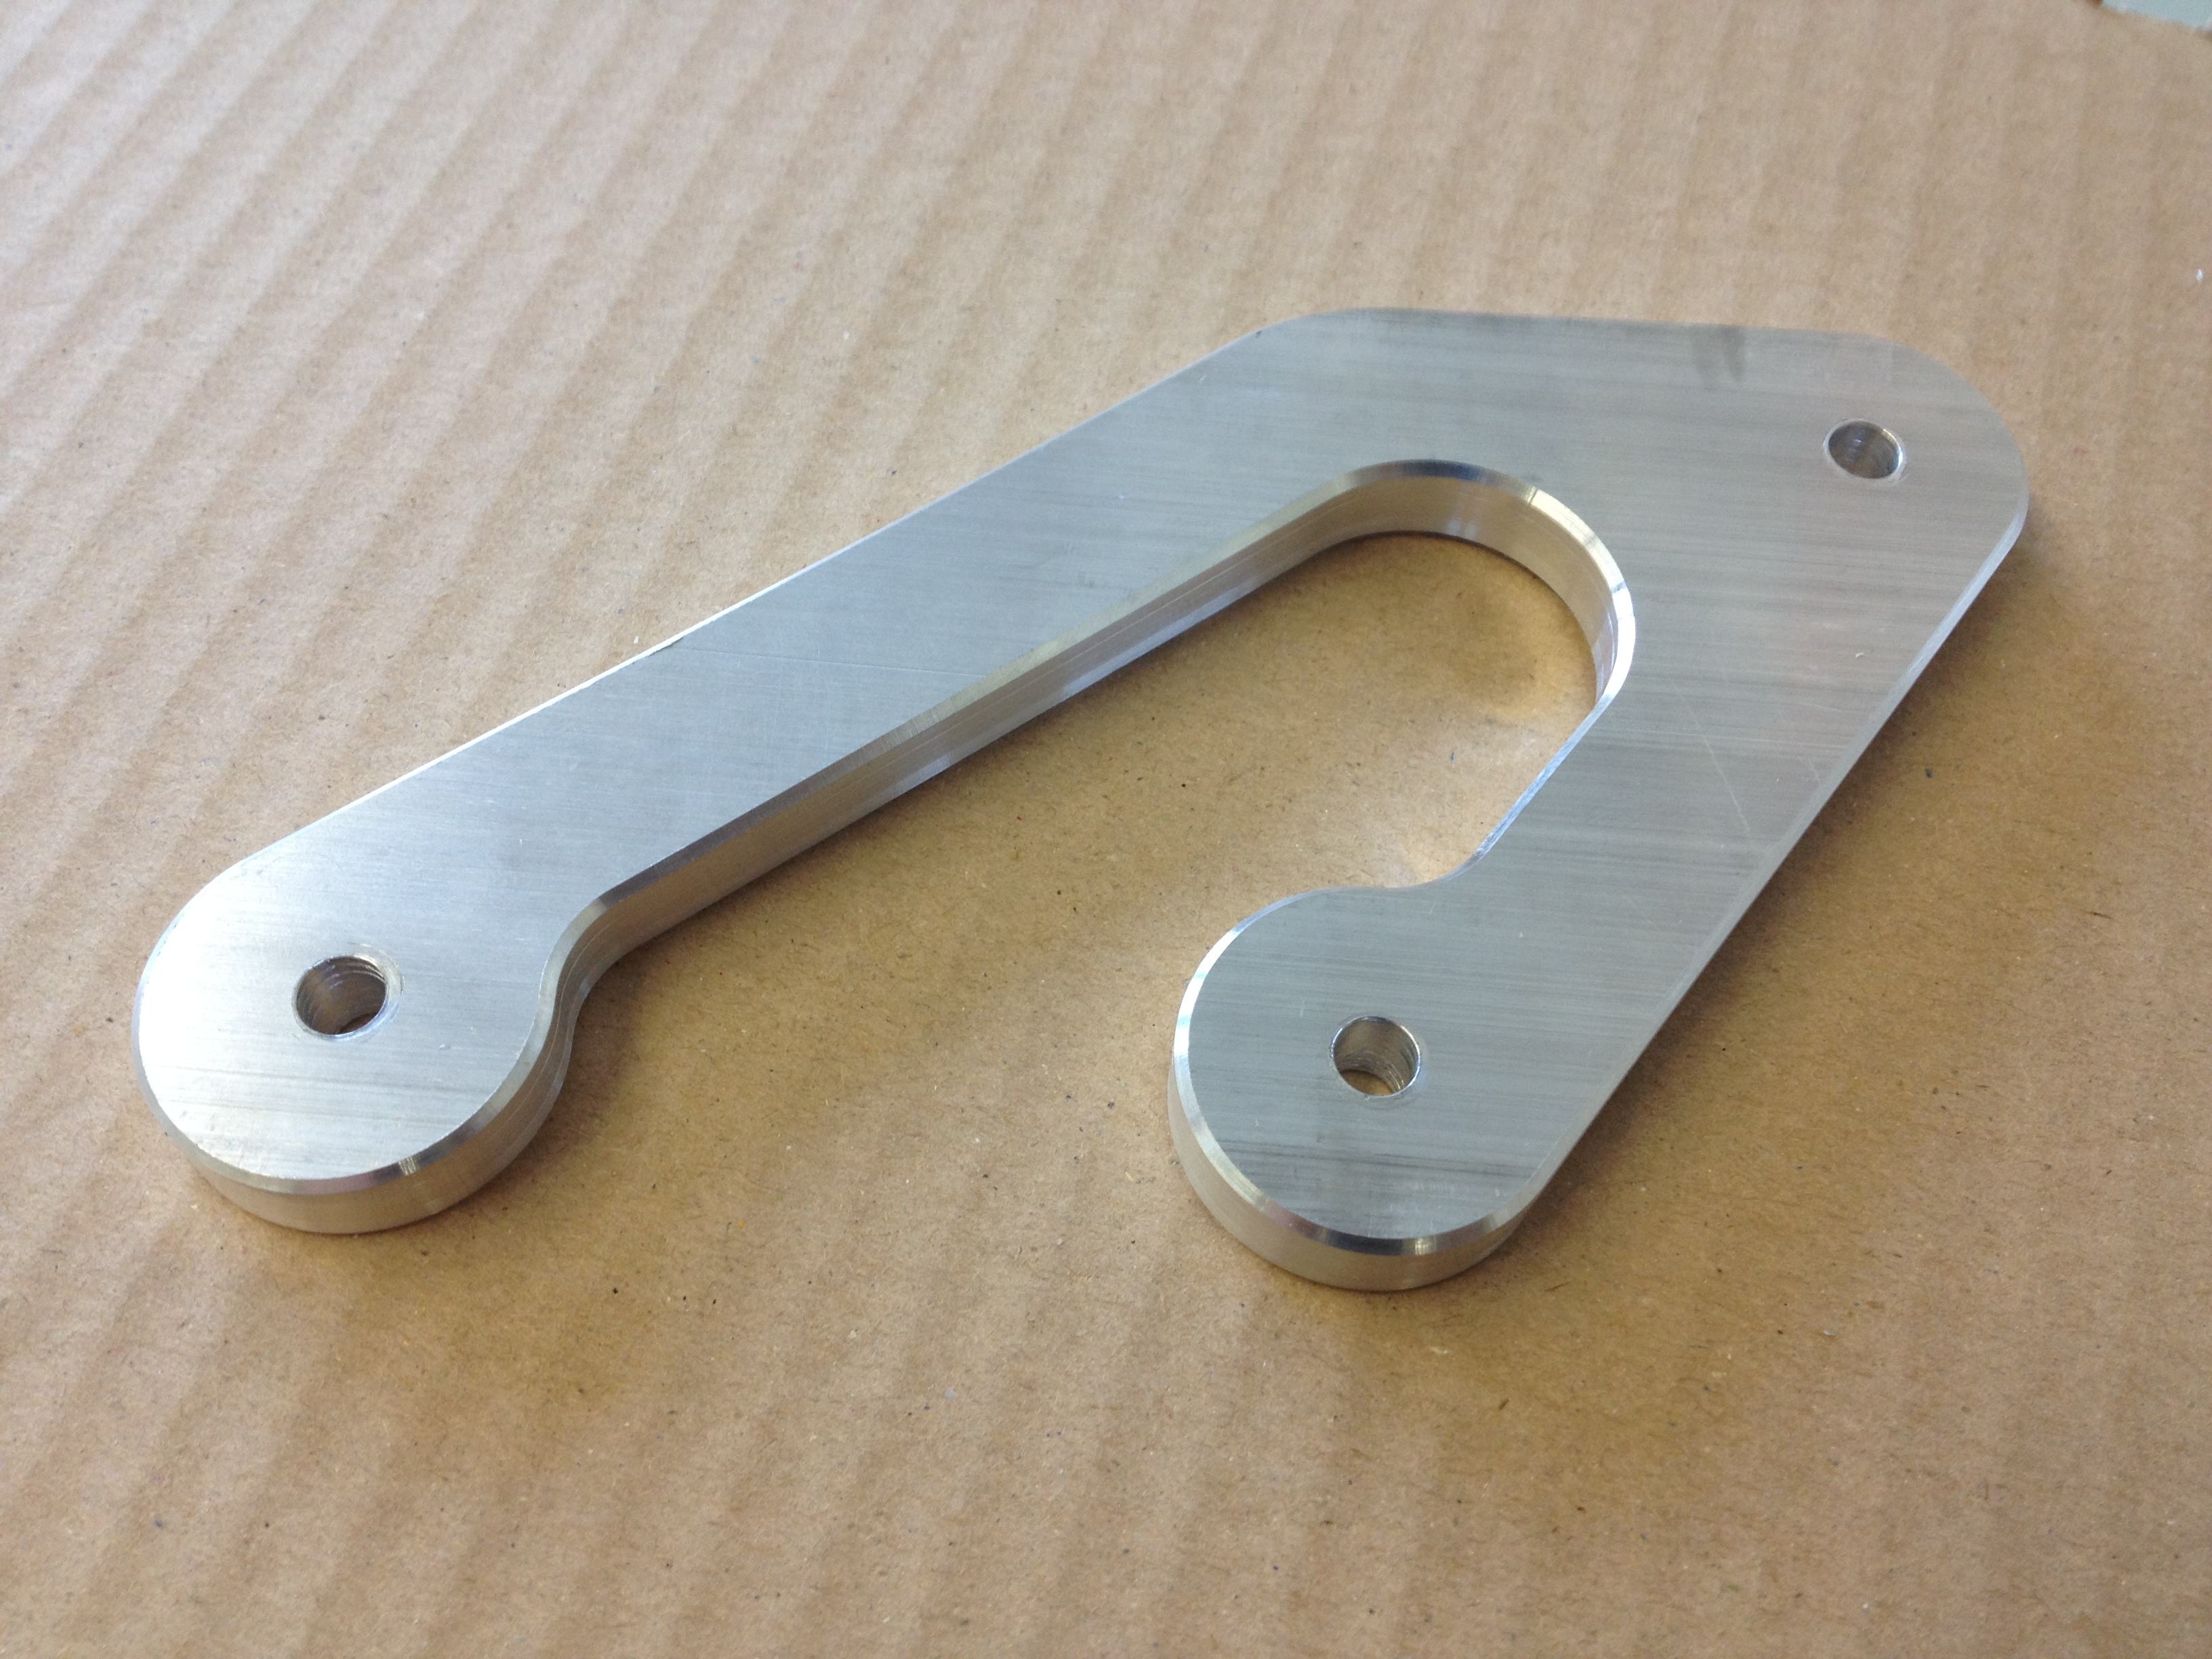
Rear Sets and Levers – Wrap Up

This small project is a good example of how working with a prototype shop can quickly bring a design into reality while accommodating design changes along the way.
For those who are not familiar with racing motorcycles, the bracket shown is a “rear set” which moves the foot pegs back to allow the rider to get into a more aerodynamic position. Custom levers are required allow the rider to shift and activate the rear brake with his/her feet from the new peg location.
This project started with the client Frank Giannini giving us the distance between the threaded bosses on the motorcycle (to which the rear set would mount) and the amount of set back required.

Giannini also gave us an existing shift lever that used a pressed-in bearing. He wanted to use a snap ring to retain the bearing instead of the press fit. We generated Solidworks drawings of the rear set and levers and used HSMWORKS to generate the toolpaths for the CNC milling machine.
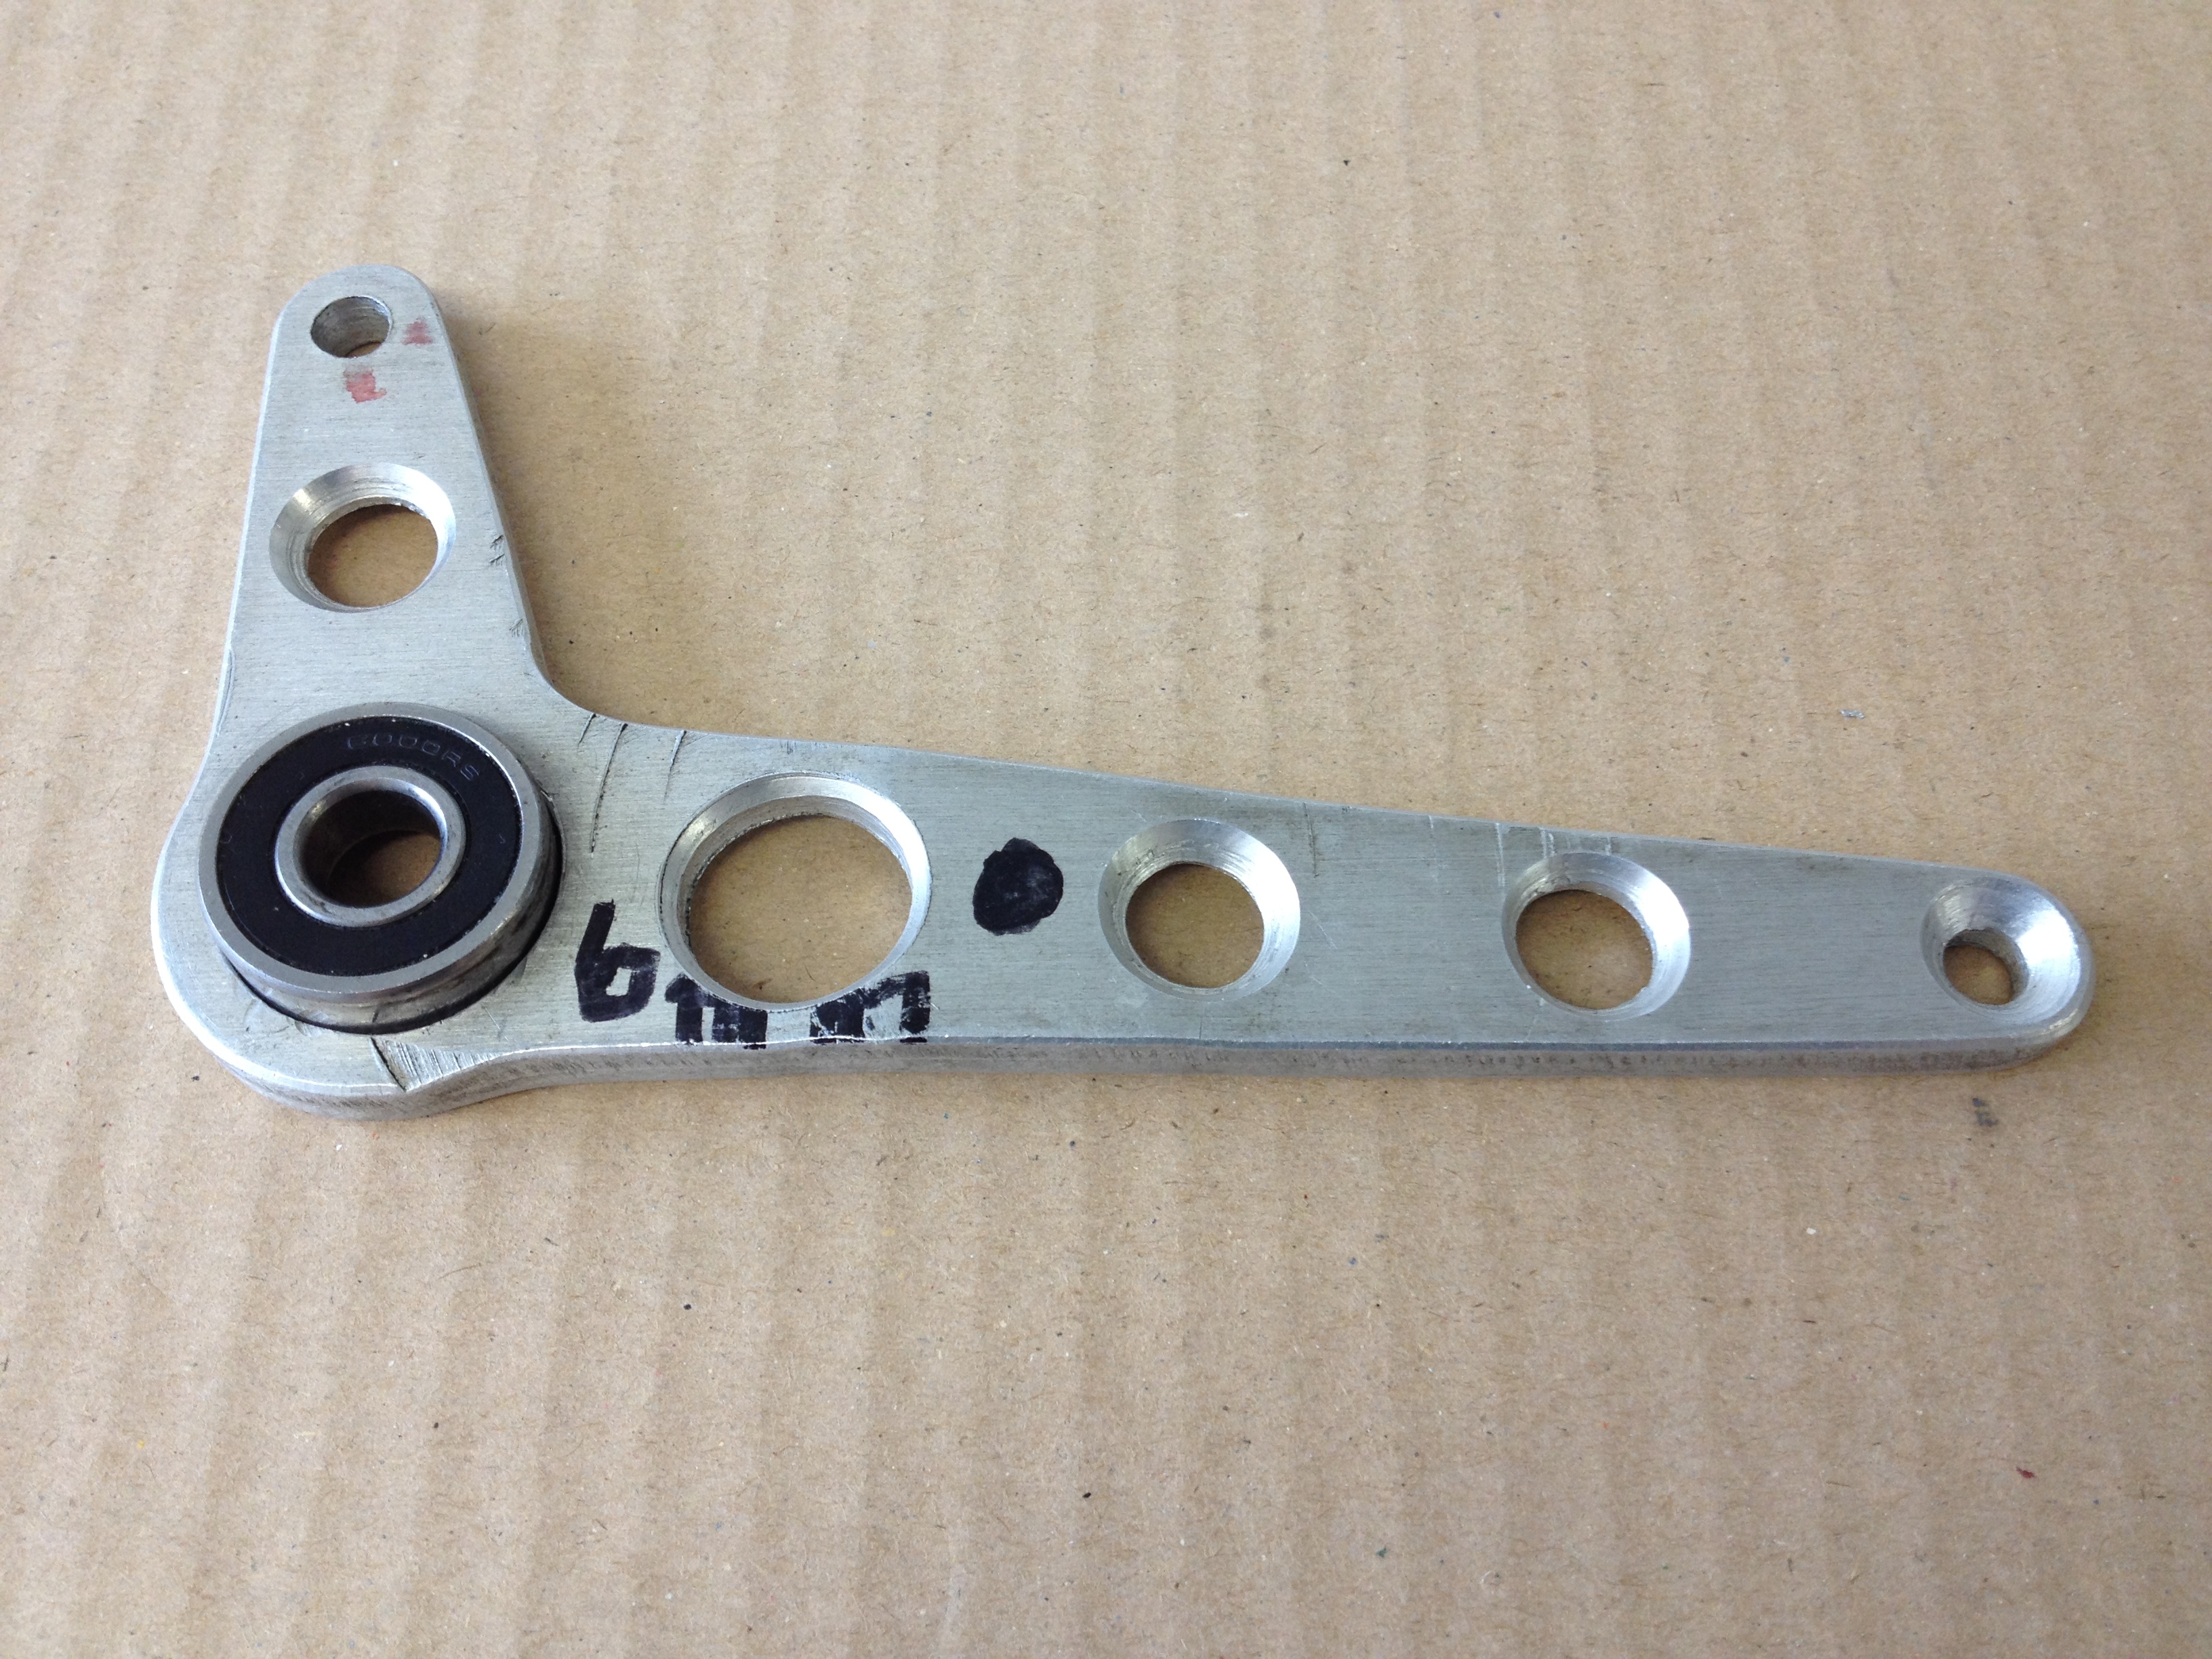

We machined one full set (a pair a rear sets and a pair of levers) and sent them to the client for a trial fit. Everything fit well on the first try. The only change requested was the reduction the size of the lightening holes in the levers to increase their durability. This was easily accomplished in Solidworks. Even major design changes (such as changing the length of the arms or the angle between them) would be easy at this point in the project.
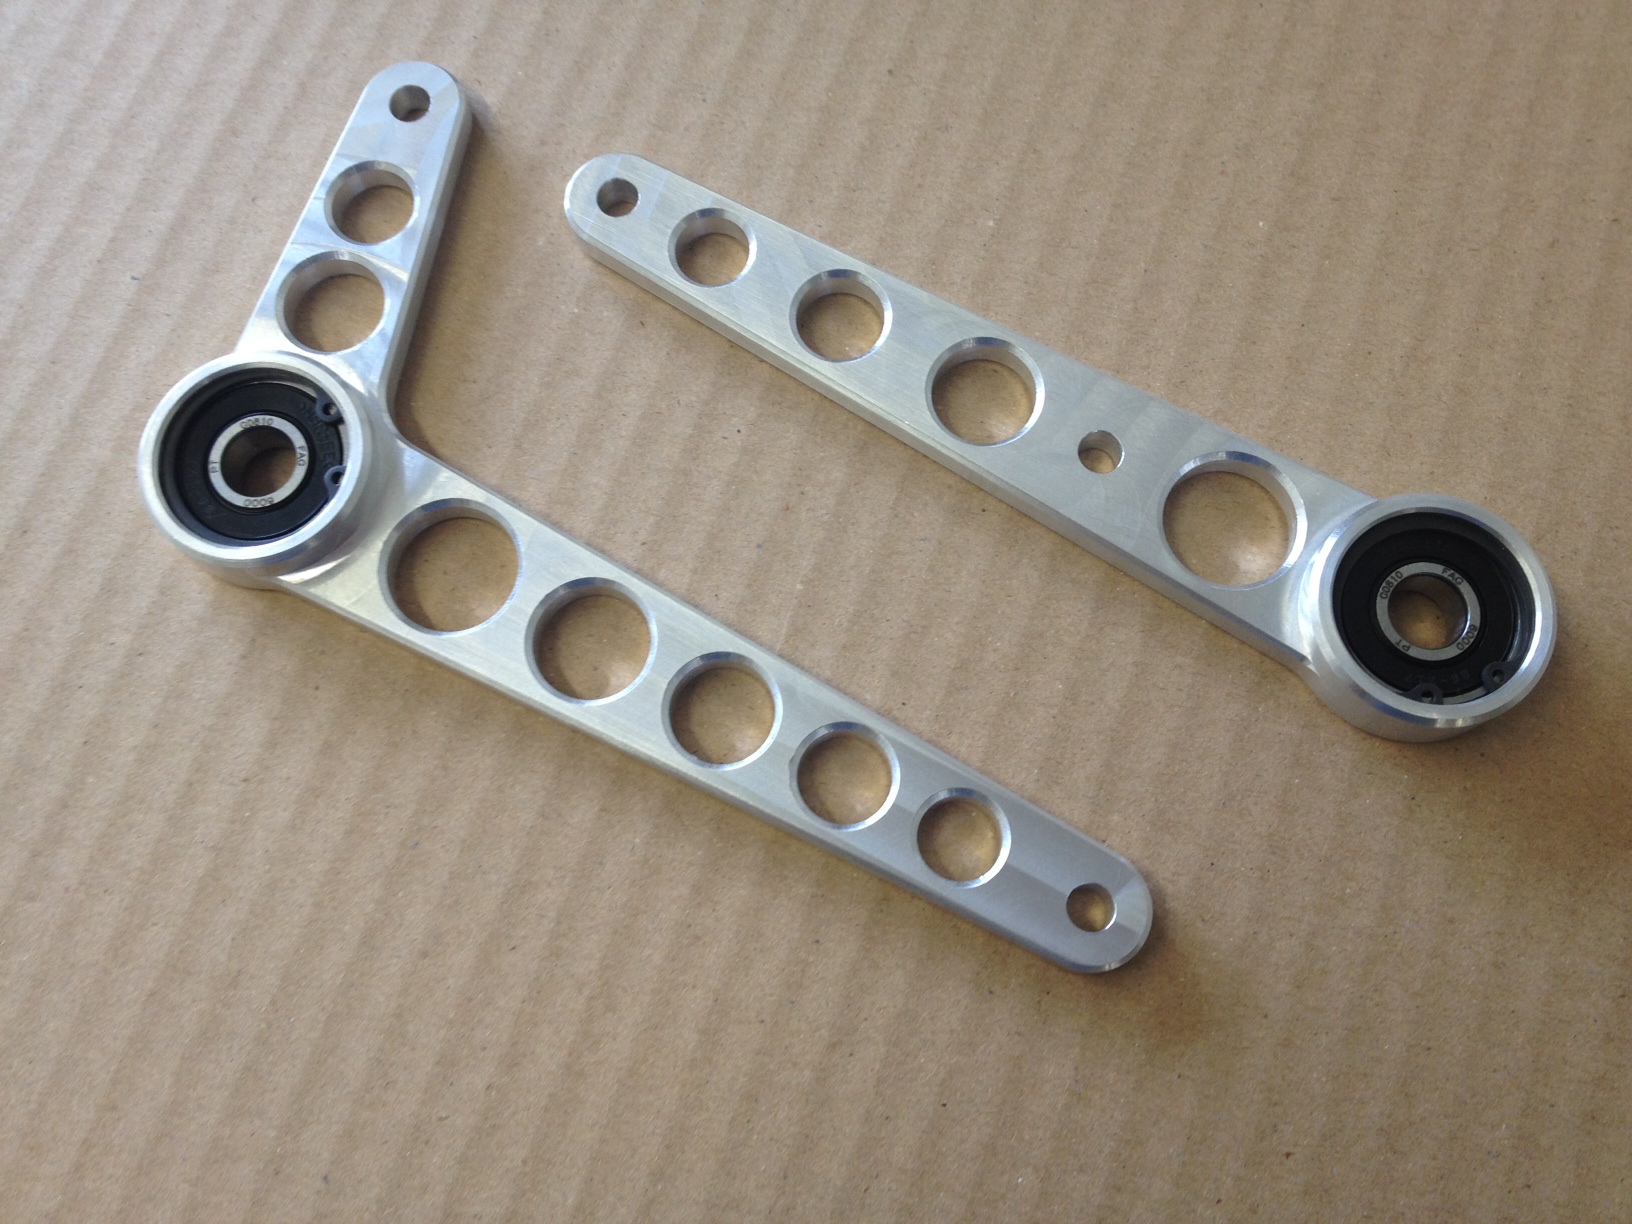
With the design verified we ran off six more full sets for the race bikes and spares.
In a short amount of time we were able to start with a drawing and physical sample, generate a design and a prototype, revise the design based on feedback from the client and do a short production run.
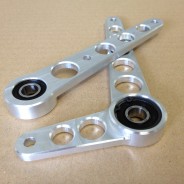

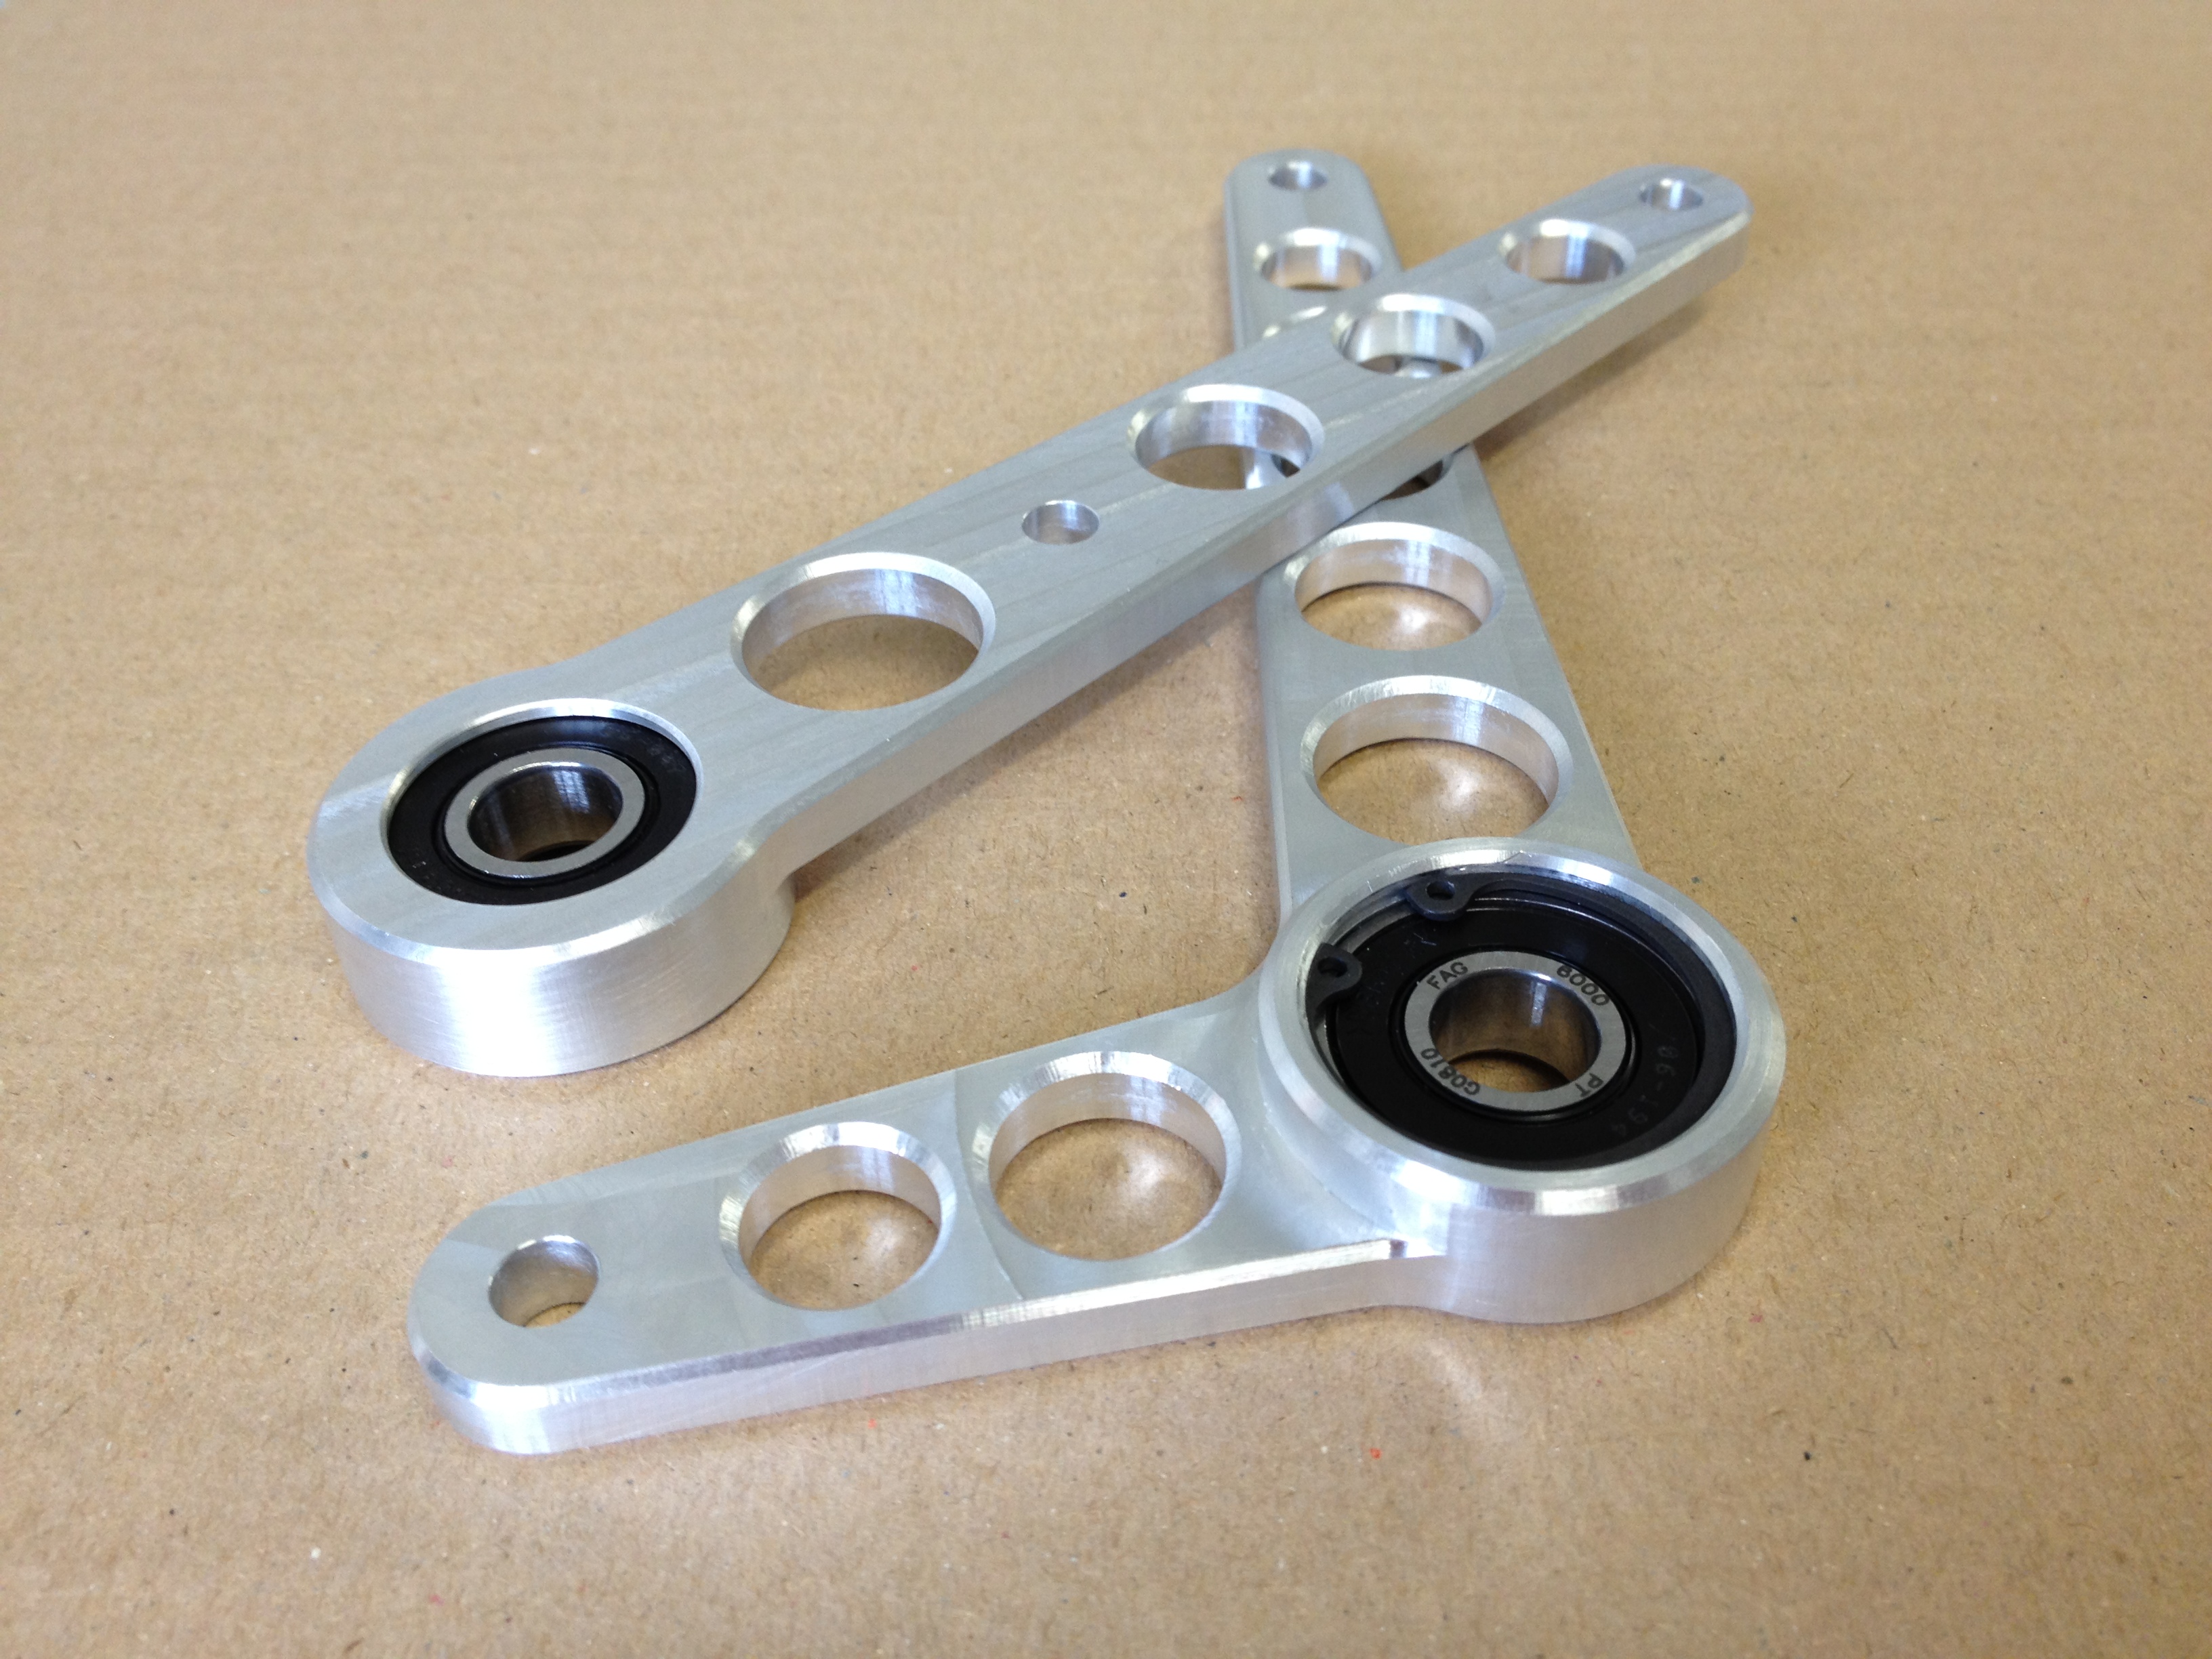
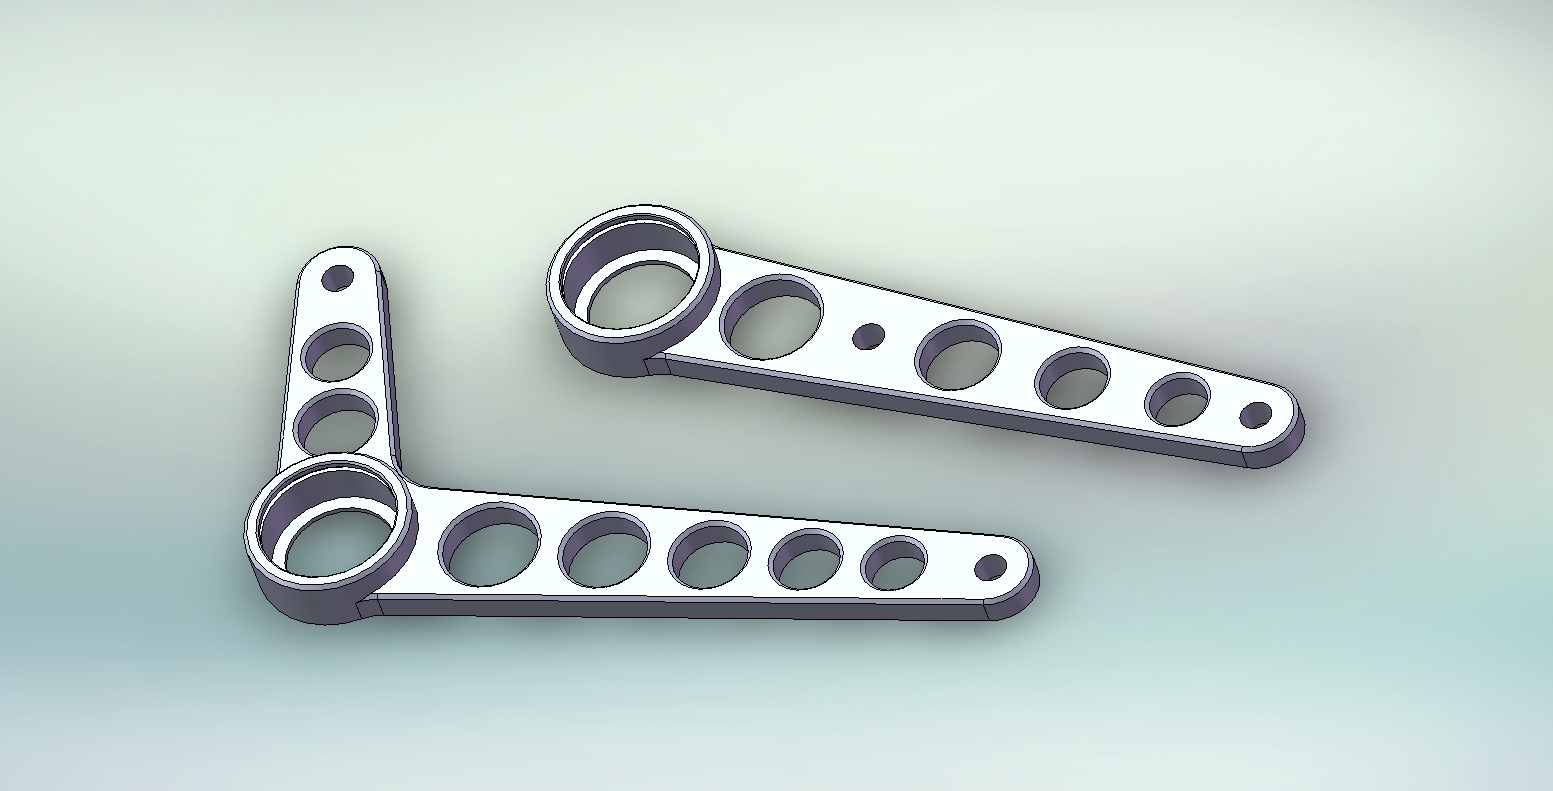

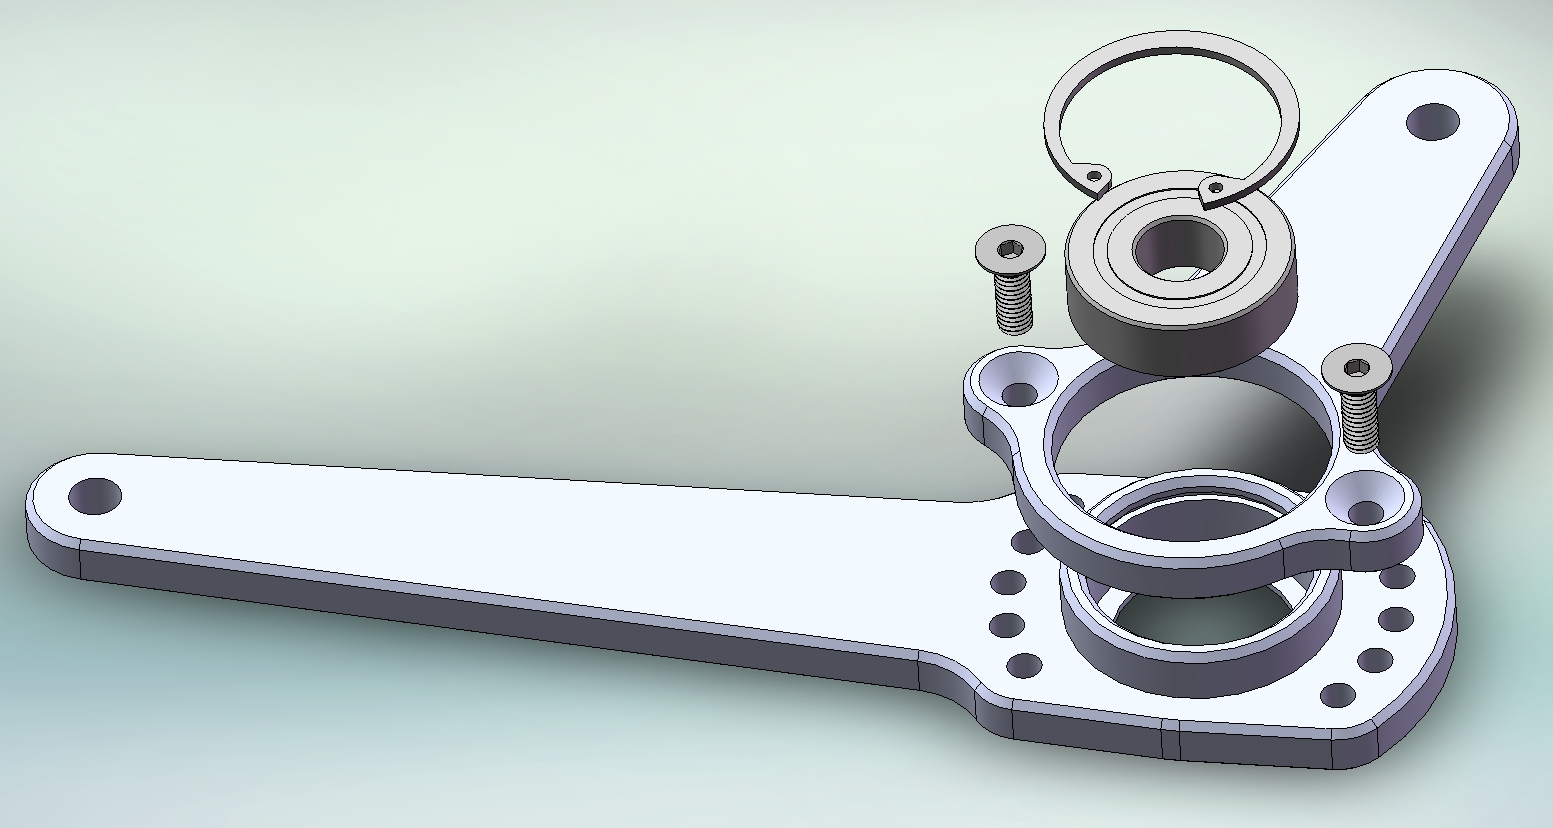
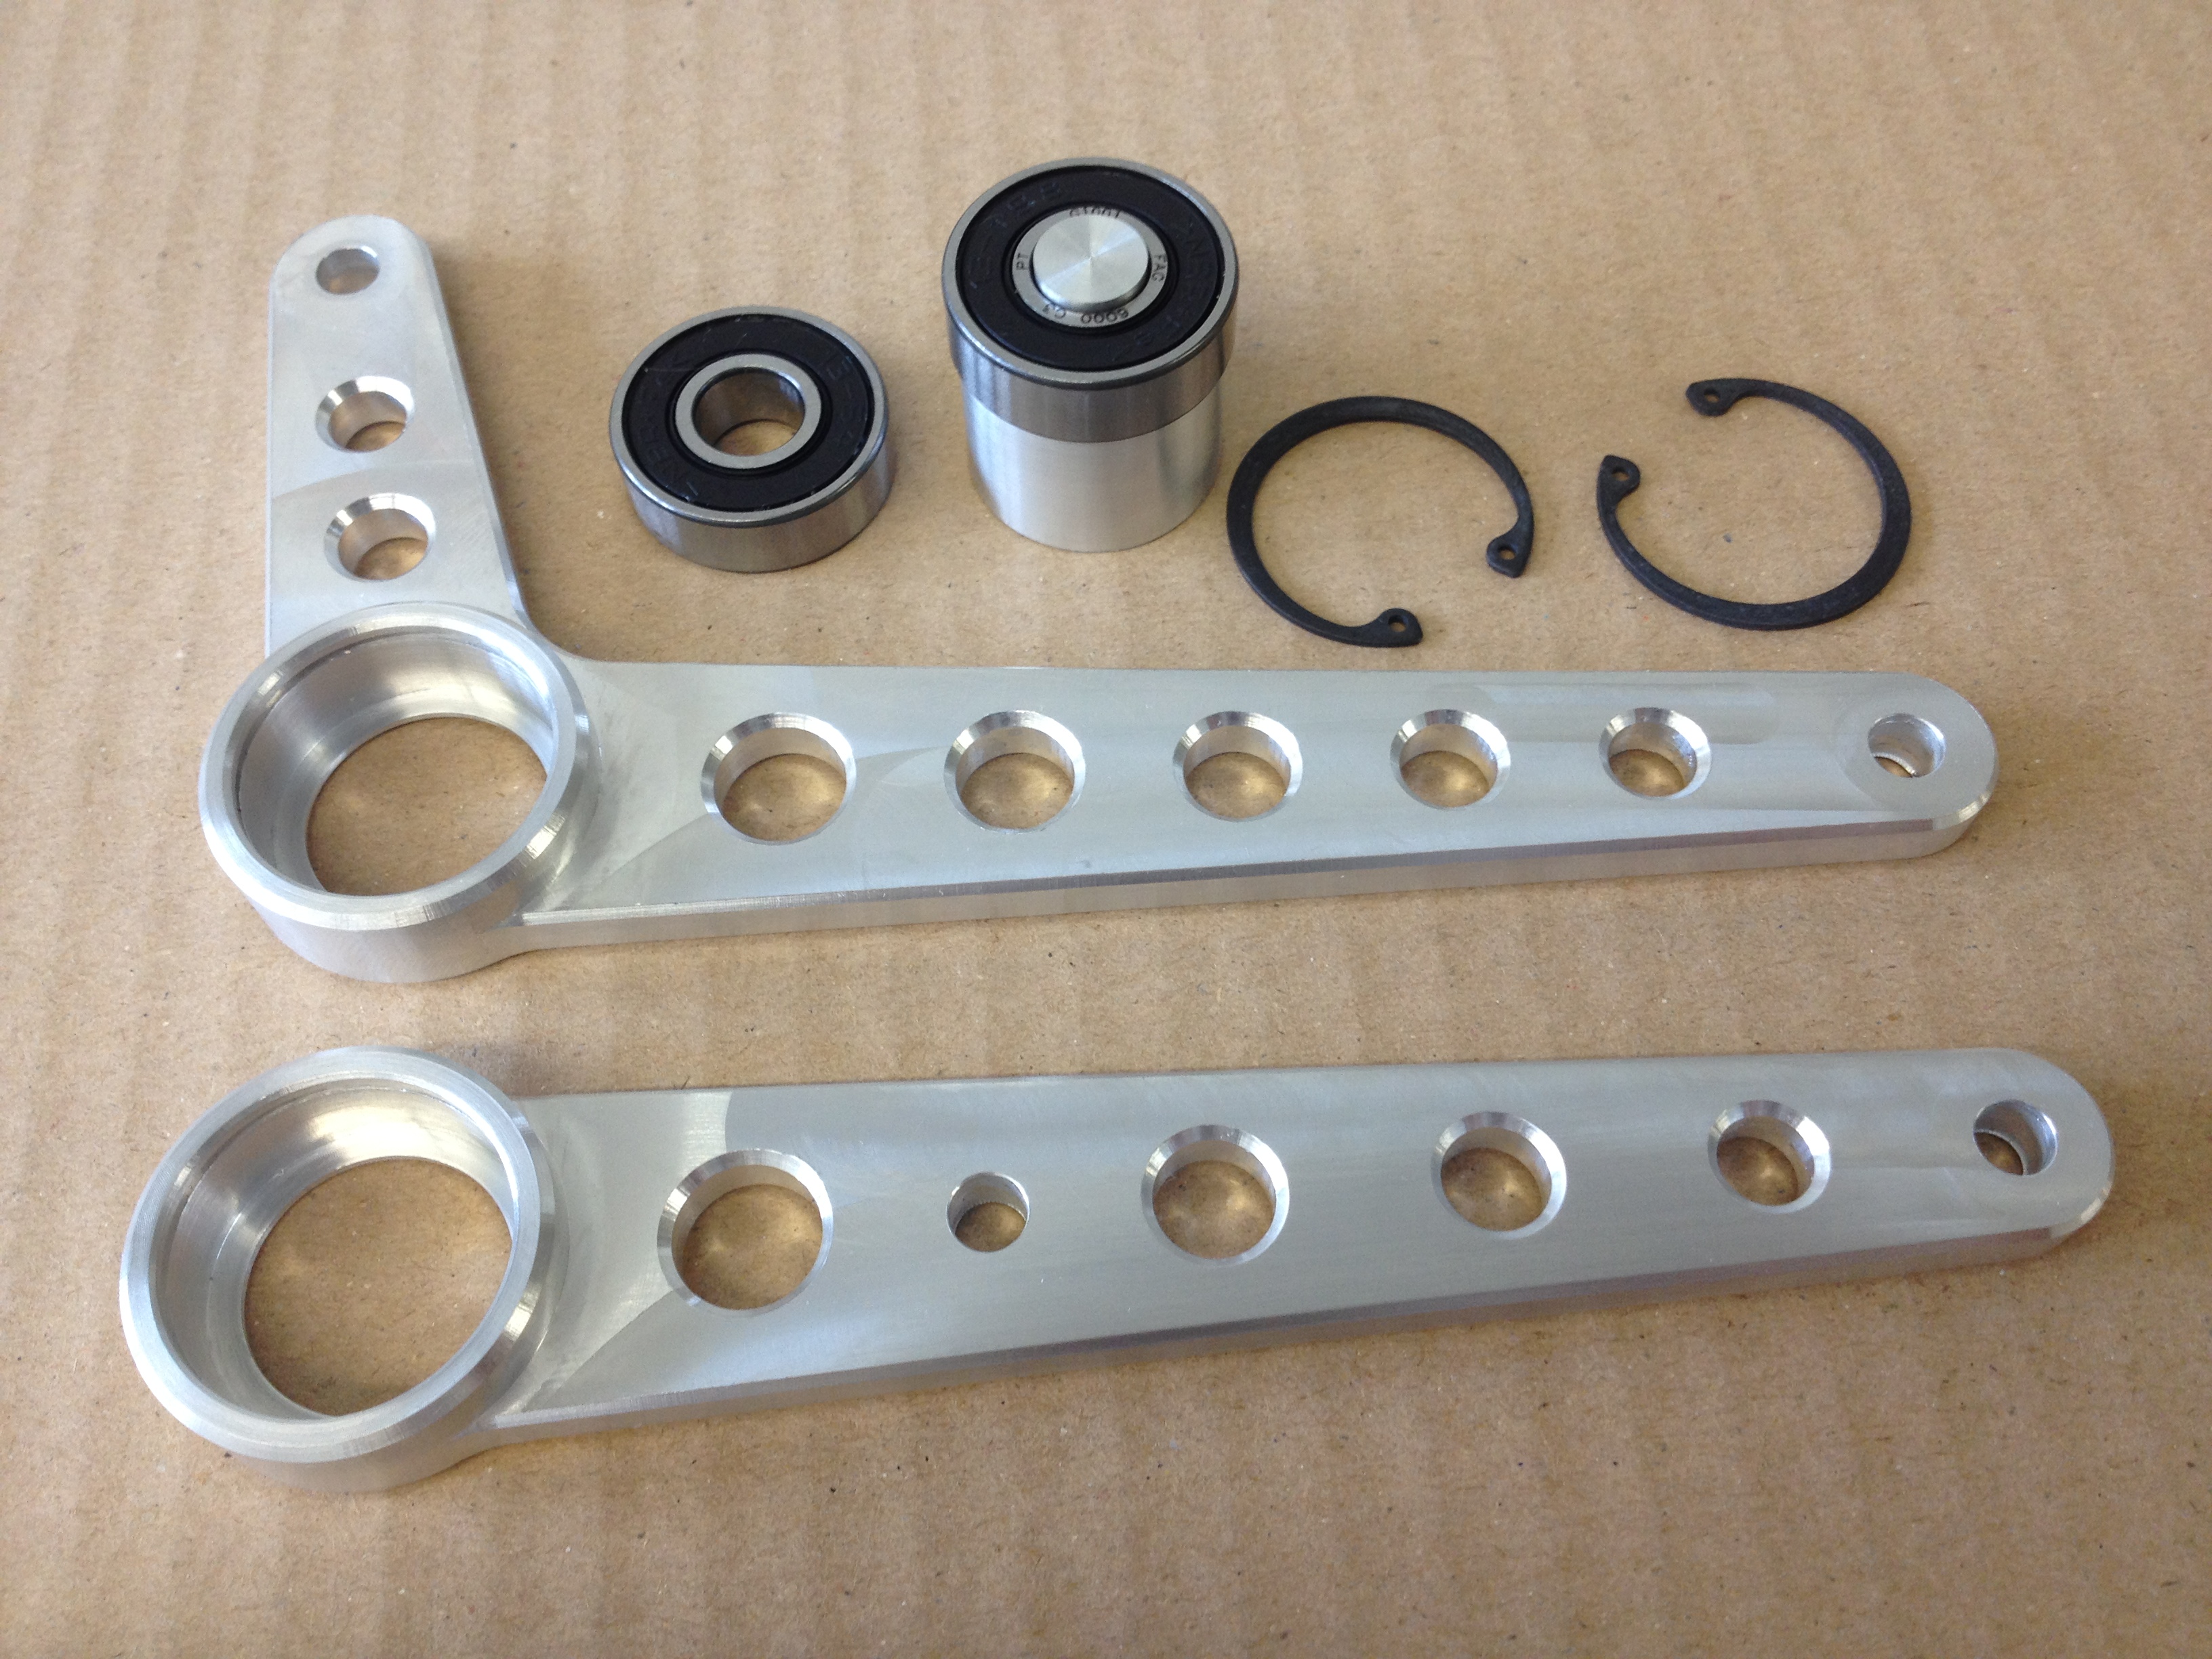
Shift / Brake Levers
A pair of shift / brake levers for a custom Honda 350 race bike. Solidworks model showing the inside of the lever with the bore for the bearing and internal snap ring groove. I wanted to do a test interpolating the bearing bore. The first two attempts were unsuccessful due to the snap ring grove raising a burr on the inside of the bore. On the third attempt I roughed the bore, cut the snap ring grove, then finished the bore. It’s a nice tight sliding fit.
Fixturing these parts was challenging. I didn’t want to invest much time in complex fixturing given that these are prototypes and the design may change based on feedback from the racer or builder. I decided to face one side and rough out the shape (.01″ outside actual profile) so I could cut the chamfers on the outside. I’ll face off the small pads under the socket cap screws one at a time below the level of the part. Then I can flip the part and index it using the four holes drilled in the corners. All sides and bores will be finished from this side in addition to the bearing bore, snap ring groove and other features.
I’ll flip it and finish that up tomorrow.
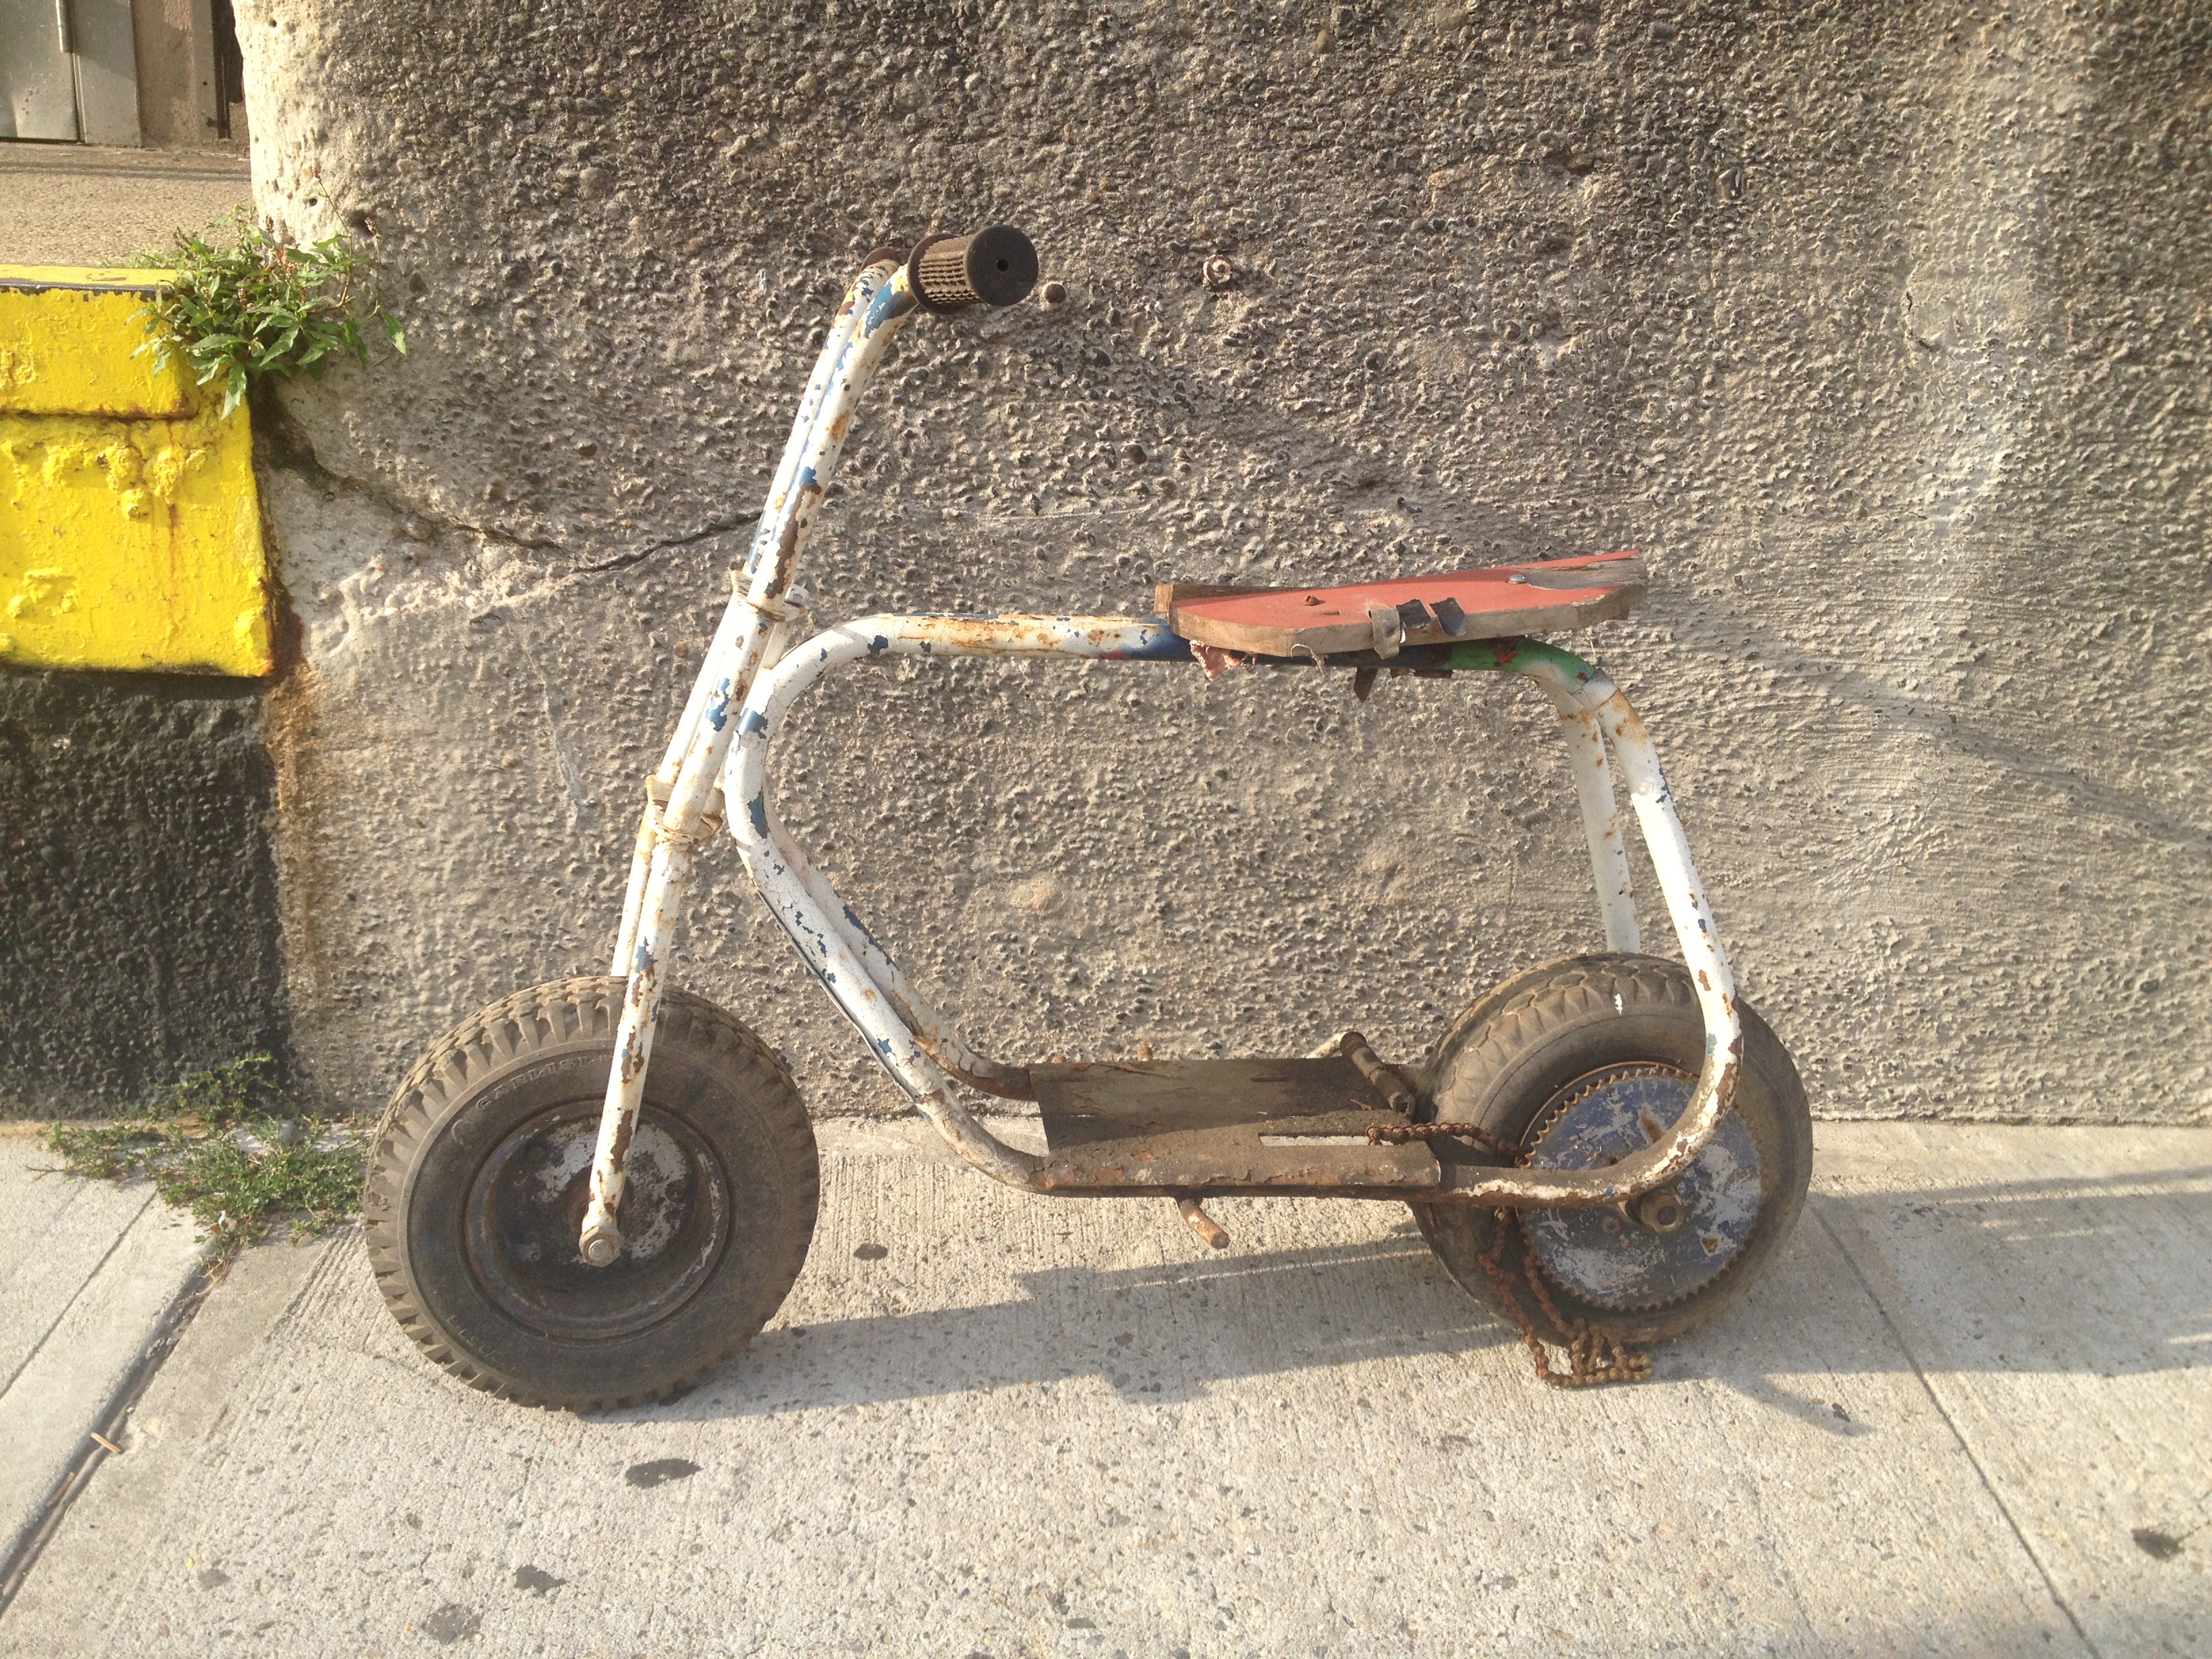
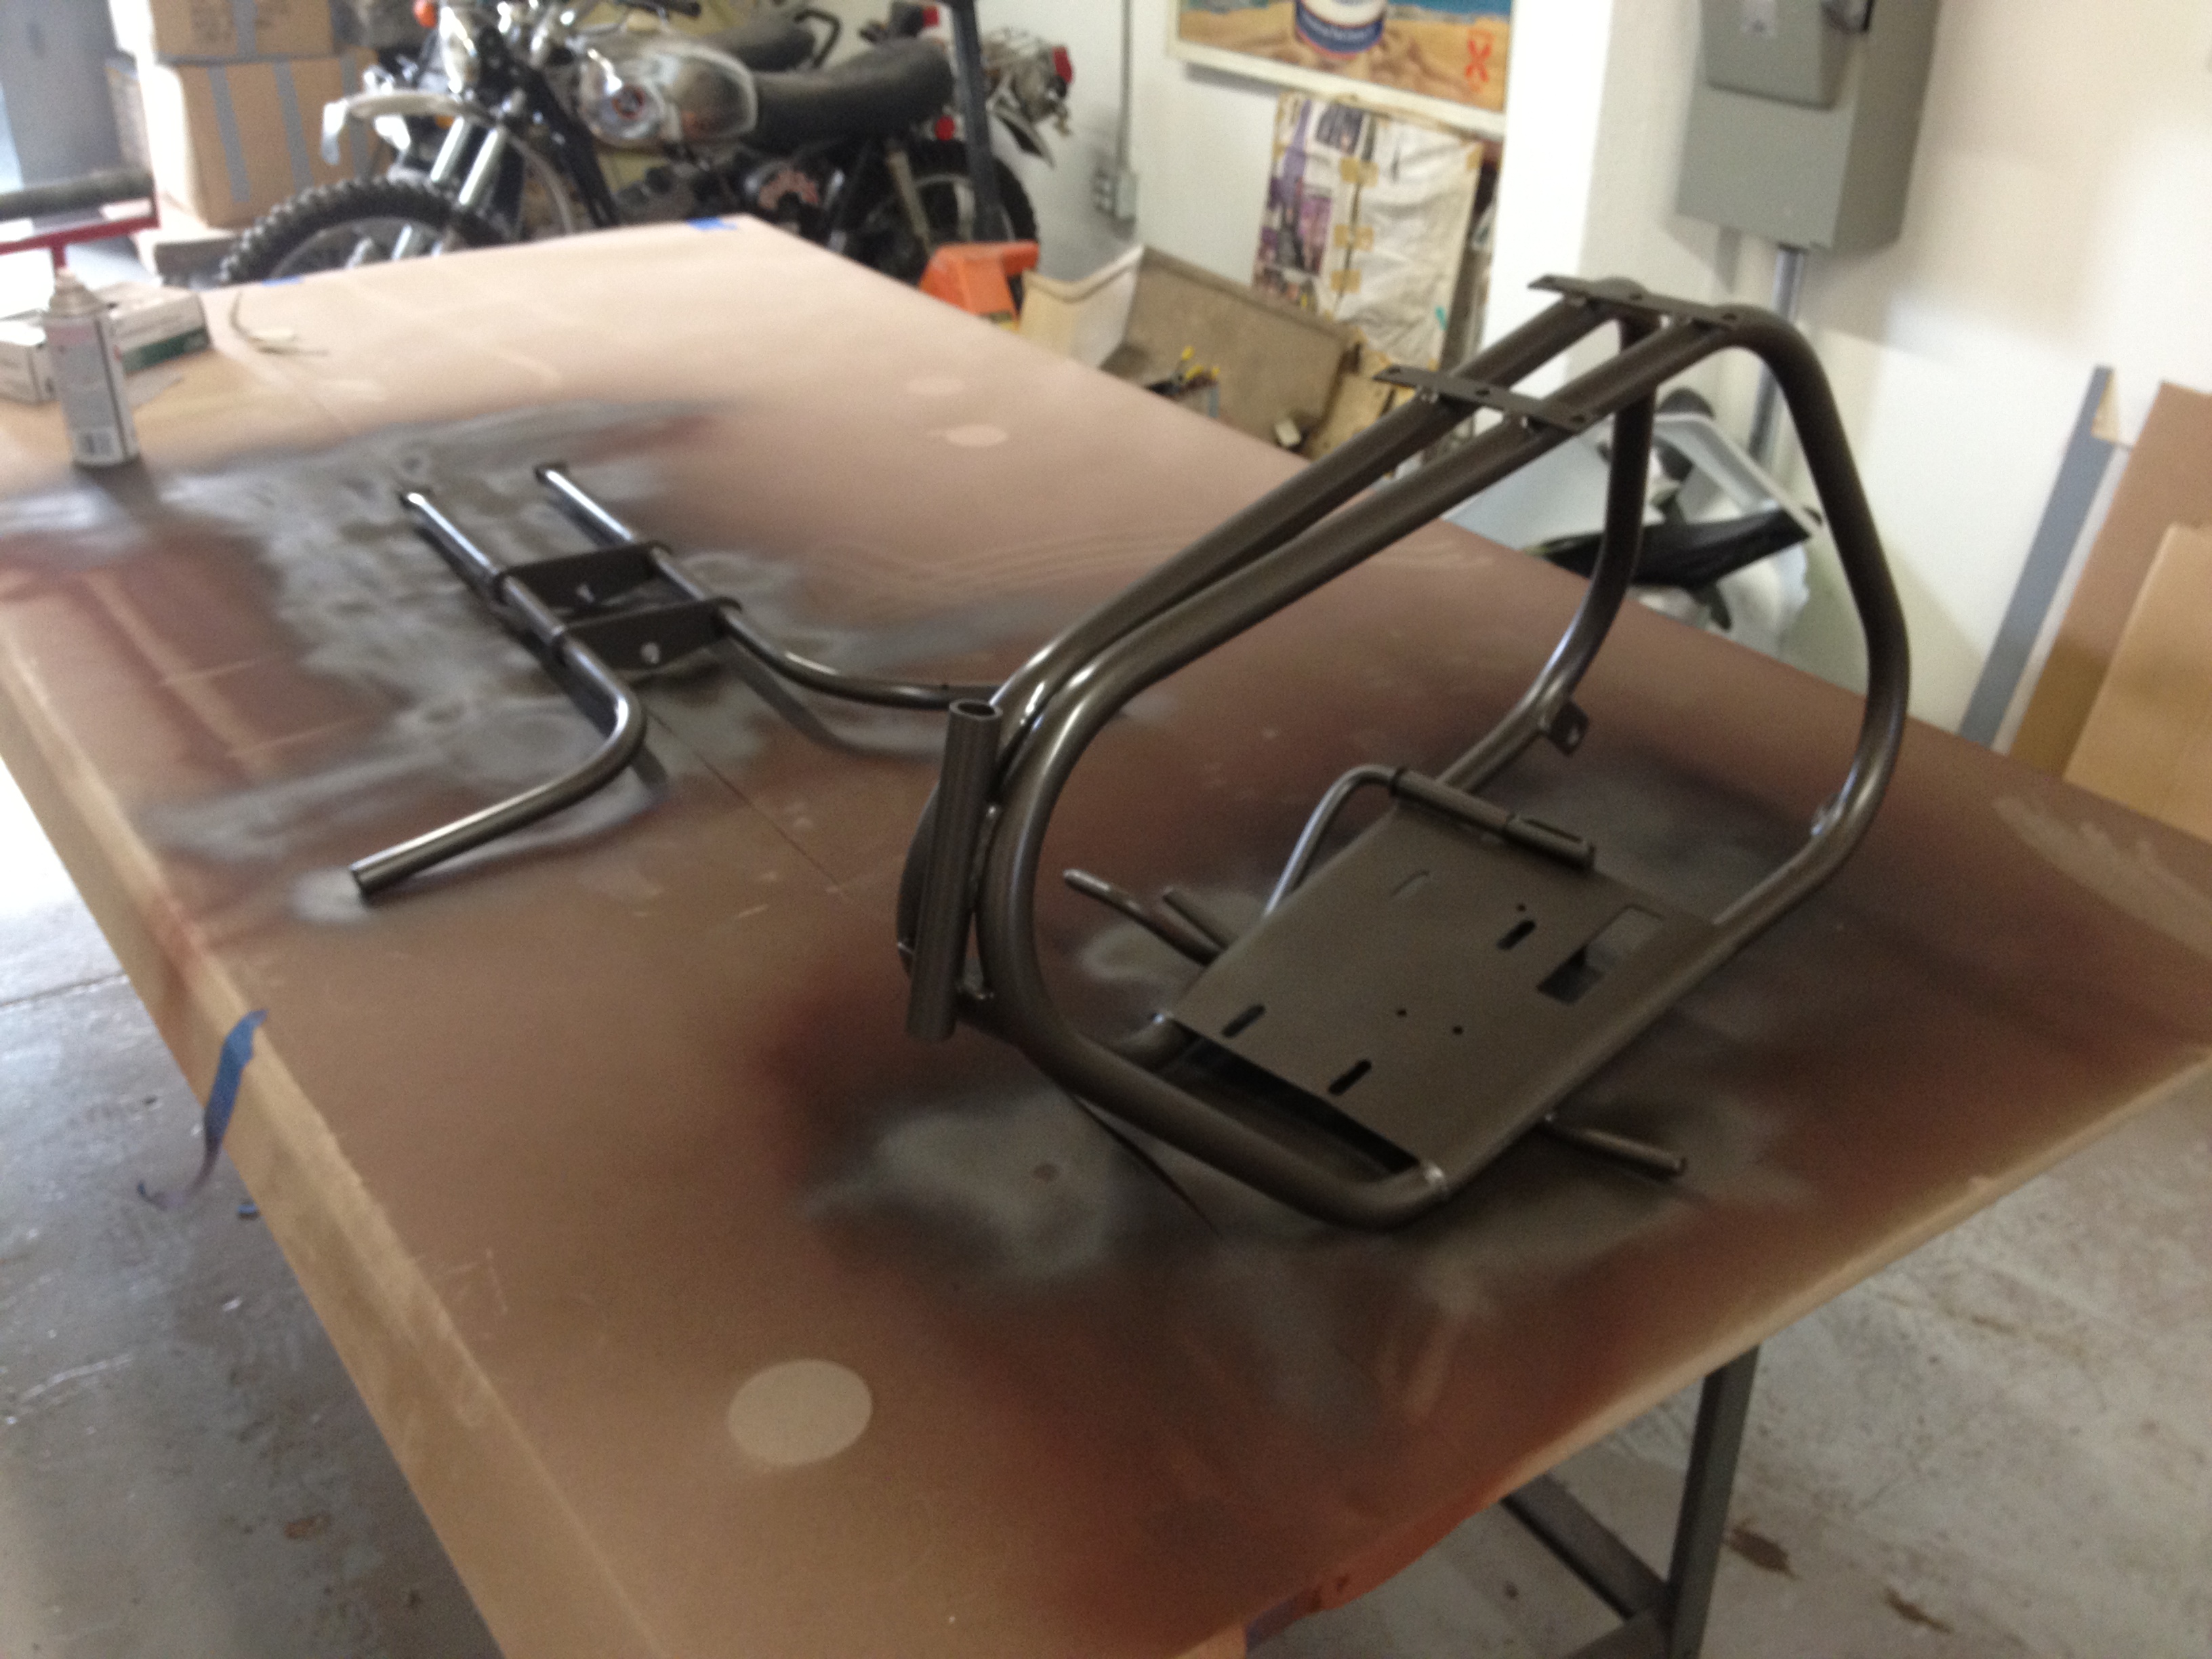
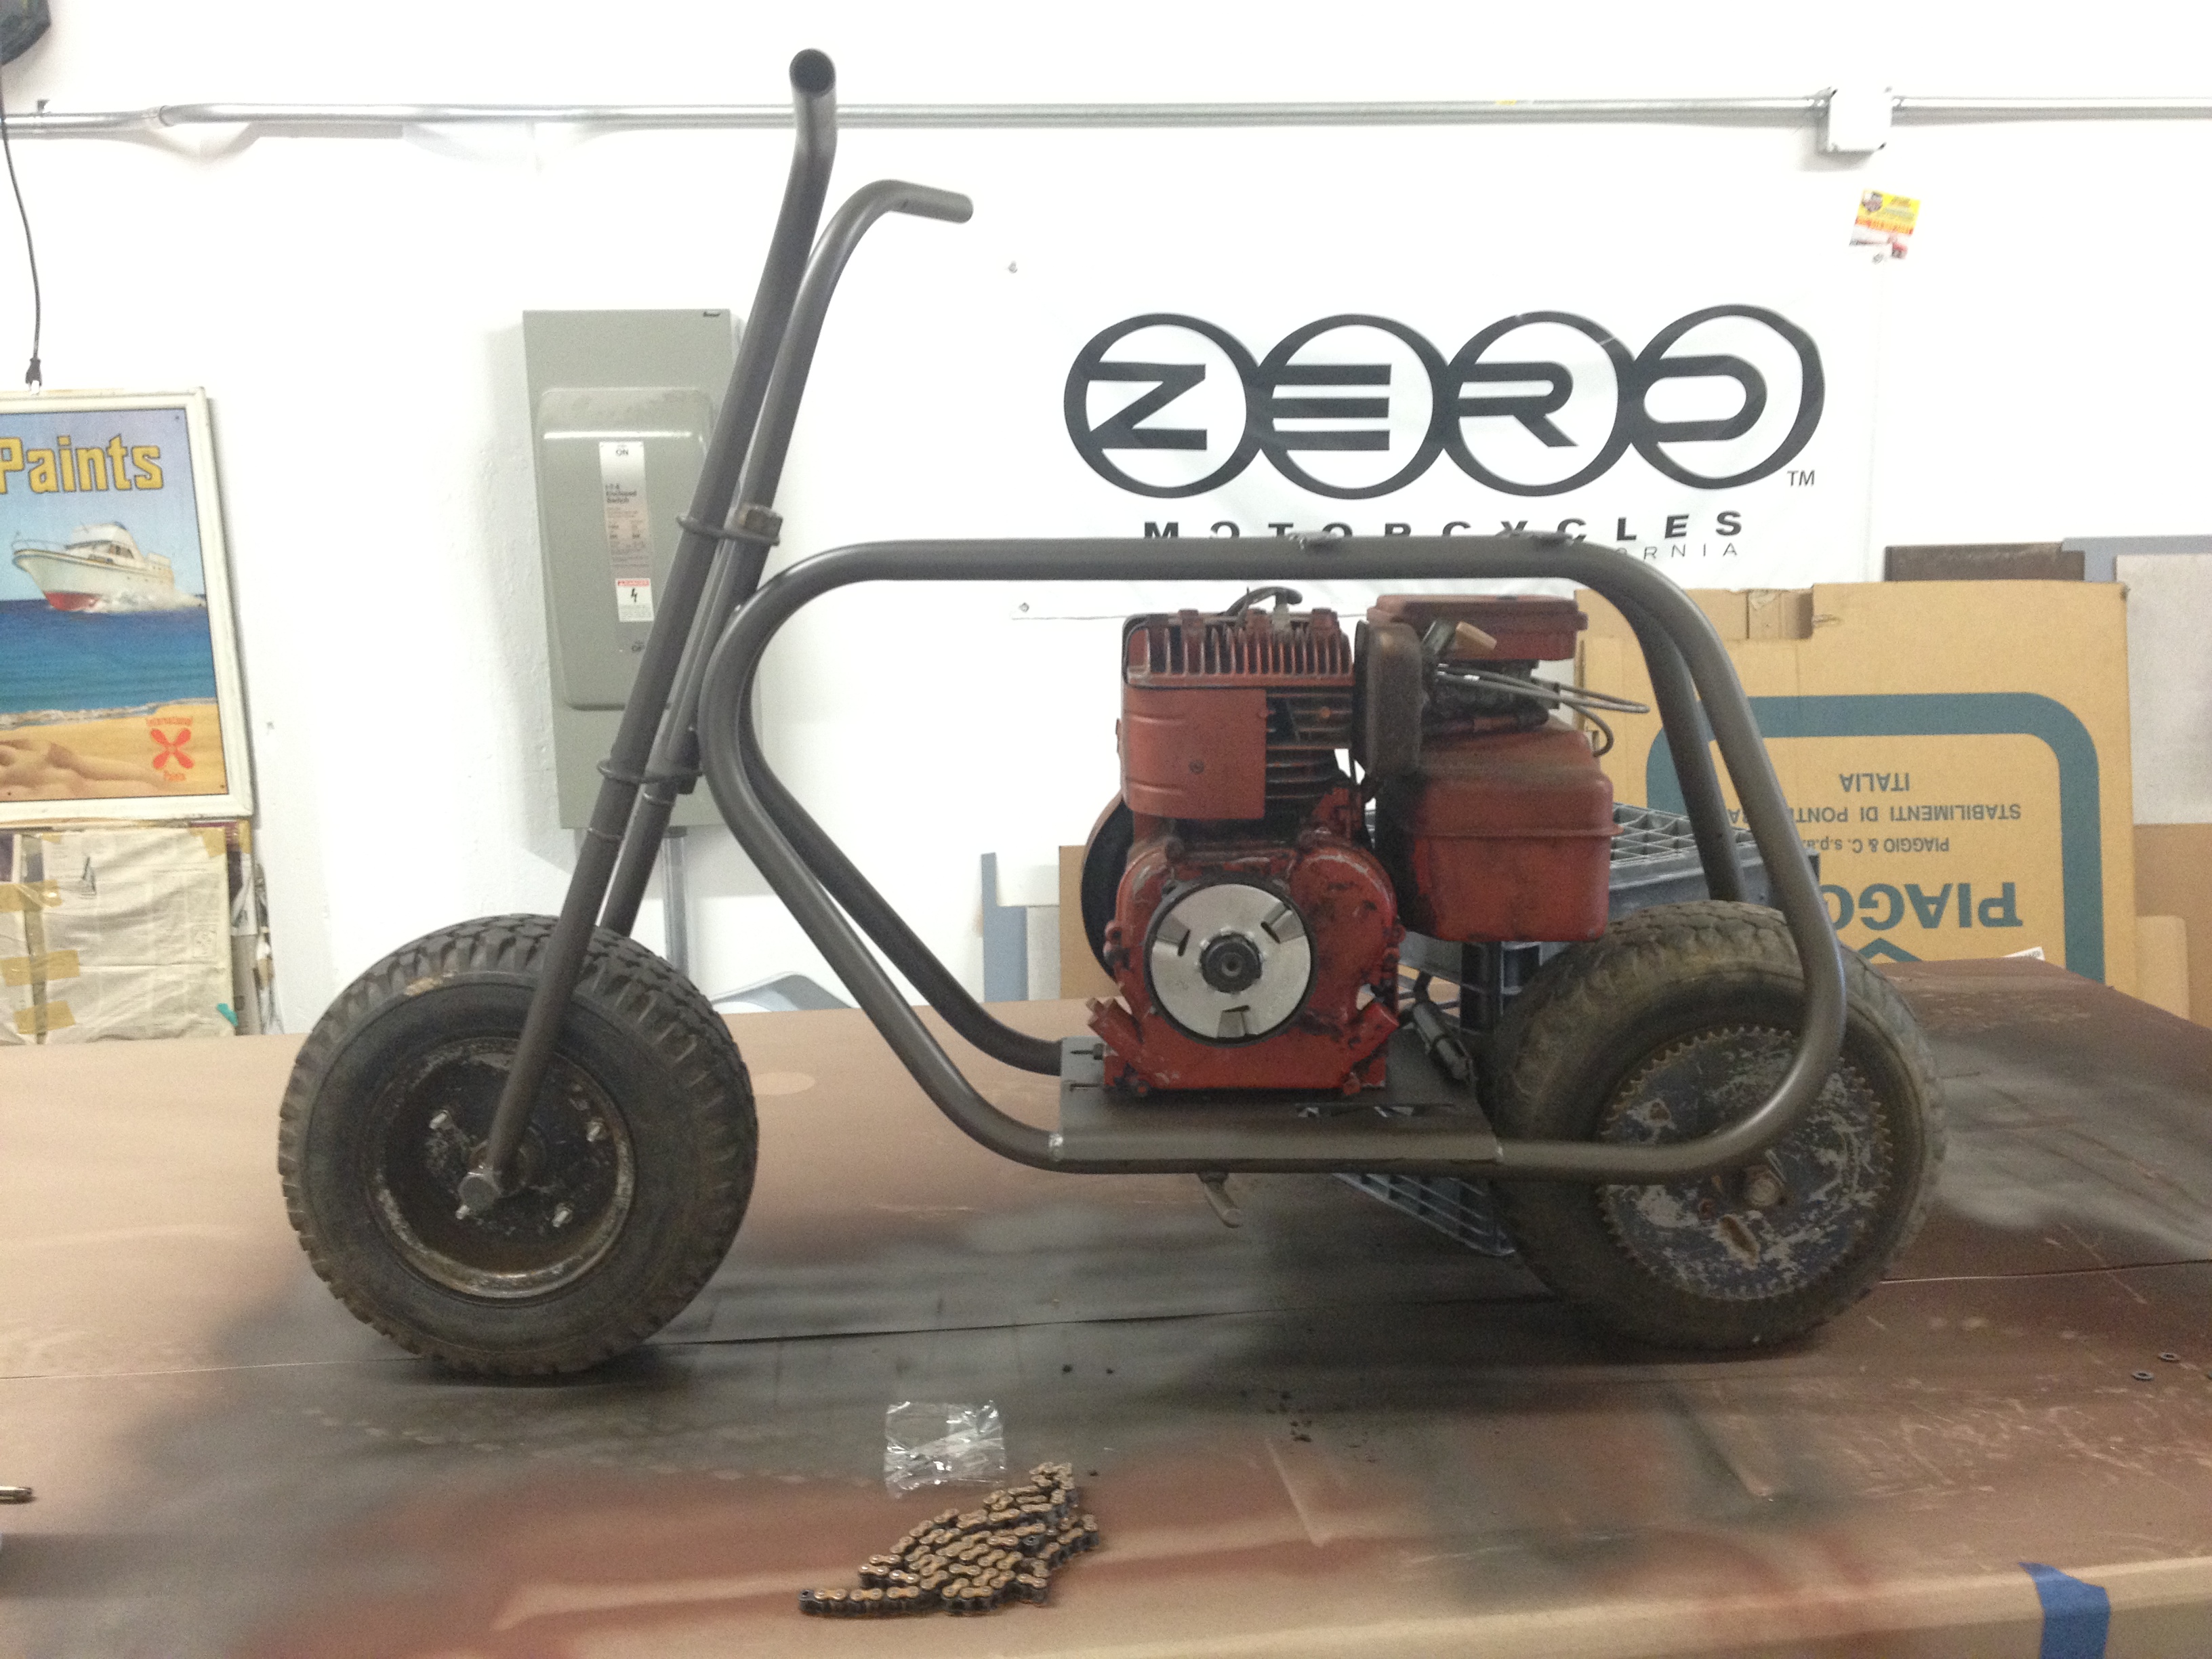
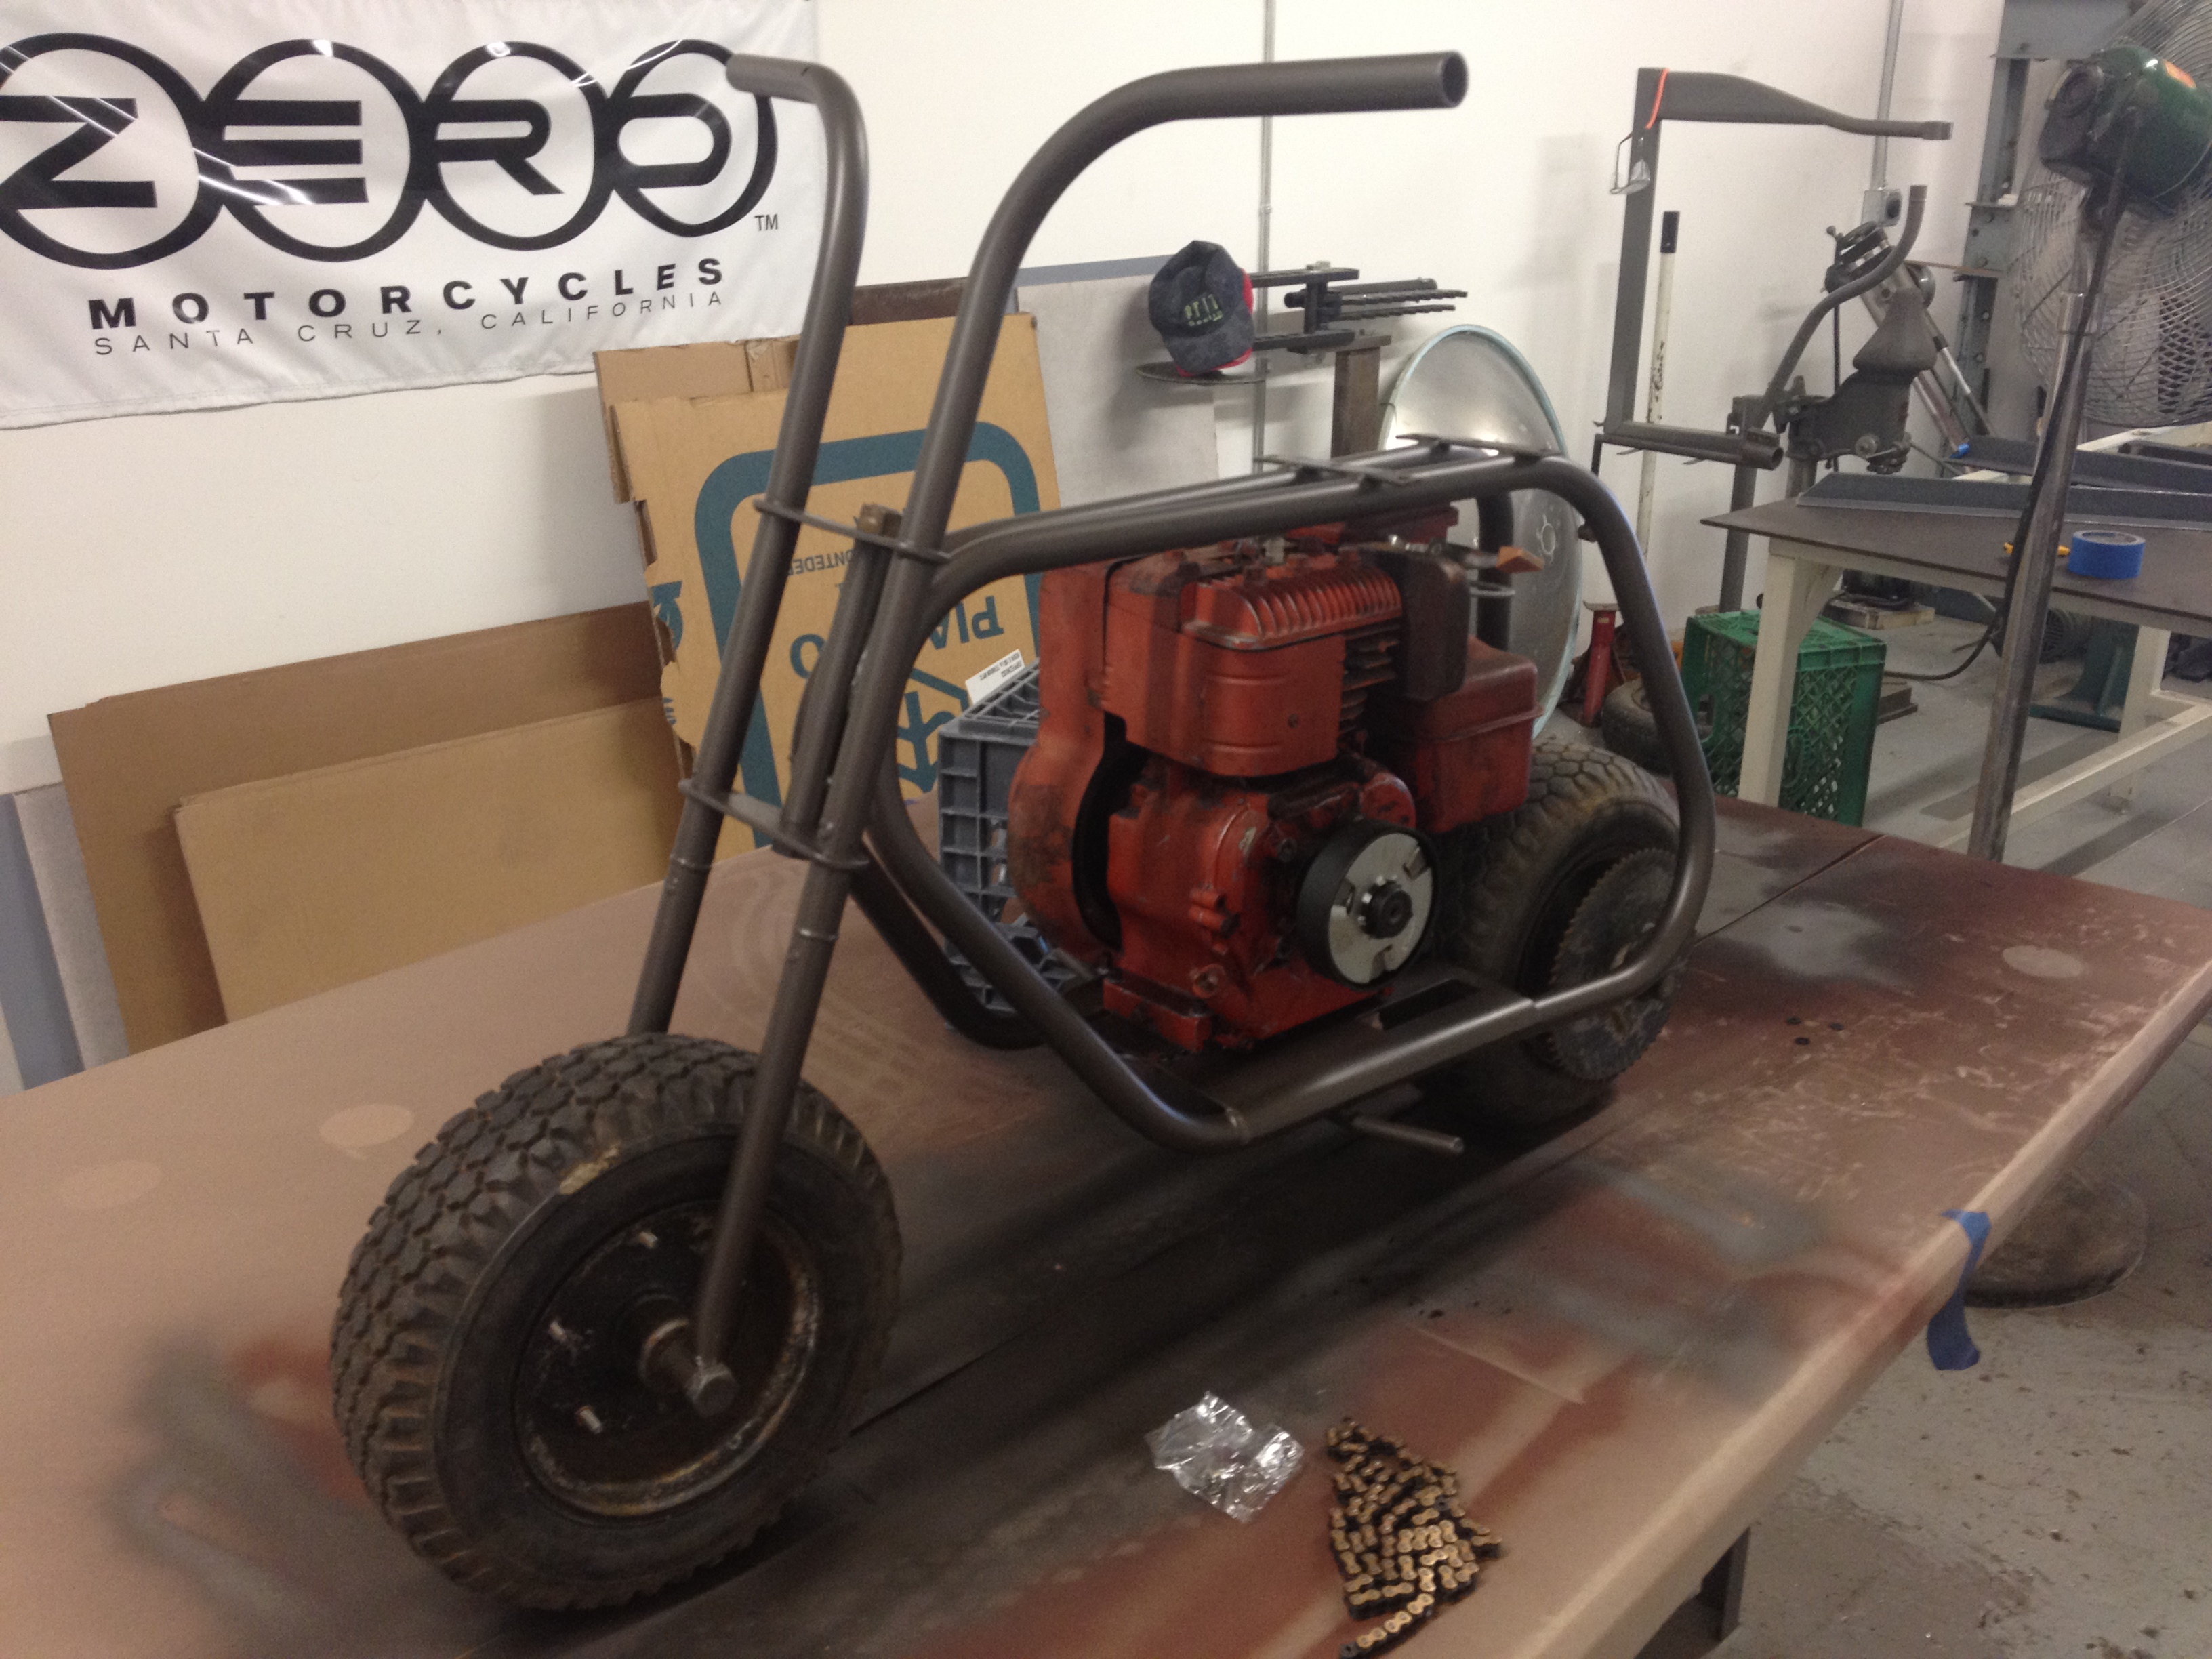
Clark’s first motorcycle
This minibike was gifted to me by my friend Dean when I was in third or forth grade. This machine gave me many pleasurable hours of both riding and wrenching until I got a car and temporarily gave up two wheeled vehicles.
This spring while visiting Ted Dillard (http://evmc2.wordpress.com/) to drop off a part for his electric R5 I noticed this motor sitting in a corner of his garage and immediately thought that it would be a great candidate to freshen up the minibike. Ted told me that the motor was leftover from the electric conversion of his rototiller and several minutes later it was in my trunk.
I brought the frame to our shop where Will repaired the damaged fork legs and I stripped and painted it. Its now waiting for a long enough chain and a seat.
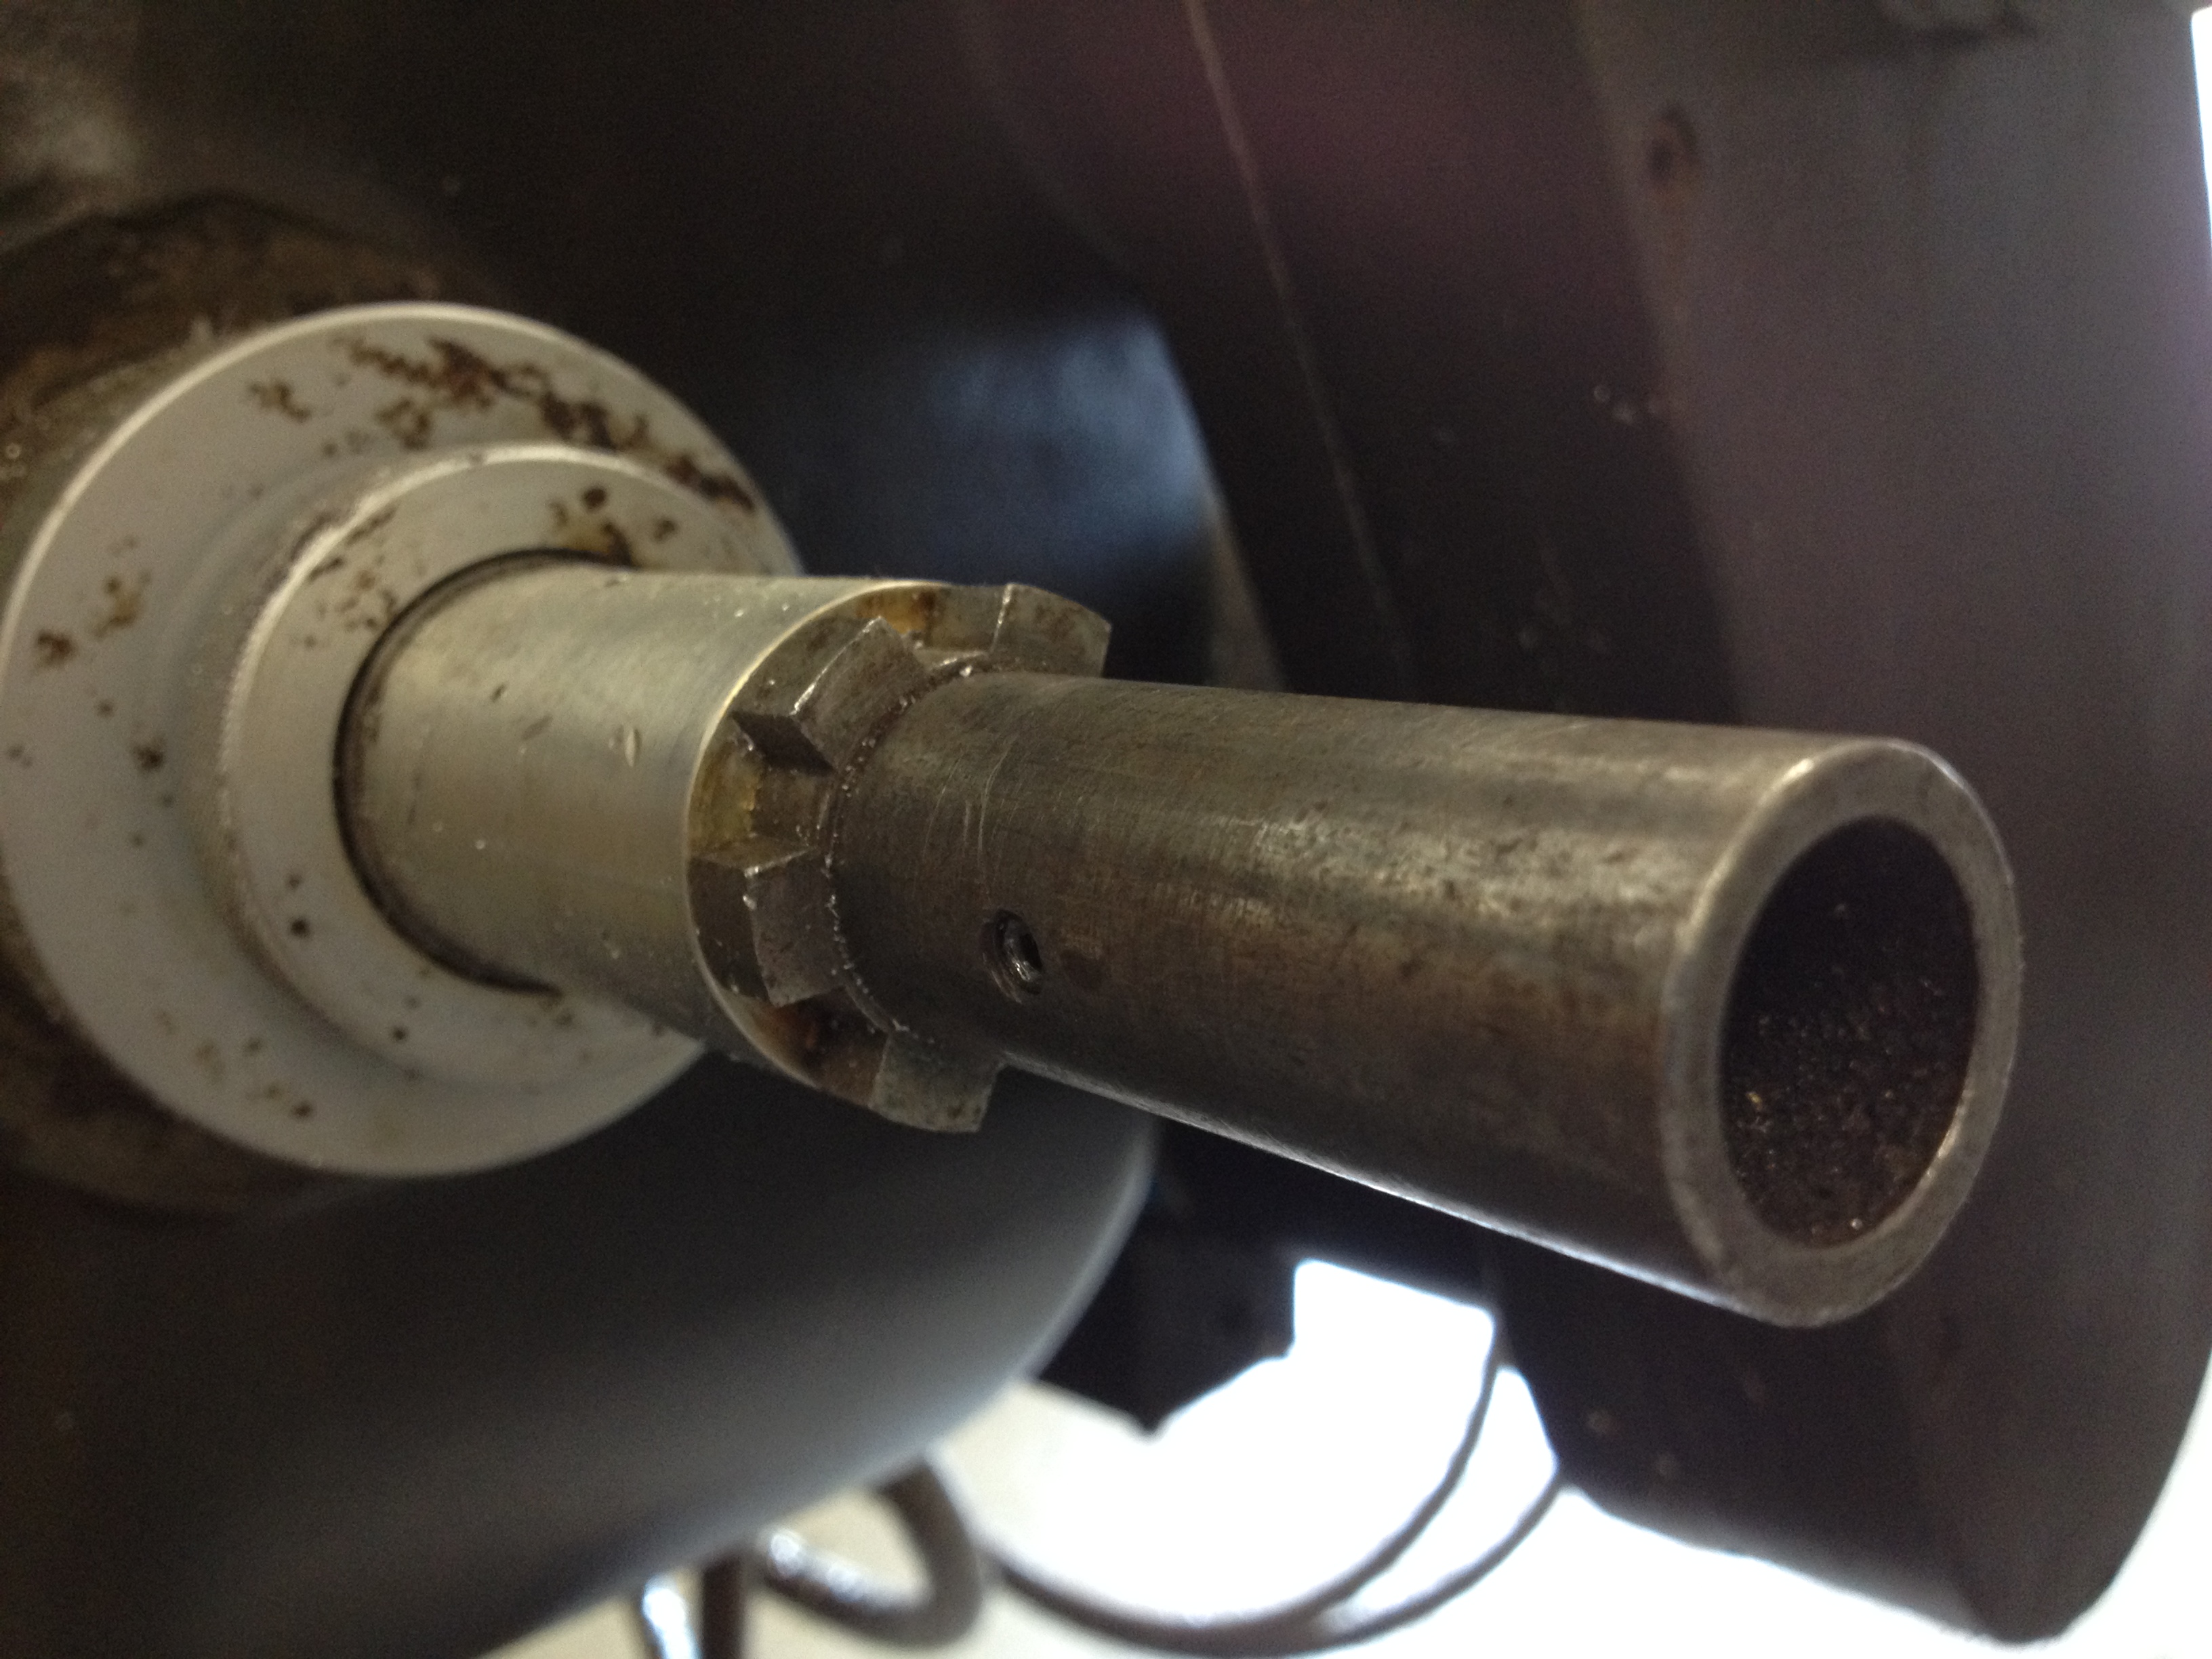
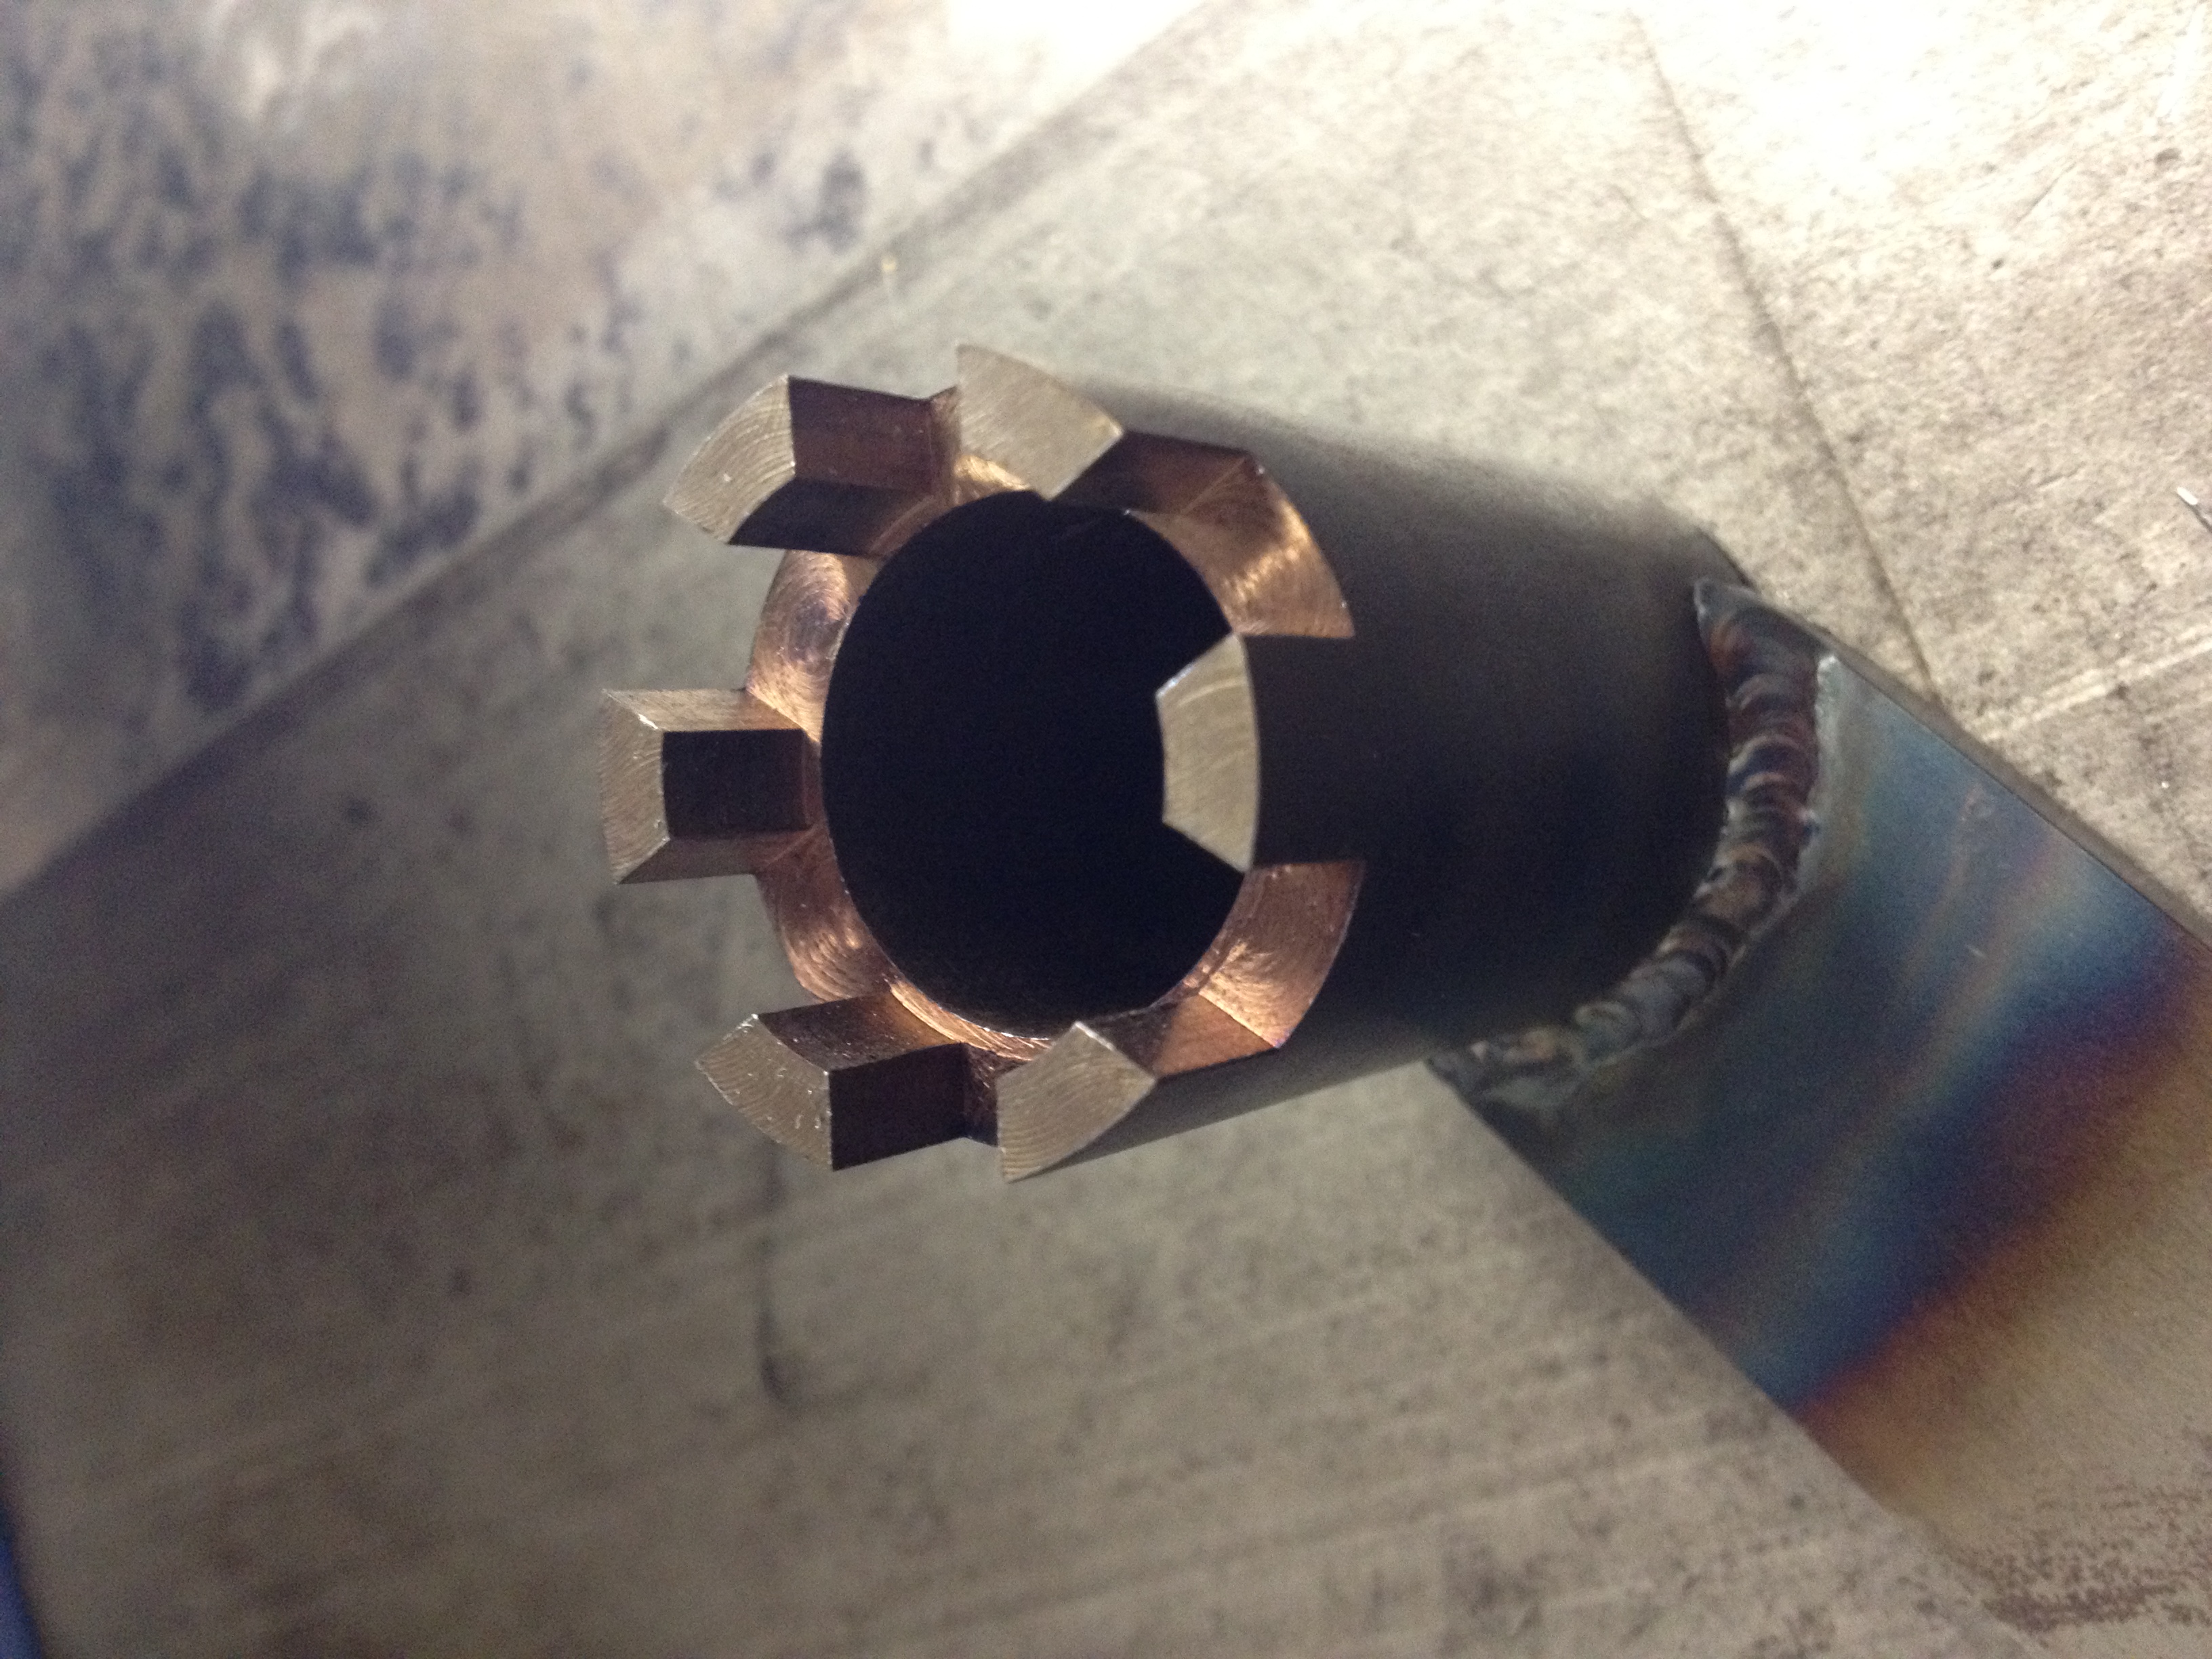
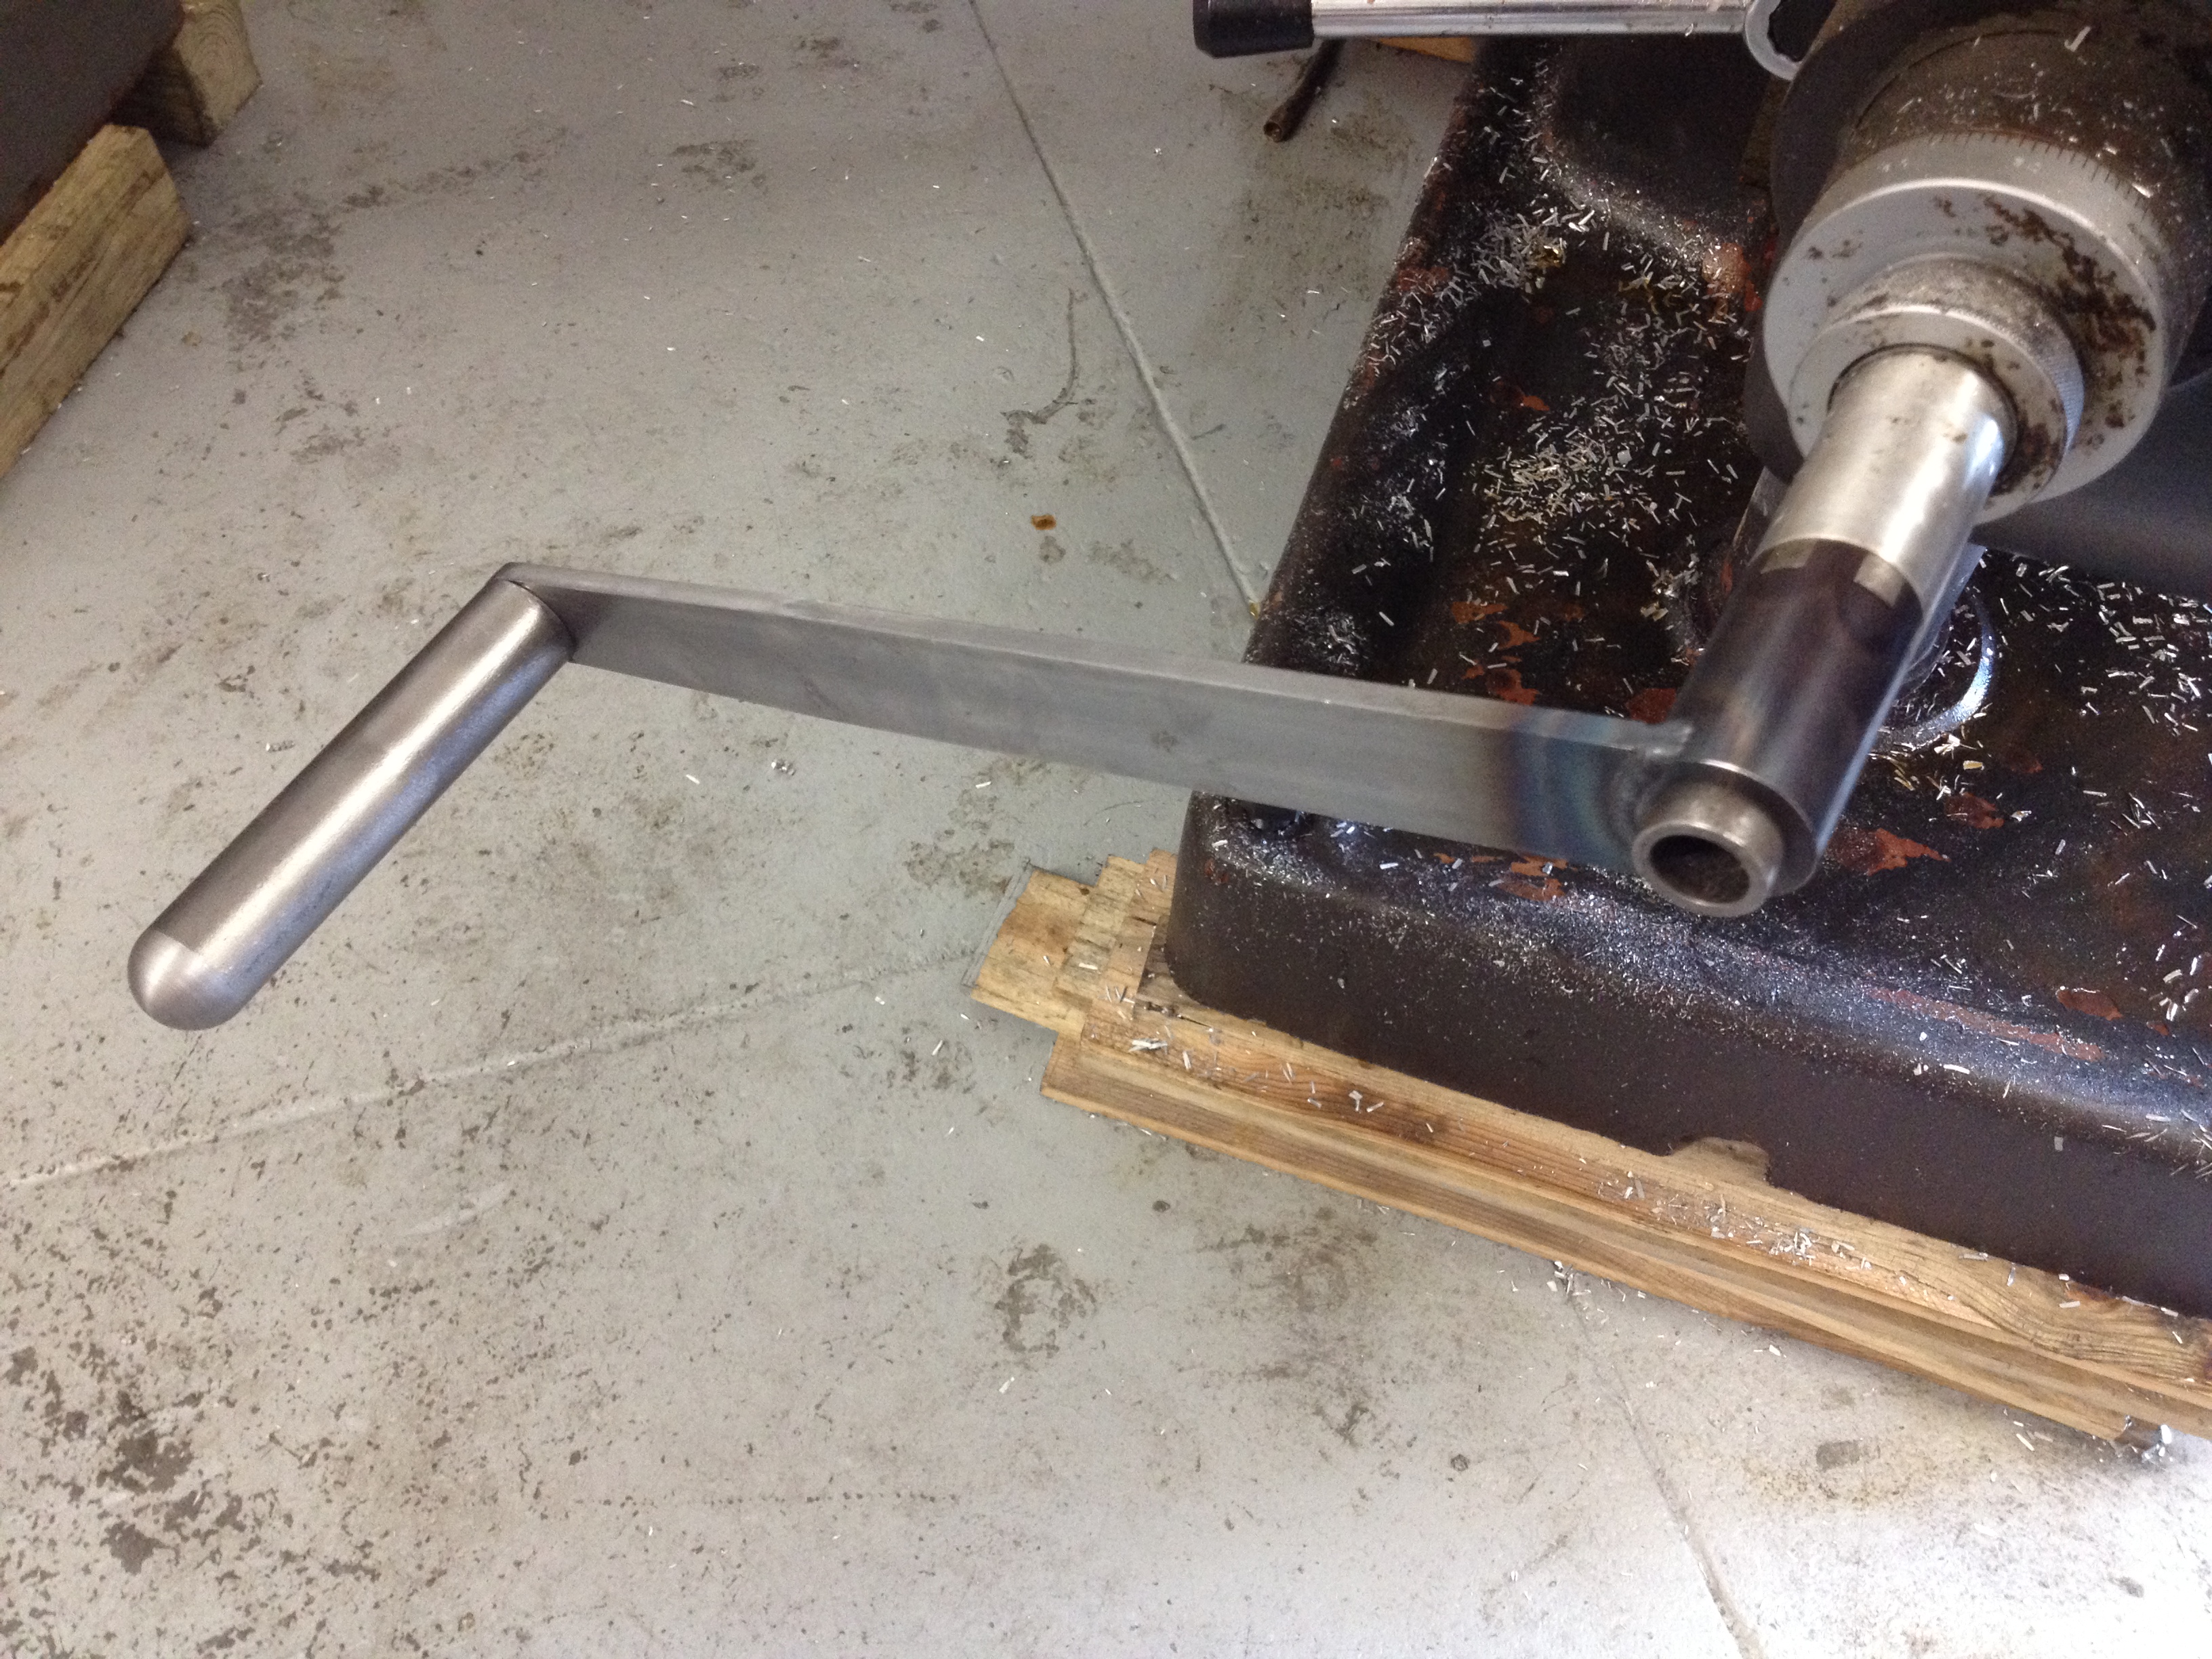
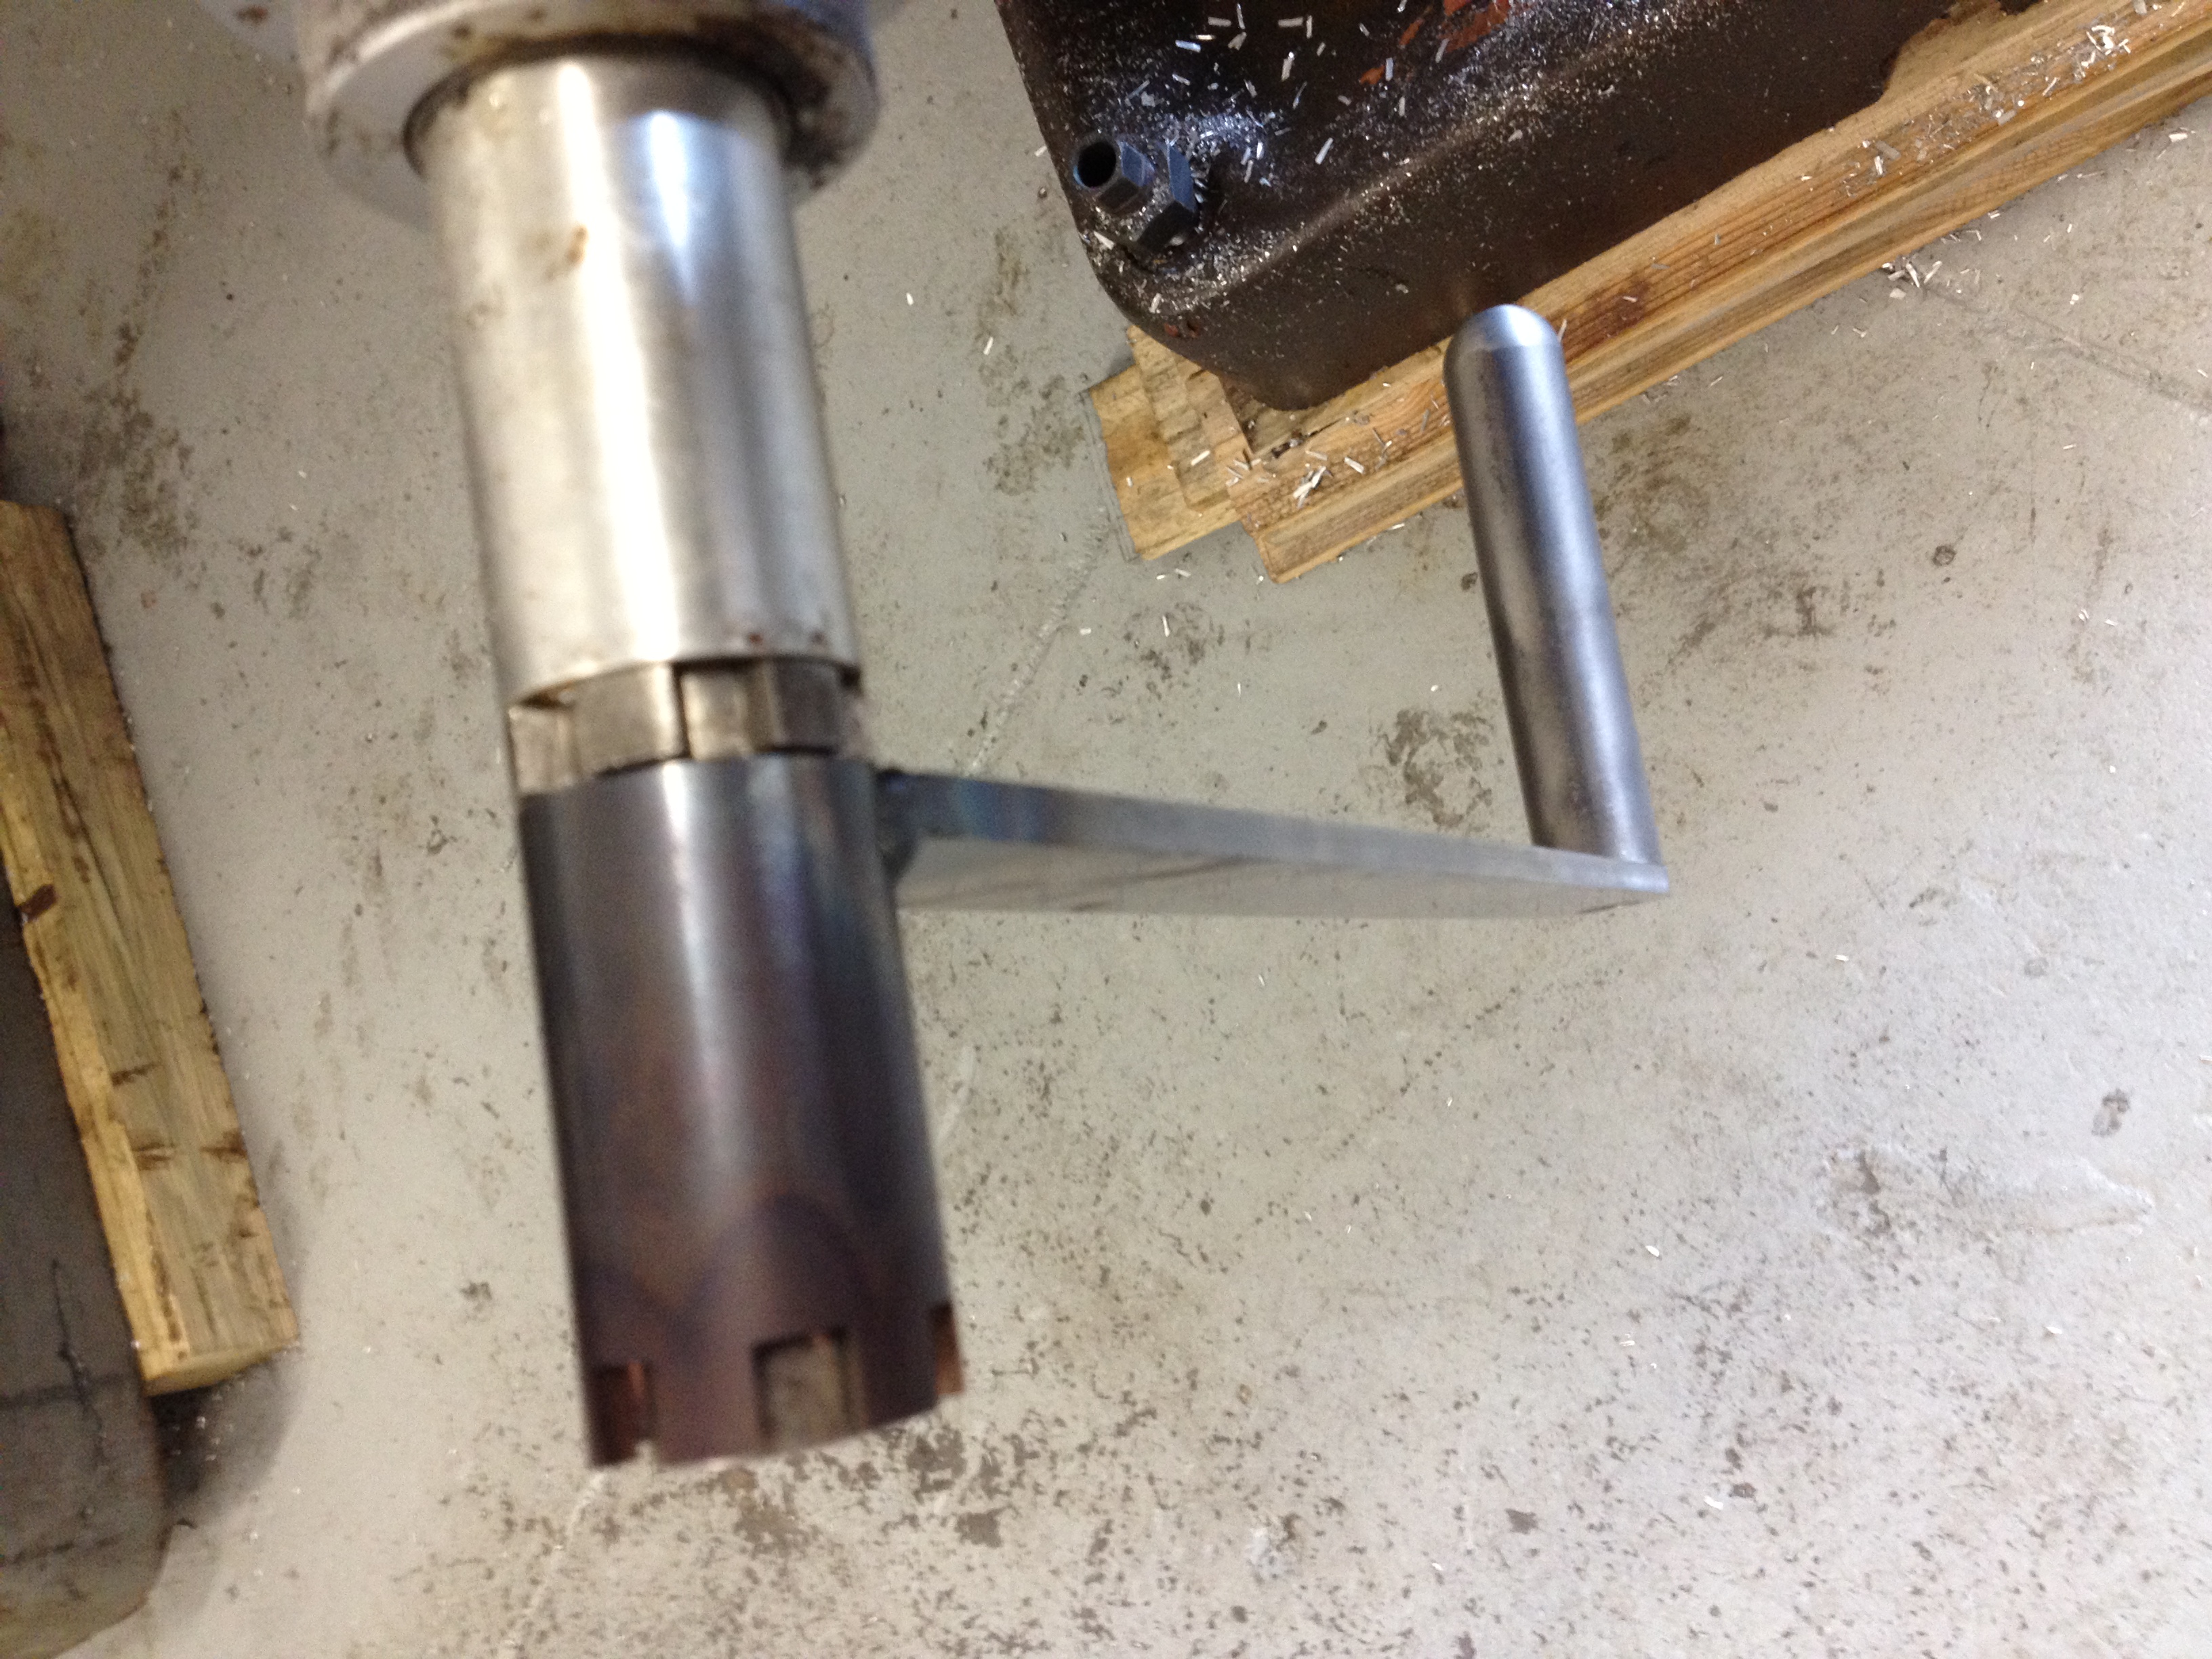
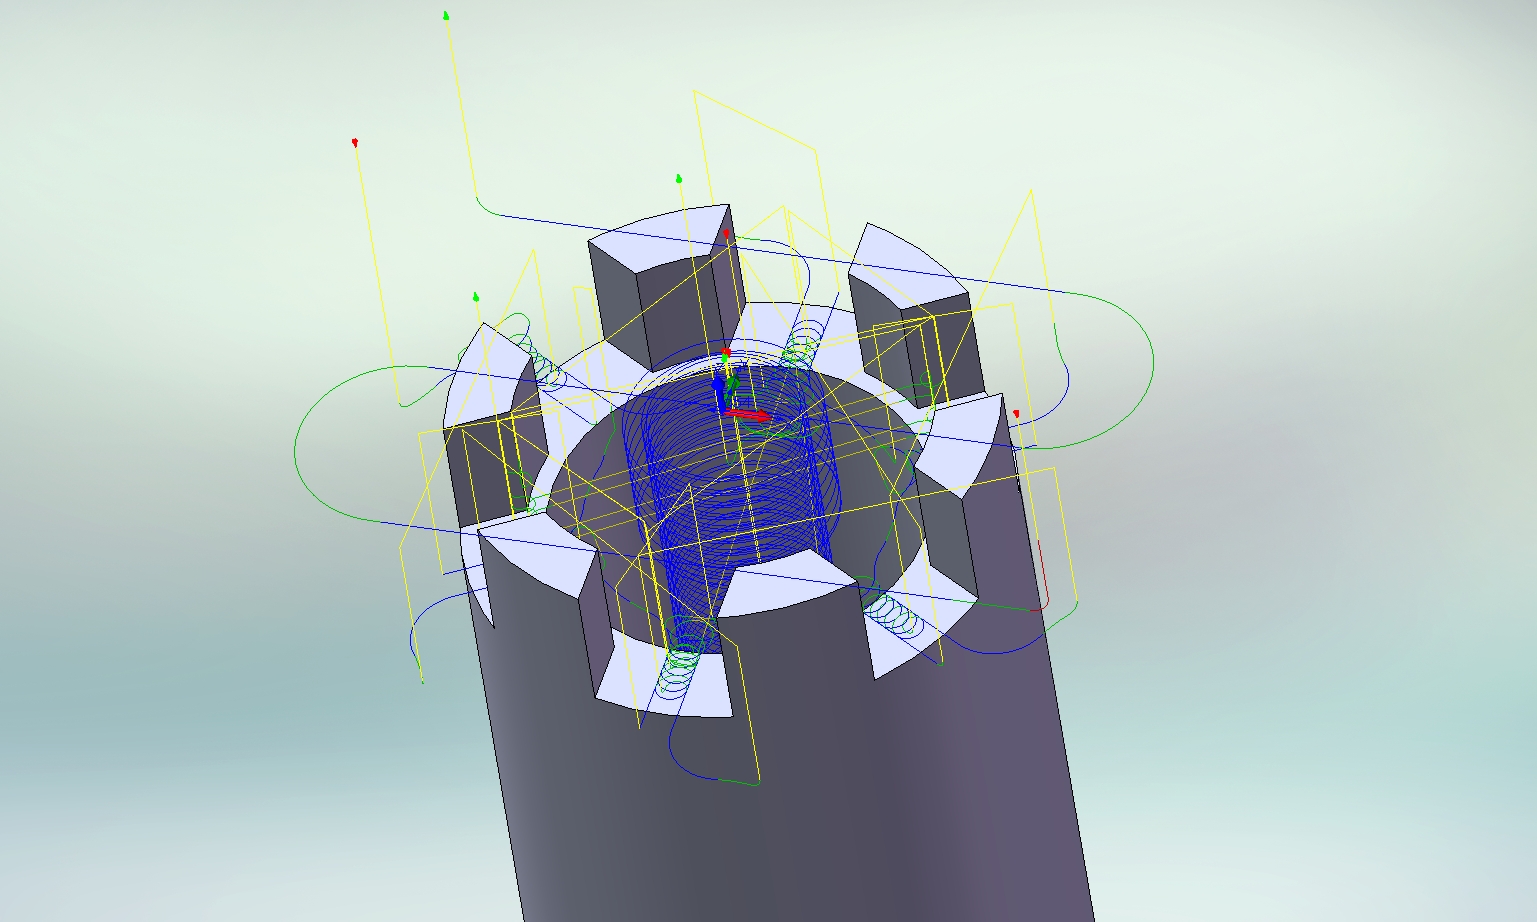
Crank for Tree Knee
The crank that raises and lowers the knee on our CNC Mill was lost somewhere before the mill came to us. After some measuring I generated a quick Solidworks model and used HSMWORKS to make the tool path. Between the “teeth” you can see some of the adaptive clearing strategy that HSMWORKS employs. I turned a nice radius on the end of some bar stock with our CNC lathe for a handle. As you can see, it fits nicely and stores out of the way.
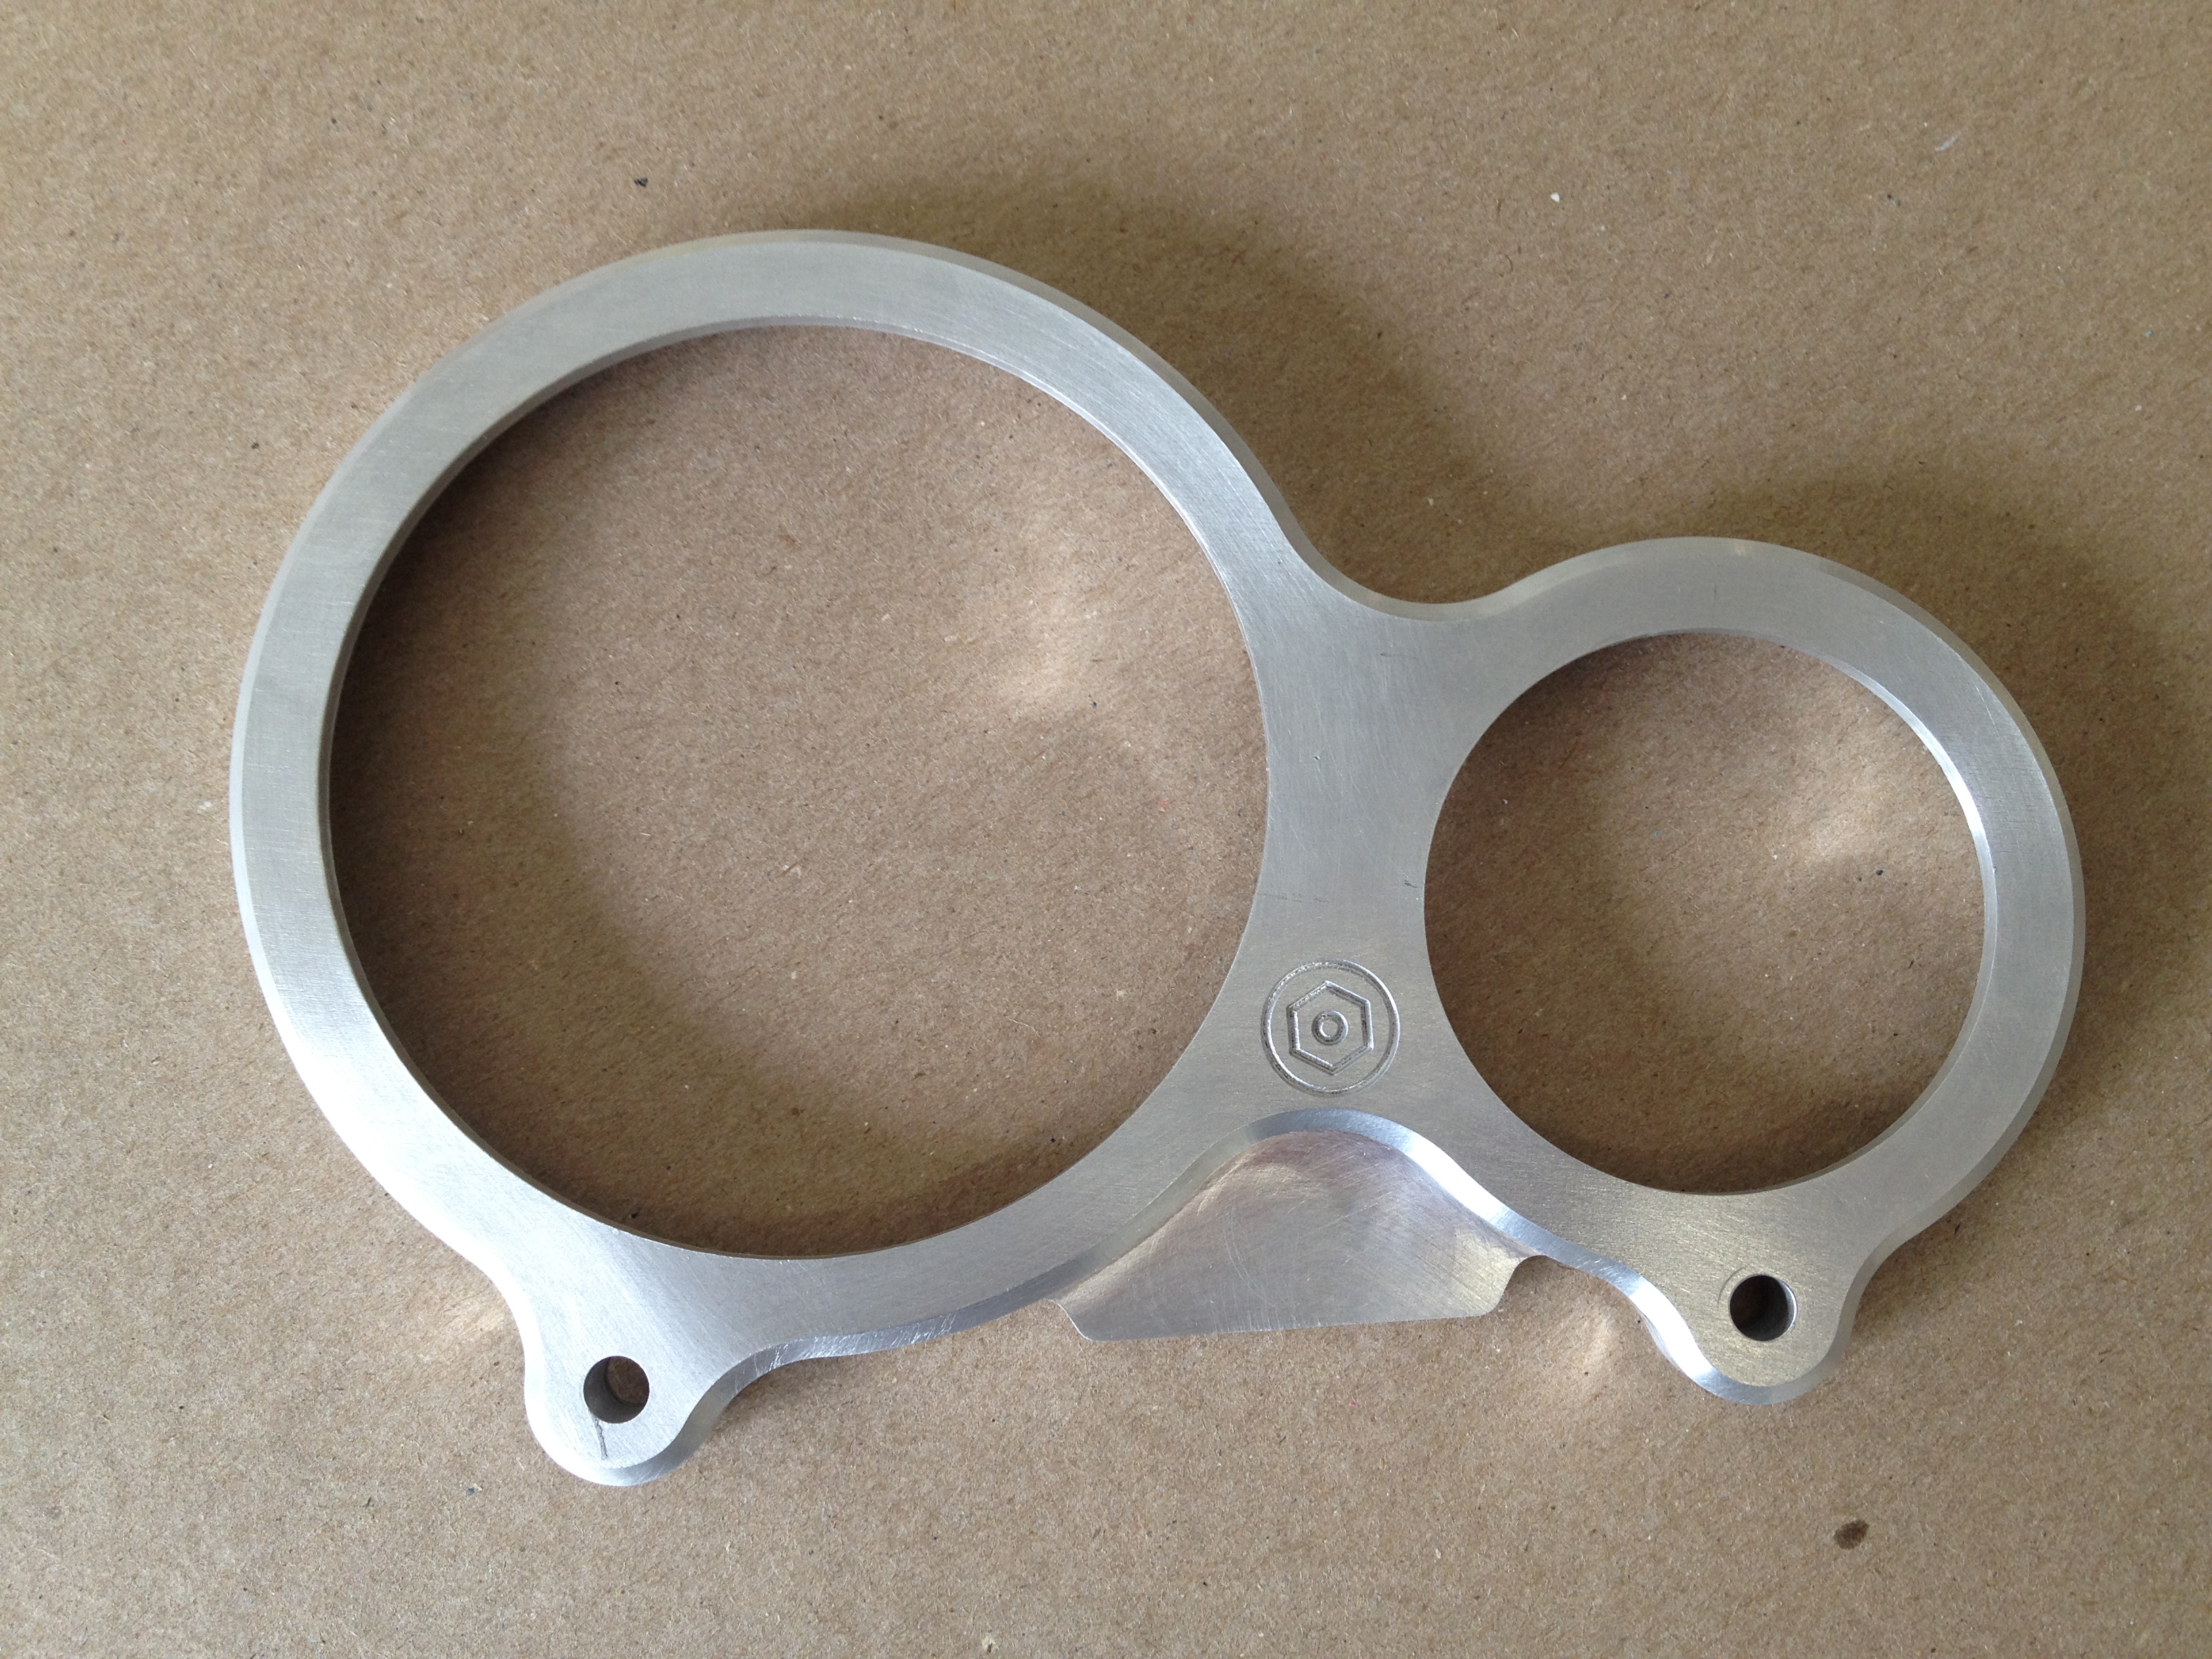
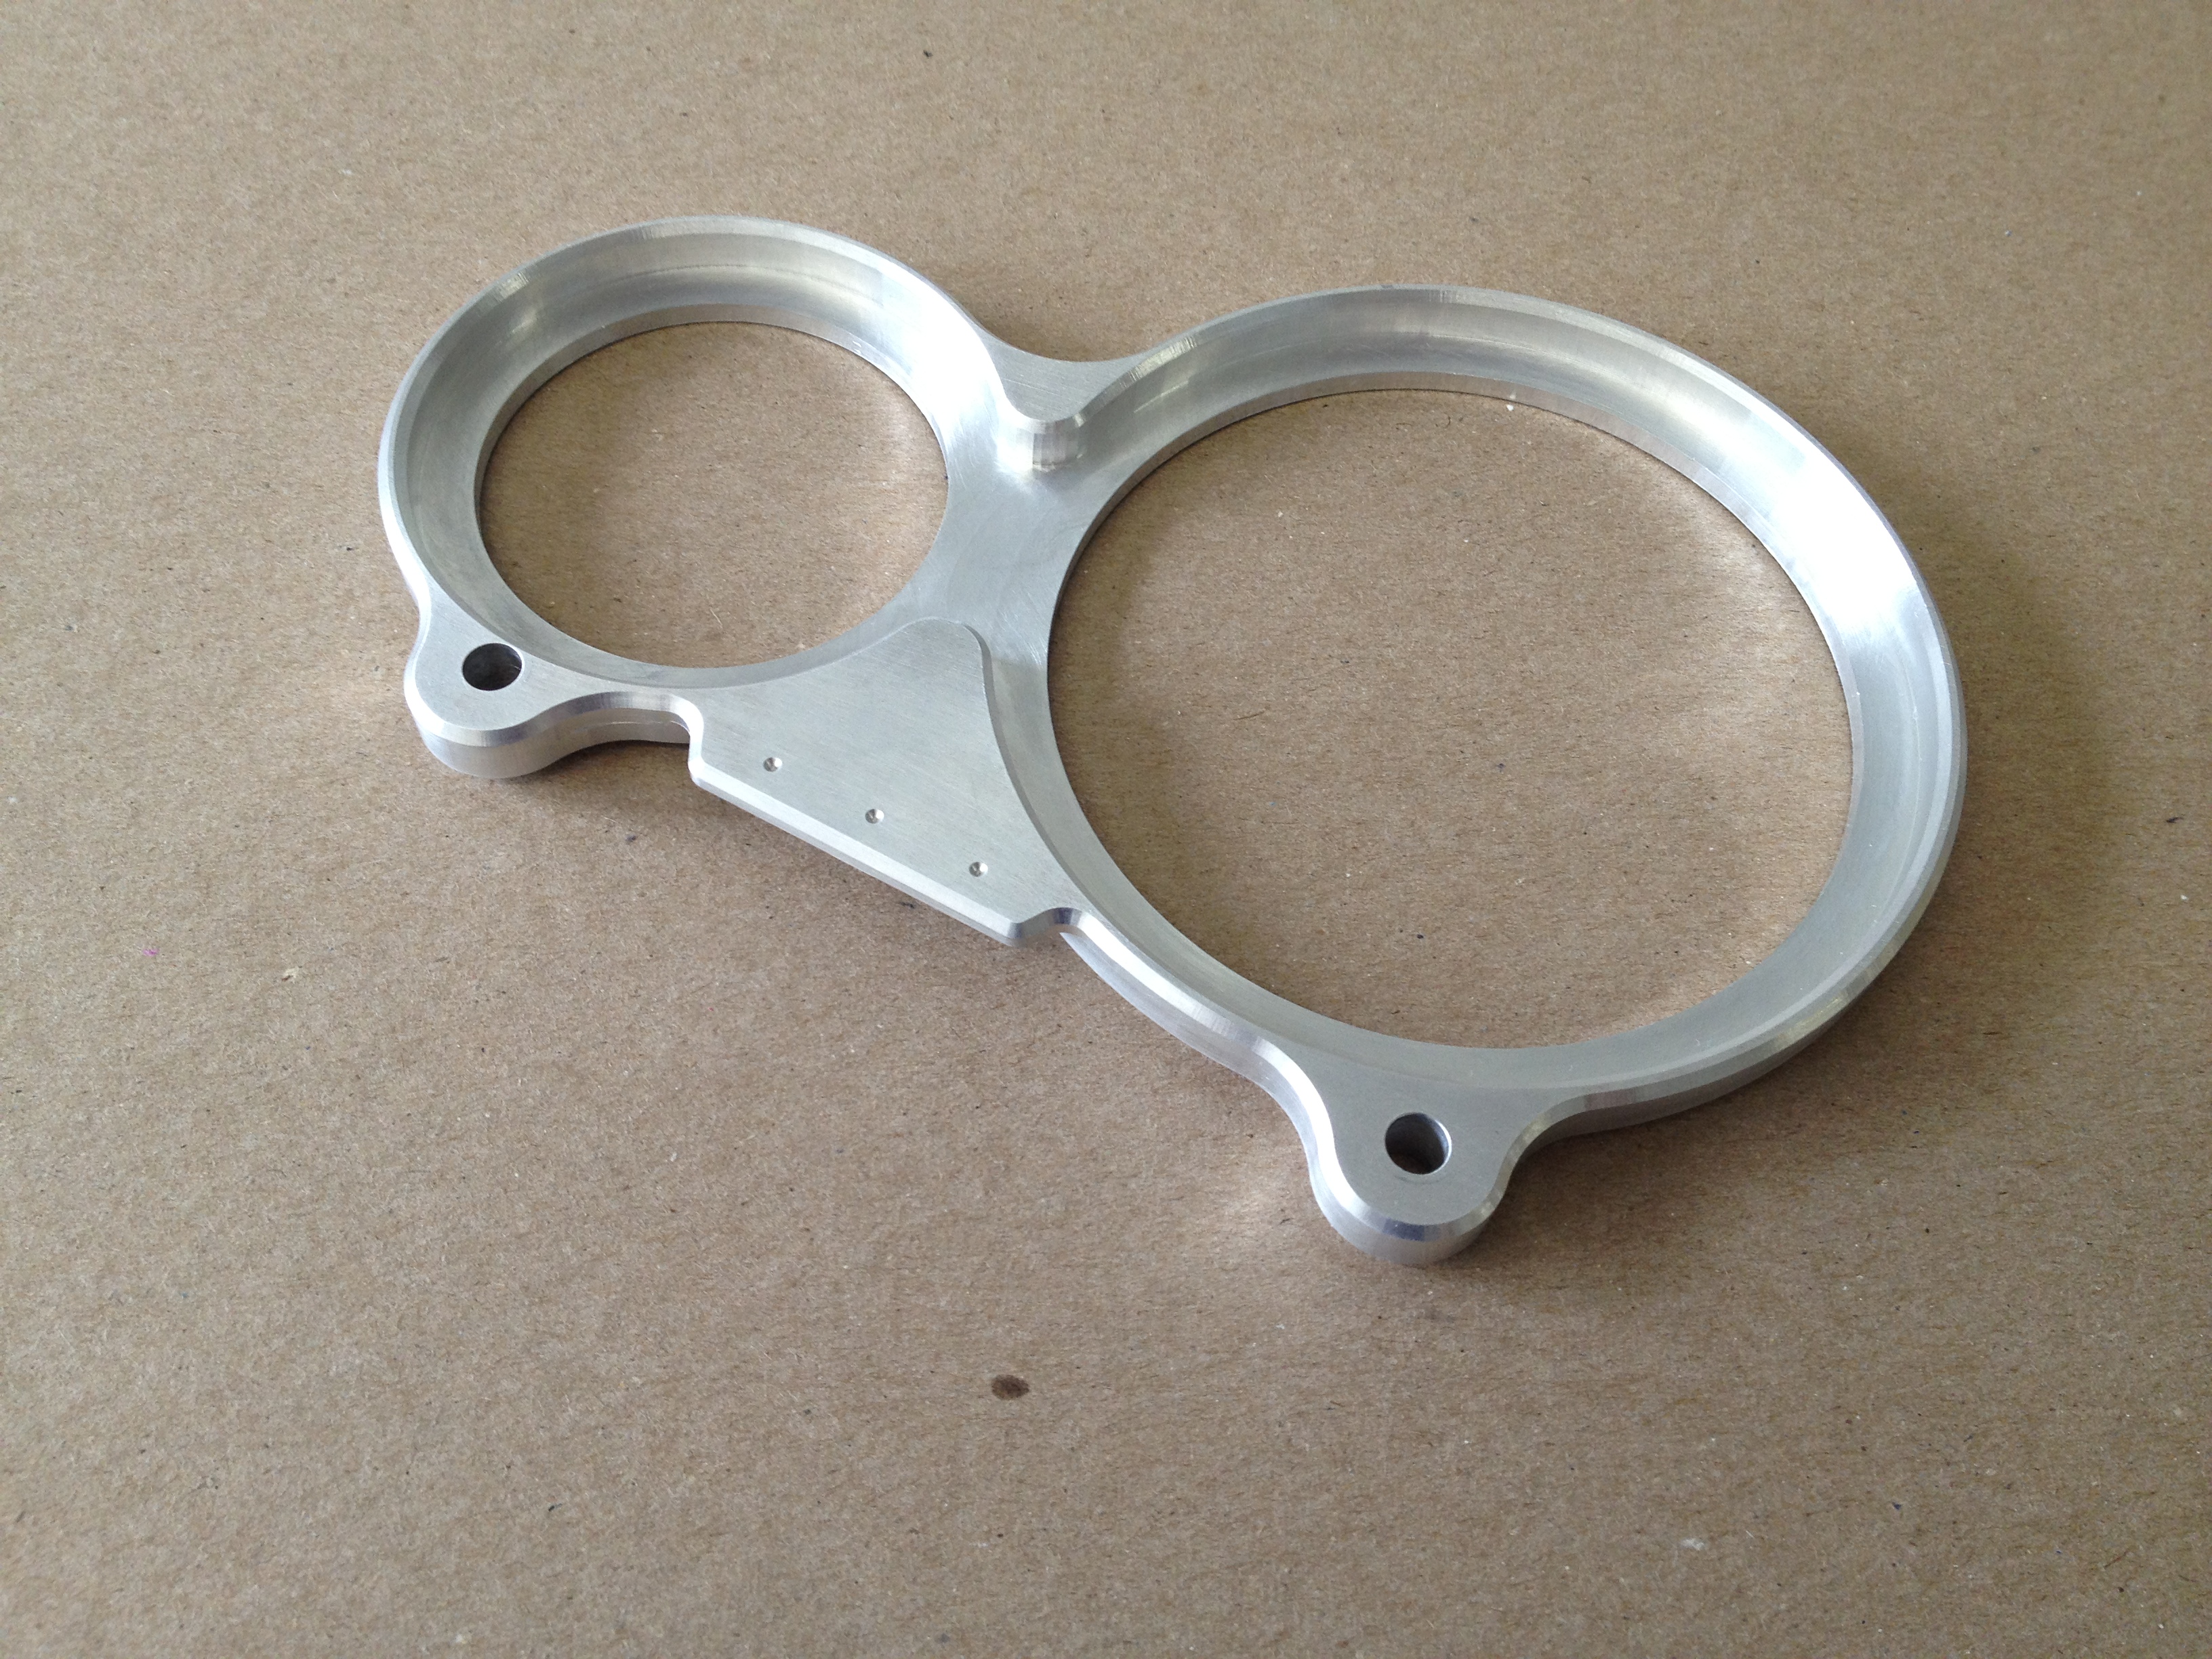
Electric motorcycle gauge cluster
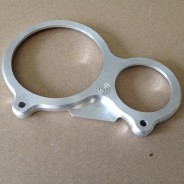
Machined aluminum mount for speedometer and voltmeter. The flat area below our logo will be drilled by the client to hold LEDs.
6061 Aluminum.

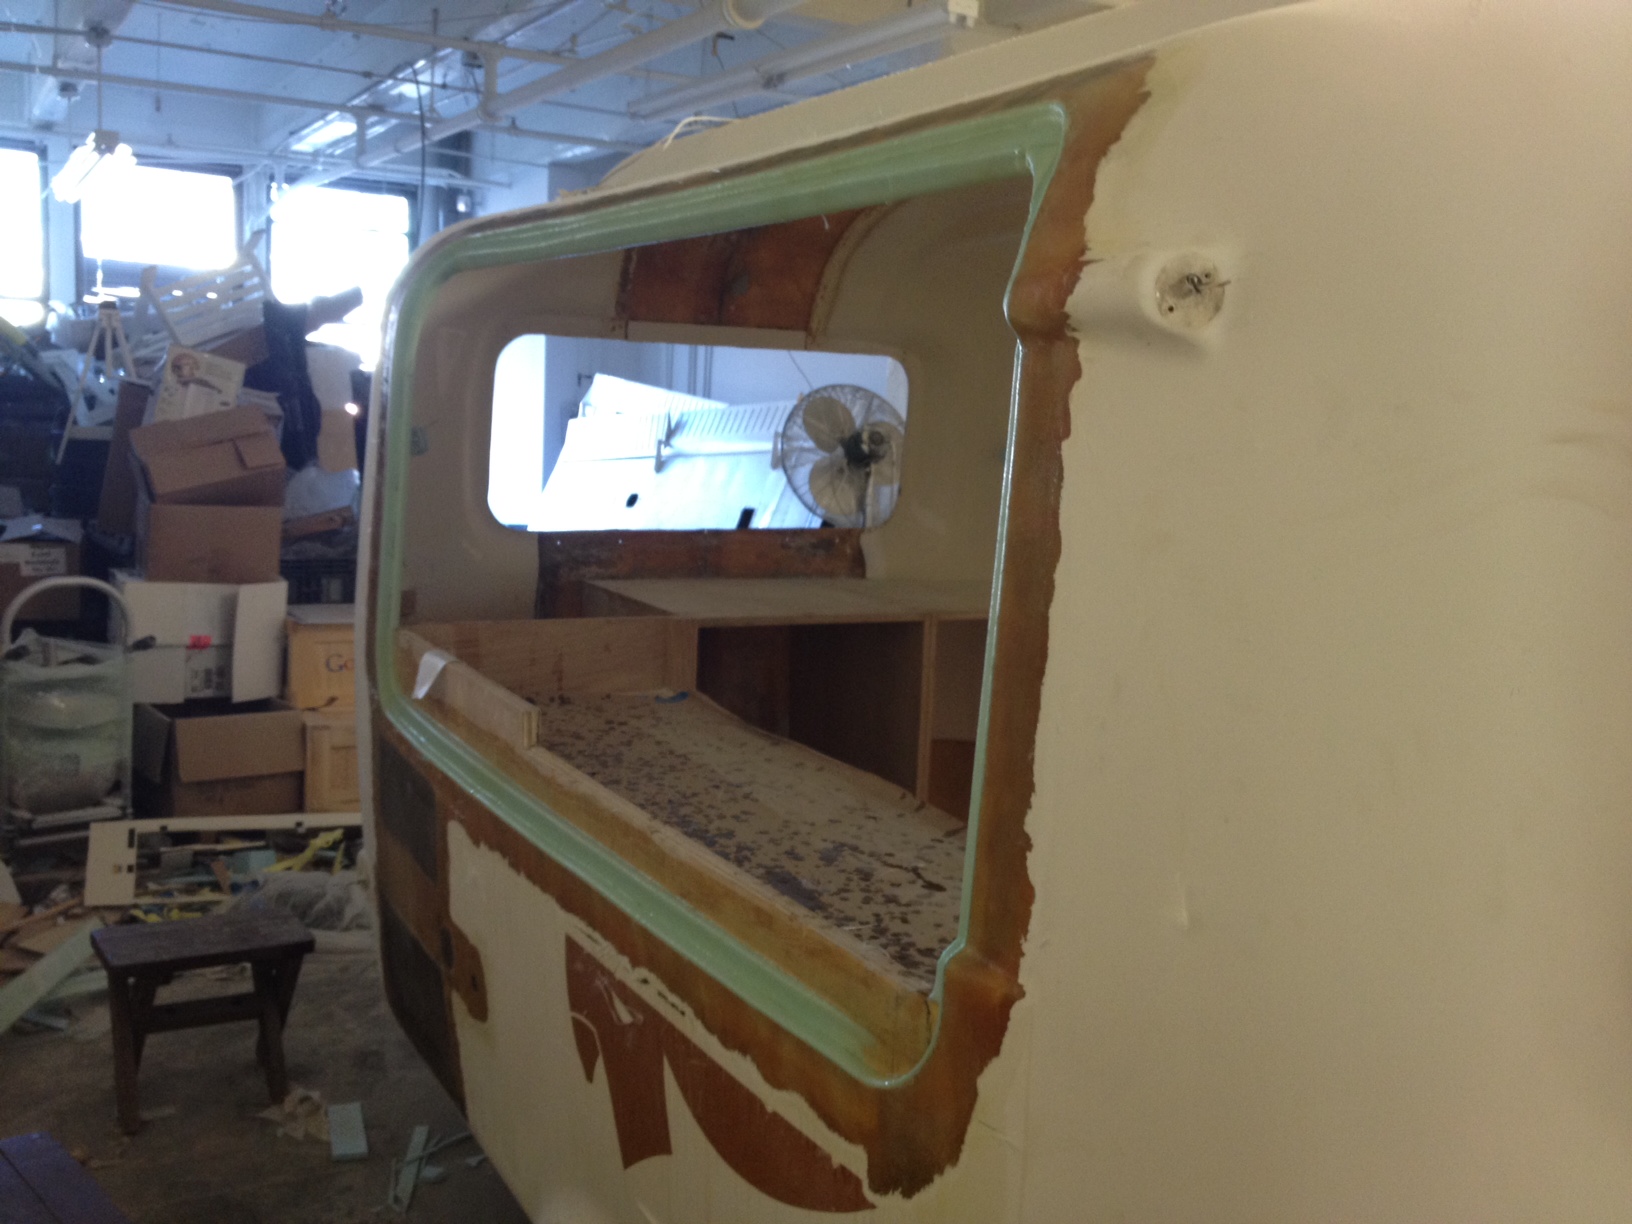
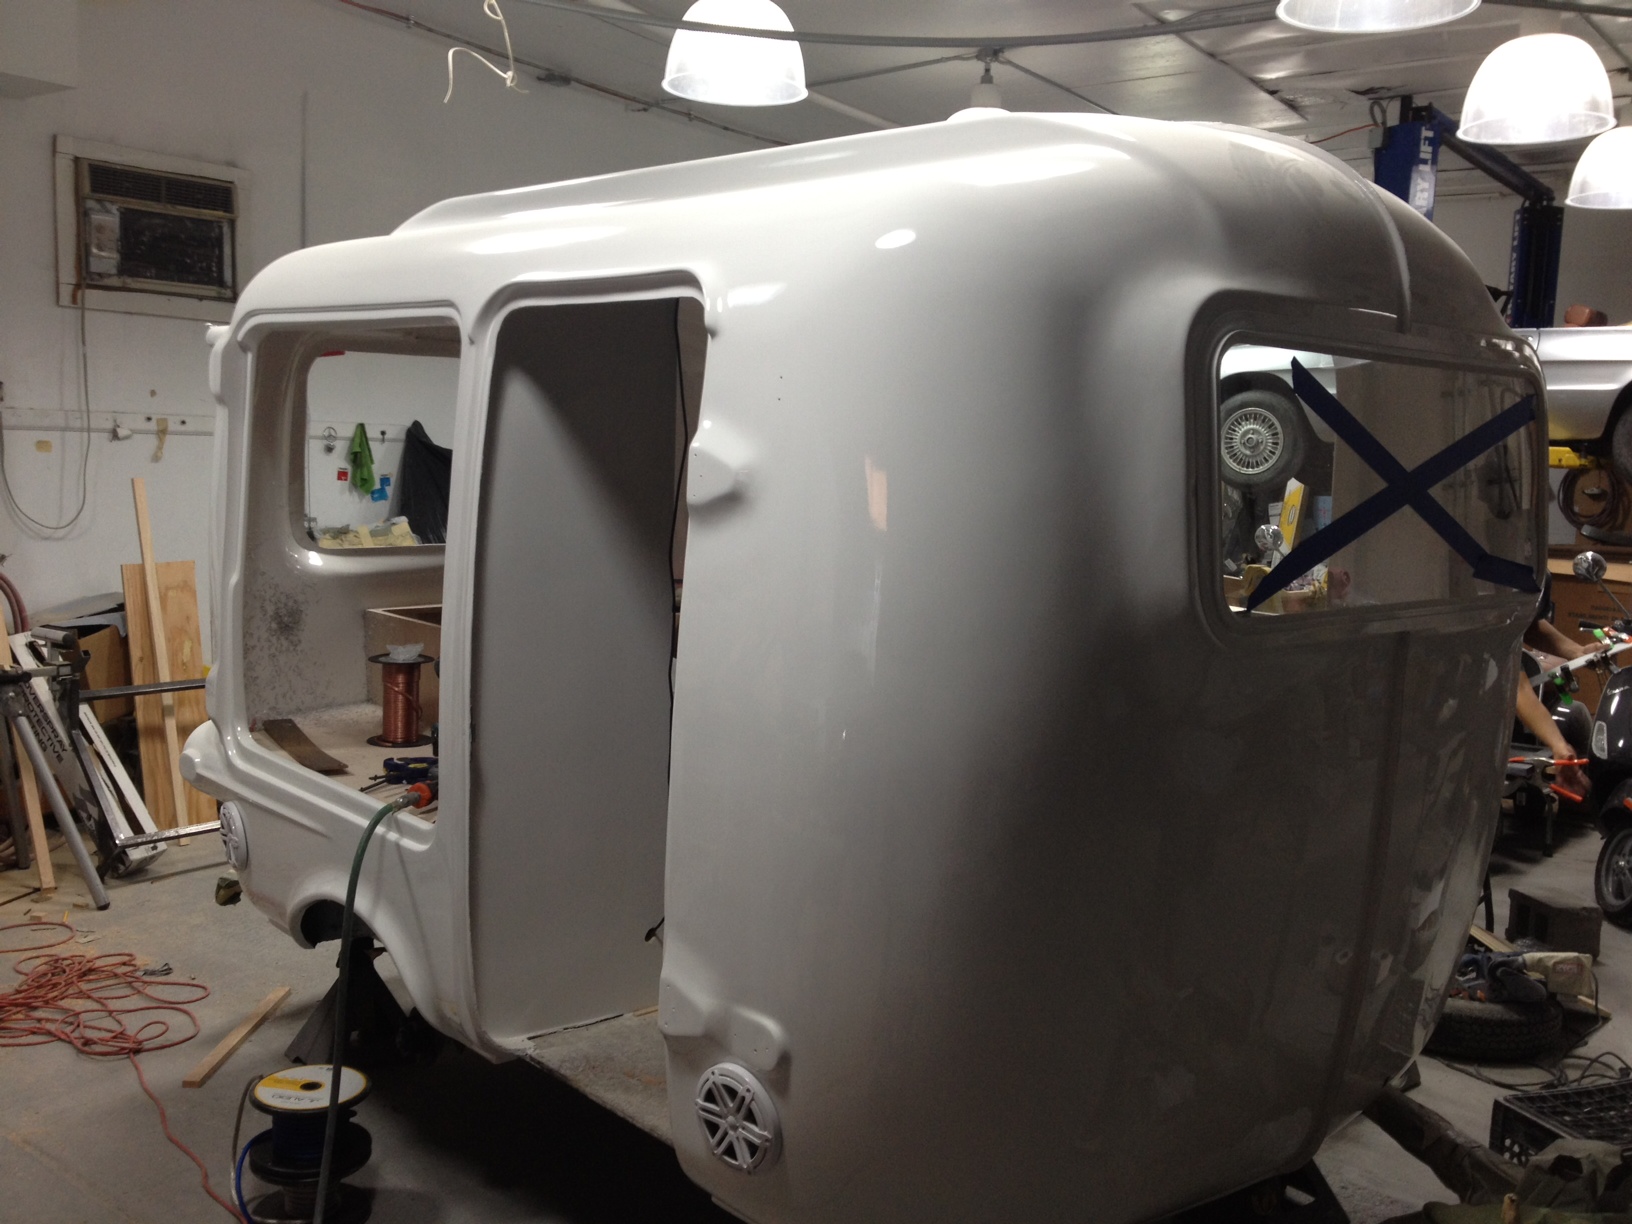
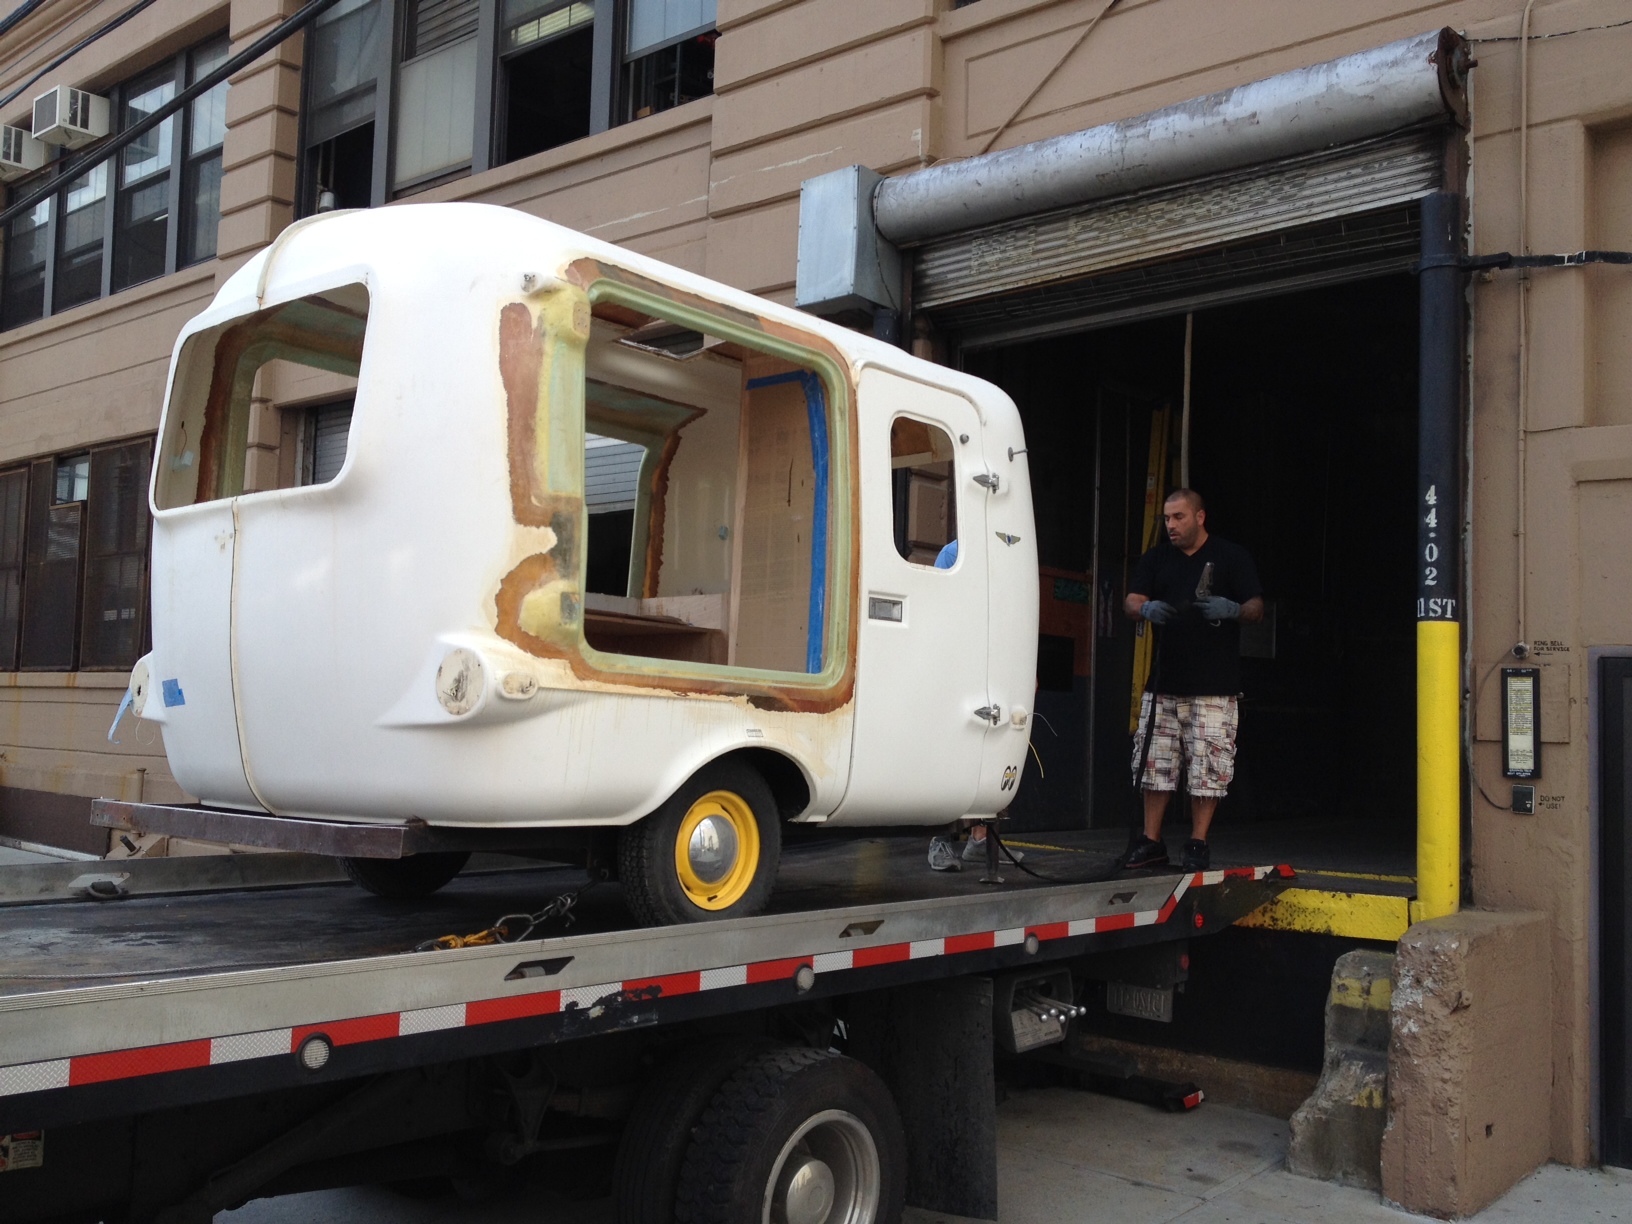
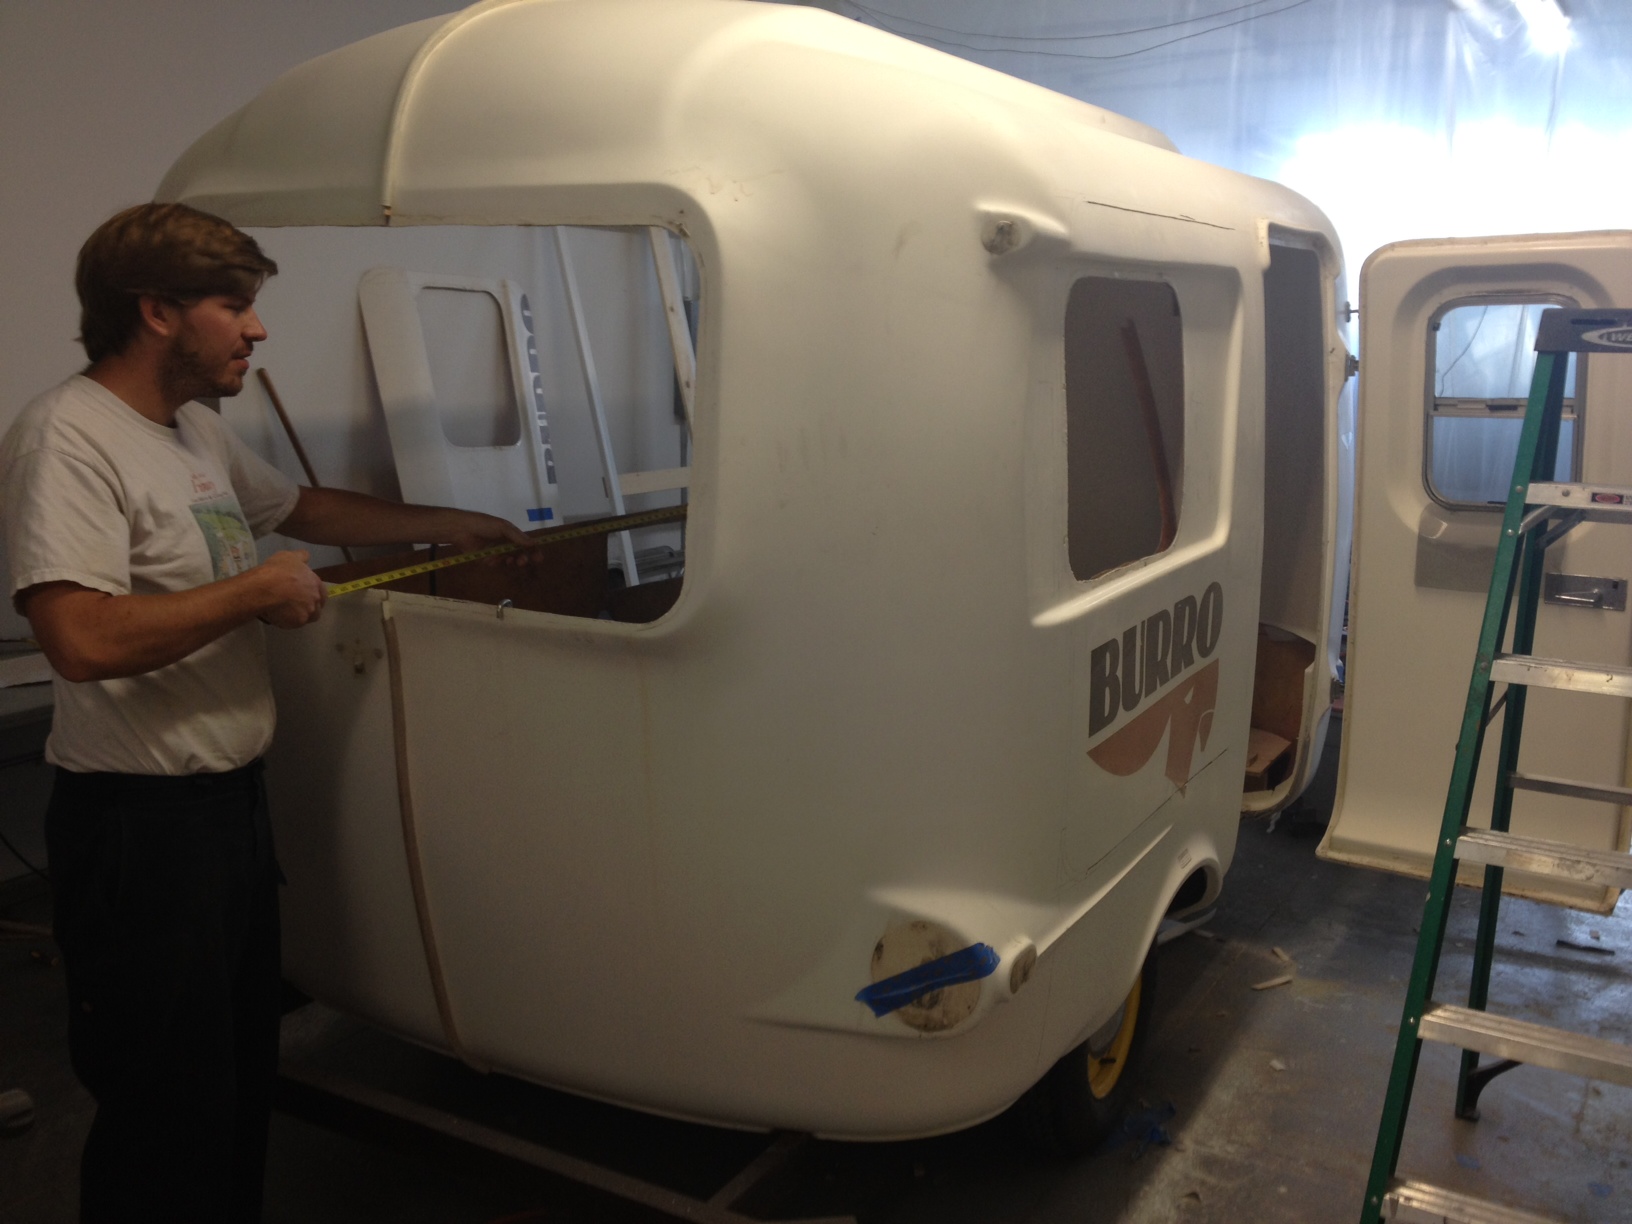
Burro Camper to Mobile Bar

This was an interesting fiberglass project. We cut up a Burro fiberglass trailer camper to make a mobile bar. The smaller door opens backwards while the long door opens up into a canopy.